openSUSE 12.3
Publication Date 08 Mar 2013
Copyright © 2006–2013 SUSE LLC and contributors. All rights reserved.
Permission is granted to copy, distribute and/or modify this document under the terms of the GNU Free Documentation License, Version 1.2 or (at your option) version 1.3; with the Invariant Section being this copyright notice and license. A copy of the license version 1.2 is included in the section entitled “GNU Free Documentation License”.
For SUSE or Novell trademarks, see the Novell Trademark and Service Mark list http://www.novell.com/company/legal/trademarks/tmlist.html. All other third party trademarks are the property of their respective owners. A trademark symbol (®, ™ etc.) denotes a SUSE or Novell trademark; an asterisk (*) denotes a third party trademark.
All information found in this book has been compiled with utmost attention to detail. However, this does not guarantee complete accuracy. Neither SUSE LLC, its affiliates, the authors nor the translators shall be held liable for possible errors or the consequences thereof.
Contents
- About This Manual
- I. Requirements and Limitations
- II. Managing Virtual Machines with
libvirt - III. Managing Virtual Machines with QEMU
- 10. QEMU Overview
- 11. Guest Installation
- 12. Running Virtual Machines with qemu-kvm
- 13. Administrating Virtual Machines with QEMU Monitor
- 13.1. Accessing Monitor Console
- 13.2. Getting Information about the Guest System
- 13.3. Changing VNC Password
- 13.4. Managing Devices
- 13.5. Controlling Keyboard and Mouse
- 13.6. Changing Available Memory
- 13.7. Dumping Virtual Machine Memory
- 13.8. Managing Virtual Machine Snapshots
- 13.9. Suspending and Resuming Virtual Machine Execution
- 13.10. Live Migration
- A. Appendix
- B. GNU Licenses
List of Figures
List of Tables
List of Examples
- 4.1. Interactive Setup on the Command Line Using vm-install
- 4.2. vm-install command line switches
- 9.1. Typical Output of kvm_stat
- 12.1. Restricted User-mode Networking
- 12.2. User-mode Networking with Custom IP Range
- 12.3. User-mode Networking with Network-boot and TFTP
- 12.4. User-mode Networking with Host Port Forwarding
- 12.5. Password Authentication
- 12.6. x509 Certificate Authentication
- 12.7. x509 Certificate and Password Authentication
- 12.8. SASL Authentication
- 12.9. Exporting Host's Filesystem with VirtFS
About This Manual
This manual offers an introduction to setting up and managing
virtualization with KVM (Kernel-based Virtual Machine) on openSUSE.
The first part introduces KVM by describing it's requirements and
SUSE's support status. The second part deals with managing KVM with
libvirt, while the last part covers management with QEMU.
Many chapters in this manual contain links to additional documentation resources. This includes additional documentation that is available on the system as well as documentation available on the Internet.
For an overview of the documentation available for your product and the latest documentation updates, refer to http://www.suse.com/documentation.
1. Available Documentation
We provide HTML and PDF versions of our books in different languages. The following manuals for users and administrators are available on this product:
- Start-Up (↑Start-Up)
Guides you step-by-step through the installation of openSUSE from DVD, or from an ISO image, gives short introductions to the GNOME and KDE desktops including some key applications running on it. Also gives an overview of LibreOffice and its modules for writing texts, working with spreadsheets, or creating graphics and presentations.
- Reference (↑Reference)
Gives you a general understanding of openSUSE and covers advanced system administration tasks. It is intended mainly for system administrators and home users with basic system administration knowledge. It provides detailed information about advanced deployment scenarios, administration of your system, the interaction of key system components and the set-up of various network and file services openSUSE offers.
- Security Guide (↑Security Guide)
Introduces basic concepts of system security, covering both local and network security aspects. Shows how to make use of the product inherent security software like AppArmor (which lets you specify per program which files the program may read, write, and execute) or the auditing system that reliably collects information about any security-relevant events.
- System Analysis and Tuning Guide (↑System Analysis and Tuning Guide)
An administrator's guide for problem detection, resolution and optimization. Find how to inspect and optimize your system by means of monitoring tools and how to efficiently manage resources. Also contains an overview of common problems and solutions and of additional help and documentation resources.
- Virtualization with KVM
This manual offers an introduction to setting up and managing virtualization with KVM (Kernel-based Virtual Machine) on openSUSE. Also shows how to manage VM Guests with
libvirtand QEMU.
Find HTML versions of most product manuals in your installed system under
/usr/share/doc/manual or in the help centers of your
desktop. Find the latest documentation updates at
http://www.suse.com/documentation where you can download
PDF or HTML versions of the manuals for your product.
2. Feedback
Several feedback channels are available:
- Bugs and Enhancement Requests
To report bugs for a product component, or to submit enhancement requests, please use https://bugzilla.novell.com/. For documentation bugs, submit a bug report for the component of the respective product.
If you are new to Bugzilla, you might find the following articles helpful:
- User Comments
We want to hear your comments about and suggestions for this manual and the other documentation included with this product. Use the User Comments feature at the bottom of each page in the online documentation or go to http://www.suse.com/documentation/feedback.html and enter your comments there.
For feedback on the documentation of this product, you can also send a mail to
doc-team@suse.de. Make sure to include the document title, the product version and the publication date of the documentation. To report errors or suggest enhancements, provide a concise description of the problem and refer to the respective section number and page (or URL).
3. Documentation Conventions
The following typographical conventions are used in this manual:
/etc/passwd: directory names and filenamesplaceholder: replaceplaceholderwith the actual valuePATH: the environment variable PATHls,
--help: commands, options, and parametersuser: users or groupsAlt, Alt+F1: a key to press or a key combination; keys are shown in uppercase as on a keyboard
, +: menu items, buttons
Dancing Penguins (Chapter Penguins, ↑Another Manual): This is a reference to a chapter in another manual.
4. About the Making of This Manual
This book is written in Novdoc, a subset of DocBook (see
http://www.docbook.org). The XML source files were
validated by xmllint, processed by
xsltproc, and converted into XSL-FO using a customized
version of Norman Walsh's stylesheets. The final PDF is formatted through
XEP from RenderX. The open source tools and the
environment used to build this manual are available in the package
daps that is shipped with
openSUSE. The project's home page can be found at
http://daps.sf.net/.
5. Source Code
The source code of openSUSE is publicly available. Refer to http://en.opensuse.org/Source_code for download links and more information.
6. Acknowledgments
With a lot of voluntary commitment, the developers of Linux cooperate on a global scale to promote the development of Linux. We thank them for their efforts—this distribution would not exist without them. Furthermore, we thank Frank Zappa and Pawar. Special thanks, of course, goes to Linus Torvalds.
Have a lot of fun!
Your SUSE Team
Contents
Chapter 1. KVM Installation and Requirements
Contents
KVM is a full virtualization solution for x86 processors supporting
hardware virtualization (Intel VT or AMD-V). It consists of two main
components: A set of Kernel modules (kvm.ko,
kvm-intel.ko, and
kvm-amd.ko) providing the core virtualization
infrastructure and processor specific drivers and a userspace program
(qemu-kvm) that provides
emulation for virtual devices and control mechanisms to manage VM Guests
(virtual machines). The term KVM more properly refers to the Kernel
level virtualization functionality, but is in practice more commonly used
to reference the userspace component.
VM Guests (virtual machines), virtual storage and networks can be
managed with libvirt-based and QEMU tools. libvirt is a library
that provides an API to manage VM Guests based on different
virtualization solutions, among them KVM and Xen. It offers a
graphical user interface as well as a command line program. The QEMU
tools are KVM/QEMU specific and are only available for the command
line.
1.1. Hardware Requirements
Currently, SUSE only supports KVM full virtualization on x86_64 hosts. KVM is designed around hardware virtualization features included in AMD (AMD-V) and Intel (VT-x) CPUs. It supports virtualization features of chipsets, and PCI devices, such as an I/O Memory Mapping Unit (IOMMU) and Single Root I/O Virtualization (SR-IOV)).
You can test whether your CPU supports hardware virtualization with the following command:
egrep '(vmx|svm)' /proc/cpuinfo
If this command returns no output, your processor either does not support hardware virtualization, or this feature has been disabled in the BIOS.
The following Web site identifies processors which support hardware virtualization: http://wiki.xensource.com/xenwiki/HVM_Compatible_Processors
![[Note]](static/images/note.png) | |
The KVM Kernel modules will not load if the CPU does not support hardware virtualization or if this feature is not enabled in the BIOS. | |
The general minimum hardware requirements for the VM Host Server are the same as for openSUSE. However, additional RAM for each virtualized guest is needed. It should at least be the same amount that is needed for a physical installation. It is also strongly recommended to have at least one processor core or hyper-thread for each running guest.
1.2. Supported Guest Operating Systems
The following table lists guest operating systems tested and their support status offered by SUSE. All operating systems listed are supported in both 32 and 64-bit x86 versions. A list of other supported operating systems (not tested by SUSE) is available at http://www.linux-kvm.org/page/Guest_Support_Status.
Para-virtualized drivers (PV drivers) are listed where available.
Para-virtualized drivers for KVM
virtio-net: Virtual network driver.virtio-blk: Virtual block device driver for para-virtualized block devices.virtio-balloon: Memory driver for dynamic memory allocation. Allows to dynamically change the amount of memory allocated to a guest.kvm-clock: Clock synchronization driver.
Table 1.1. Supported KVM Guest Operating Systems on openSUSE
|
openSUSE 11.2 or newer | ||
|
PV drivers: |
kvm-clock, virtio-net, virtio-blk, virtio-balloon | |
|
Support Status: |
Fully supported (fully virtualized) | |
|
SLES 11 SP2 / SLES 11 SP1 / SLES 10 SP4 | ||
|
PV drivers: |
kvm-clock, virtio-net, virtio-blk, virtio-balloon | |
|
Support Status: |
Fully supported (fully virtualized) | |
|
SLES 9 SP4 | ||
|
Support Status: |
Fully Supported (fully virtualized) | |
|
Note: |
| |
|
SLED 12.3 / SLED 11 SP1 | ||
|
PV drivers: |
kvm-clock, virtio-net, virtio-blk, virtio-balloon | |
|
Support Status: |
Technology Preview (fully virtualized) | |
|
OES 2 SP3 / OES 11 | ||
|
PV drivers: |
kvm-clock, virtio-net, virtio-blk, virtio-balloon | |
|
Support Status: |
Fully supported (fully virtualized) | |
|
RedHat Enterprise Linux 4.8+ / 5.5+ / 6.0+ | ||
|
PV drivers: | ||
|
Support Status: |
Best Effort (fully virtualized) | |
|
Note: |
Refer to the RHEL Virtualization guide for more information. | |
|
Windows 2003 SP2+ / Windows 2008 SP2+ / Windows 2008 R2+ | ||
|
PV drivers: |
virtio-net, virtio-blk, virtio-balloon; drivers from the Virtual Machine Driver Pack (http://www.suse.com/products/vmdriverpack/) are preferred | |
|
Support Status: |
Fully supported with Server Virtualization Validation Program (SVVP) certification (fully virtualized) | |
|
Windows XP SP3+ / Windows Vista SP2+ / Windows 7 SP1+ | ||
|
PV drivers: |
virtio-net, virtio-blk, virtio-balloon; drivers from the Virtual Machine Driver Pack (http://www.suse.com/products/vmdriverpack/) are preferred | |
|
Support Status: |
Best effort (fully virtualized) | |
![[Important]](static/images/important.png) | |
Guest images created under SUSE Linux Enterprise Server 11 SP1 are supported, but guest images created under a previous SUSE Linux Enterprise version are not supported. | |
1.2.1. Availability of Para-Virtualized Drivers
To improve the performance of the guest operating system, para-virtualized drivers are provided when available. Although they are not required, it is strongly recommended to use them. The para-virtualized drivers are available as follows:
- SUSE Linux Enterprise Server 11 SP1 / SP2
included in Kernel
- SUSE Linux Enterprise Server 10 SP4
included in Kernel
- SUSE Linux Enterprise Server 9 SP4
not available
- RedHat
available in RedHat Enterprise Linux 5.4 and newer
- Windows
SUSE has developed virtio based drivers for Windows, which are available in the Virtual Machine Driver Pack (VMDP). These drivers are preferred over the drivers provided in the
/usr/share/qemu-kvm/win-virtio-drivers.isoimage file (the latter being deprecated and will probably not be provided in future releases). See http://www.suse.com/products/vmdriverpack/ for more information.
1.3. The kvm package
The kvm package provides
qemu-kvm, the program that performs the actual
emulation. In addition to the qemu-kvm program, the
kvm package also comes with
a debug level monitoring utility (kvm-stat),
firmware components, key-mapping files, scripts, and deprecated
para-virtualized Windows drivers
(/usr/share/qemu-kvm/win-virtio-drivers.iso).
Originally, the kvm package
also provided the KVM Kernel modules. Now, these modules are included
with the Kernel and only userspace components are included in the current
kvm package.
Using the libvirt-based tools is the recommended way of managing
VM Guests. Interoperability with other virtualization tools has been
tested and is an essential part of SUSE's support stance. All tools are
provided by packages carrying the tool's name.
libvirt: A toolkit that provides management of VM Guests, virtual networks, and storage.libvirtprovides an API, a daemon, and a shell (virsh).virt-manager (Virtual Machine Manager): A graphical management tool for VM Guests.
vm-install: Define a VM Guest and install its operating system.
virt-viewer: An X viewer client for VM Guests which supports TLS/SSL encryption of x509 certificate authentication and SASL authentication.
Support for creating and manipulating file-based virtual disk images is
provided by qemu-img. qemu-img is
provided by the package
virt-utils.
1.4. Installing KVM
KVM is not installed by default. To install KVM and all virtualization tools, proceed as follows:
Start YaST and choose +.
Select and confirm with .
Confirm the list of packages that is to be installed with .
Agree to set up a network bridge by clicking . It is recommended using a bridge on a VM Host Server (virtual machine host). If you prefer to manually configure a different network setup, you can safely skip this step by clicking .
After the setup has been finished, reboot the machine as YaST suggests. Alternatively load the required kernel modules manually and start
libvirtdto avoid a reboot:modprobe kvm-intel # on Intel machines only modprobe kvm-amd # on AMD machines only modprobe vhost-net rclibvirtd start
| The vhost-net Kernel Module |
|---|---|
The vost-net kernel module allows for a more efficient network transport
to the guest. It is automatically used by
| |
Chapter 2. KVM Limitations
Although virtualized machines behave almost like physical machines, some limitations apply. These affect both, the VM Guest as well as the VM Host Server system.
2.1. General Limitations
The following general restrictions apply when using KVM:
- Overcommits
KVM allows for both memory and disk space overcommit. It is up to the user to understand the implications of doing so. However, hard errors resulting from exceeding available resources will result in guest failures. CPU overcommit is also supported but carries performance implications.
- Time Synchronization
Most guests require some additional support for accurate time keeping. Where available,
kvm-clockis to be used. NTP or similar network based time keeping protocols are also highly recommended (for VM Host Server and VM Guest) to help maintain a stable time. Running NTP inside the guest is not recommended when using thekvm-clock. Refer to Section 8.5, “Clock Settings” for details.- MAC addresses
If no MAC address is specified for a NIC, a default MAC address will be assigned. This may result in network problems when more than one NIC receives the same MAC address. It is recommended to always assure a unique MAC address has been assigned for each NIC.
- Live Migration
Live Migration is only possible between VM Host Servers with the same CPU features and no physical devices passed from host to guest. Guest storage has to be accessible from both VM Host Servers and guest definitions need to be compatible. VM Host Server and VM Guests need to have proper timekeeping installed.
- User Permissions
The management tools (Virtual Machine Manager, virsh, vm-install) need to authenticate with
libvirt—see Chapter 6, Connecting and Authorizing for details. In order to invoke qemu-kvm from the command line, a user has to be a member of the groupkvm.- Suspending/Hibernating the VM Host Server
Suspending or hibernating the VM Host Server system while guests are running is not supported.
2.2. Hardware Limitations
The following virtual hardware limits for guests have been tested. We ensure host and VMs install and work successfully, even when reaching the limits and there are no major performance regressions (CPU, memory, disk, network) since the last release (openSUSE 11 SP1).
|
Max. Guest RAM Size |
512 GB |
|
Max. Virtual CPUs per Guest |
64 |
|
Max. Virtual Network Devices per Guest |
8 |
|
Max. Block Devices per Guest |
4 emulated (IDE), 20 para-virtual (using
|
|
Max. Number of VM Guests per VM Host Server |
Limit is defined as the total number of virtual CPUs in all guests being no greater than 8 times the number of CPU cores in the host |
2.3. Performance Limitations
Basically, workloads designed for physical installations can be virtualized and therefore inherit the benefits of modern virtualization techniques. However, virtualization comes at the cost of a slight to moderate performance impact. You should always test your workload with the maximum anticipated CPU and I/O load to verify if it is suited for being virtualized. Although every reasonable effort is made to provide a broad virtualization solution to meet disparate needs, there will be cases where the workload itself is unsuited for KVM virtualization.
We therefore propose the following performance expectations for guests performance to be used as a guideline. The given percentage values are a comparison of performance achieved with the same workload under non-virtualized conditions. The values are rough approximations and cannot be guaranteed.
|
Category |
Fully Virtualized |
Paravirtualized |
Host Pass-through | ||
|---|---|---|---|---|---|
|
CPU, MMU |
7% |
not applicable |
| ||
|
Network I/O (1GB LAN) |
60% (e1000 emulated NIC) |
75% ( |
95% | ||
|
Disk I/O |
40% (IDE emulation) |
85% ( |
95% | ||
|
Graphics (non-accelerated) |
50% (VGA or Cirrus) |
not applicable |
not applicable | ||
|
Time accuracy (worst case, using recommended settings without NTP) |
95% - 105% (where 100% = accurate) |
100% ( |
not applicable |
Contents
libvirt is a library that provides a common API for managing popular
virtualization solutions, among them KVM and Xen. The library provides
a normalized management API for these virtualization solutions, allowing a
stable, cross-hypervisor interface for higher-level management tools. The
library also provides APIs for management of virtual networks and storage
on the VM Host Server. The configuration of each VM Guest is stored in an XML
file.
With libvirt you can also manage your VM Guests remotely. It supports
TLS encryption and x509 certificates as well as authentication with SASL.
The communication between the virtualization solutions and libvirt is
managed by the daemon libvirtd. It is also used by the management tools.
libvirtd needs to run on the VM Host Server and on any remote machine on which
the libvirt-based tools are started. Use the following commands to
start, stop it or check its status:
~ # rclibvirtd start
Starting libvirtd                              done
~ # rclibvirtd status
Checking status of libvirtd                 running
~ # rclibvirtd stop
Shutting down libvirtd                         done
~ # rclibvirtd status
Checking status of libvirtd                  unused
To automatically start libvirtd at boot time, either activate it using
the YaST module or by
entering the following command:
insserv libvirtd
The following libvirt-based tools are available on openSUSE:
- Virtual Machine Manager (virt-manager)
The Virtual Machine Manager is a desktop tool for managing VM Guests. It provides the ability to control the life cycle of existing machines (bootup/shutdown, pause/resume, suspend/restore). It lets you create new VM Guests and various types of storage, and manage virtual networks. Access the graphical console of VM Guests with the built-in VNC viewer, and view performance statistics, all done locally or remotely.
The Virtual Machine Manager does not need to run on the VM Host Server, it also lets you control VM Guests via remote connections. This enables you to manage VM Guests centrally from a single workstation without having to log in on the VM Host Server.
To start the Virtual Machine Manager, enter virt-manager at the command prompt.
- virt-viewer
A viewer for the graphical console of a VM Guest. It uses the VNC protocol and supports TLS and x509 certificates. VM Guests can be accessed by name, ID, or UUID. If the guest is not already running, the viewer can be told to wait until the guest starts, before attempting to connect to the console.
- vm-install
A tool to set up a VM Guest, configure its devices and start the operating system installation. Starts a GUI wizard when called from a graphical user interface. When invoked on a terminal, starts the wizard in command-line mode. vm-install is also started when creating a new virtual machine in the Virtual Machine Manager.
- virsh
A command line tool to manage VM Guests with similar functionality as the Virtual Machine Manager. Allows you to change a VM Guest's status (start, stop, pause, etc.) to set up new guests and devices and to edit existing configurations. virsh is also useful to script VM Guest management operations.
virsh basically works like Subversion's svn command or zypper: it takes the first arguments as a command and further arguments as options to this command:
virsh [-c
URI]commanddomain-id[OPTIONS]Just like zypper, virsh can also be called without a command. In this case it starts a shell waiting for your commands. This mode is useful when having to run subsequent commands:
~> virsh -c qemu+ssh://root@mercury.example.com/system
Enter passphrase for key '/home/wilber/.ssh/id_rsa':
Welcome to virsh, the virtualization interactive terminal.

Type:  'help' for help with commands
       'quit' to quit

virsh # hostname
mercury.example.com
Chapter 4. Guest Installation
Contents
A VM Guest is comprised of an image containing an operating system and data files and a configuration file describing the VM Guest's virtual hardware resources. VM Guests are hosted on and controlled by the VM Host Server.
4.1. Guest Installation with Virtual Machine Manager
Clicking in the Virtual Machine Manager launches vm-install. It provides the graphical that guides you through the guest installation. vm-install can also be run directly from the command-line or from YaST by choosing +.
Start the as described above and click .
Choose whether to install an operation system or an already existing image or disk.
Select the operating system you want to install from the list. Each entry provides reasonable defaults for the chosen operating system.
The page shows the default configuration for the chosen operating system. Edit the configuration by clicking on a headline. When having chosen to install a system, you at least have to specify either an image or a CD/DVD device from which to boot or choose PXE boot. When accepting the configuration with , the guest system boots to start the installation.
4.1.1. Customizing the Default Settings
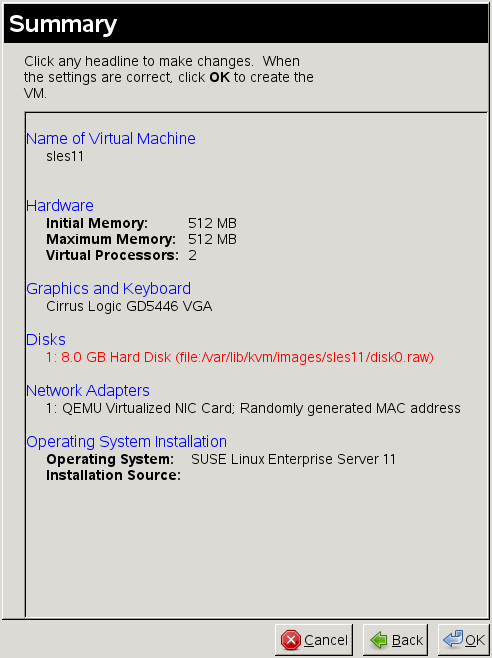
Change the proposed configuration by clicking on a headline in the Summary page of the Create Virtual Machine Wizard:
 |
4.1.1.1. 
Specify a and an optional
for the guest. The
must contain only alphanumeric and
_-.:+ characters. It must be unique among all
VM Guests on the VM Host Server. It is used to create and name the guest’s
configuration file and you will be able to access the guest with this
name from virsh.
4.1.1.2. 
Change memory and CPU assignments in this screen. It is recommended not to specify values larger than the resources the VM Host Server can provide (overcommit), since it may result in errors or performance penalties.
The lets you activate or
deactivate ACPI, APIC, and PAE. It is recommended not to change the
default settings. You can also enable or disable para-virtualized I/O
with virtio or choose to execute the kernel on
boot (linux only) here.
| Para-Virtualized I/O |
|---|---|
If you enable para-virtualized I/O by activating
, all hard disks you create will be
configured as | |
4.1.1.3. 
Configure the type of virtualized graphics hardware, the keymap and
sound device in this dialog. If you disable the graphics card support,
the machine is only accessible via network services (ssh) or serial
port. Sound in VM Guests is currently not supported by SUSE,
therefore should be set to
None.
4.1.1.4. 
: Manage virtual hard disks and CD/DVD drives in this dialog. A VM Guest must have at least one virtual disk—either an existing one or a newly created disk. Virtual disks can be:
a single file with a fixed size
a single file that grows on demand (
Sparse Image
       File)
Sufficient Space for Sparse Image Files When creating sparse image files, the partition on which you create them always needs sufficient free space. The VM Guest has no means to check the VM Host Server disk space. Having no space left on the host partition causes write errors and loss of data on the guest system.
a block device, such as an entire disk, partition, or a network volume.
For best performance, create each virtual disk from an entire disk or a partition. For the next best performance, create an image file but do not create it as a sparse image file. A virtual disk based on a sparse image file delivers the most disk space flexibility but slows installation and disk access speeds.
![[Tip]](static/images/tip.png) | Live Migration |
|---|---|
If you need to be able to migrate your VM Guest to another host without shutting it down (live migration), all disks must reside on a network resource (network file system or iSCSI volume) that is accessible from both hosts. | |
By default, a single sparse raw disk image file is created in
/var/lib/kvm/images/
where VM_NAME/VM_NAME is the name of the virtual
machine.
| Supported Disk format |
|---|---|
Currently, only the disk formats | |
Procedure 4.1. Creating a Virtual Disk
Click .
Enter a . If creating a file-backed disk, either enter the path directly or click . When creating a disk from a device, enter the device node, for example
/dev/disk/by-path/. It is strongly recommended not to use the simple device paths such aspath/dev/sdbor/dev/sda5, since they may change (by adding a disk or by changing the disk order in the BIOS).Specify the . For creating
rawdisks, choose either for file-backed virtual disks or for device-backed disks.qcow2orqeddisks can be created by choosing the corresponding value.Enter a in GB. This option is only available for file-backed disks.
Choose whether to create a . This option is only available for file-backed disks. If you want to disable write-access to the disk, choose .
If you want to install from DVD or CD-ROM, add the drive to the list of available hard disks. To learn about device nodes of the available optical drives, run:
hwinfo --cdrom | egrep "(Device File:|Model:)"
Instead of the real DVD or CD-ROM drive, you can also add the ISO image of an installation medium. Note that each CD-Rom drive or ISO image can only be used by one guest at the same time.
To add a CD/DVD-ROM device or an ISO image, proceed as follows:
Click .
Enter a . If adding a device, enter its node. If adding an ISO image, either enter the path directly or click to open a file browser.
Specify the . Choose for an ISO image and for a device.
The disks are listed in the order in which they have been created. This order also represents the boot order. Use the and arrows to change the disk order.
4.1.1.5. 
By default, a single virtual network card is created for the virtual
machine. It has a randomly generated MAC address that you can change to
fit your desired configuration. If a bridge exists on the VM Host Server, the
virtual network card will be attached to it, otherwise it will be
attached to the libvirt's
default virtual bridge
(virbr1).
To add a new network adapter or edit an existing one, proceed as follows:
Click to add a card or to change the configuration of the selected card.
Choose a from the drop-down list.
Supported Virtual Network Adapter Types Currently, only , or the paravirtualized (
virtio) are supported by SUSE.Choose a from the drop-down list.
Choose whether to assign a randomly generated MAC address or manually specify an address.
MAC addresses need to be unique When choosing to manually specify a MAC address, make sure it is not already used in your network. If so, it may result in network problems, especially when using DHCP. Therefore avoid specifying obvious MAC addresses such as 52:54:00:12:34:56 or 52:54:00:11:22:33, because they may already be in use. It is strongly recommended to always use a randomly generated MAC address for each adapter.
4.1.1.6. 
This dialog is only available when having chosen to install an operating system. The installation can be booted from a virtual disk, from a CD/DVD device, from an ISO image, a network resource or via PXE boot—use this dialog to configure the boot device.
Also use this dialog to configure the behavior of the VM Guest when the operating system is powered off, rebooted or if it crashes. The following options are available
normal cleanup
a new VM Guest is started in place of the old one
no cleanup, do not delete temporary, configuration and image files
the VM Guest is not cleaned up but is renamed and a new domain started in its place
a crashed machine's core is dumped before a normal cleanup is performed
a crashed machine's core is dumped before a normal restart is performed
4.2. Installing from the Command Line with vm-install
If $DISPLAY is not set (for example, when operating on a
console or on an ssh shell with no X-forwarding),
vm-install offers a command-line wizard to
interactively set up a VM Guest for installation. Once the setup is
completed, the newly created guest boots into the installation system
which can be connected via VNC.
| Graphical User Interface needed for Installation |
|---|---|
Once the VM Guest boots into the installation, you need to connect to the graphical console via VNC to attend the installation. Therefore, you need to start the viewer from a graphical user interface. If you are working from a console with no access to a graphical user interface, you can set up the VM Guest configuration and start the installation at a later time. Refer to Section 4.2.1, “Defining a VM Guest without Starting the Installation” for instructions. | |
To start the wizard, just type vm-install to start. For a lot of parameters, the installation wizard already provides reasonable defaults which you can confirm by just pressing Enter. Here is a log of an interactive setup for a SUSE Linux Enterprise Server 11 installation:
Example 4.1. Interactive Setup on the Command Line Using vm-install
~ # vm-install
Gathering settings...

Please specify the type of operating system that will run within the virtual
machine.  This defines many defaults, and helps decide how to start
paravirtualized operating systems.
Press 'q' or the Escape key to exit.
  1: Novell Open Enterprise Server 2 (Linux)
  2: Novell Open Enterprise Server 2 (NetWare)
  3: Other operating system
  4: PXE
  5: RedHat (other)
  6: RedHat Enterprise Linux 3
  7: RedHat Enterprise Linux 4
  8: RedHat Enterprise Linux 5
  9: SUSE (other)
 10: SUSE Linux Enterprise Desktop 10
 11: SUSE Linux Enterprise Desktop 11
 12: SUSE Linux Enterprise Server 8
 13: SUSE Linux Enterprise Server 9
 14: SUSE Linux Enterprise Server 10
 15: SUSE Linux Enterprise Server 11
 16: Solaris 9 and older
 17: Solaris 10
 18: Windows (other)
 19: Windows (other, x64)
 20: Windows NT
 21: Windows Server 2008
 22: Windows Server 2008 (x64)
 23: Windows Vista, Windows 7
 24: Windows Vista, Windows 7 (x64)
 25: Windows XP, 2000, 2003
 26: Windows XP, 2003 (x64)
 27: openSUSE
 28: openSUSE 11
[15] >

PXE Boot
(Y / N) [N] >
Please choose a name for the virtual machine.
[sles11] >

Description > SLES 11 SP1

Specify the amount of memory and number of processors to allocate for the VM.
Initial Memory [512] >
Maximum Memory [512] > 768
Warning: Setting the maximum memory greater than the initial memory requires
the VM operating system to have a memory balloon driver.
Virtual Processors [2] >

Please specify the type of virtualized graphics hardware.
  1: Cirrus Logic GD5446 VGA
  2: No Graphics Support
  3: VESA VGA
[1] >

Virtual Disks:
  (None)
Do you want to add another virtual disk?
(Y / N) [Y] >

Create a virtual disk based on a device (CD or other block device), an existing
image file (ISO), or a new file.  Specify a device by its device node, such as
/dev/cdrom, not its mount point.
What type of virtual disk do you want to add?
  1: CD-ROM or DVD
  2: Floppy
  3: Hard Disk
[3] > 3
Where will the virtual disk physically reside?
[/var/lib/kvm/images/sles11/hda] >
Size (GB) [4.0] > 8.0
Create a sparse image file for the virtual disk?
(Y / N) [Y] >

Virtual Disks:
  8.0 GB Hard Disk (file:/var/lib/kvm/images/sles11/hda)
Do you want to add another virtual disk?
(Y / N) [N] > y

Create a virtual disk based on a device (CD or other block device), an existing
image file (ISO), or a new file.  Specify a device by its device node, such as
/dev/cdrom, not its mount point.
What type of virtual disk do you want to add?
  1: CD-ROM or DVD
  2: Floppy
  3: Hard Disk
[3] > 1
Where will the virtual disk physically reside?
[/var/lib/kvm/images/sles11/hdb] > /isos/SLES-11-SP1-CD-i386-GM-CD1.iso

Virtual Disks:
  8.0 GB Hard Disk (file:/var/lib/kvm/images/sles11/hda)
  2.9 GB CD-ROM or DVD (file:/isos/SLES-11-SP1-DVD-x86_64-GM-DVD1.iso)
Do you want to add another virtual disk?
(Y / N) [N] >

Network Adapters
  (None)
Do you want to add another virtual network adapter?
(Y / N) [Y] >
What type of virtual network adapter do you want to add?
  1: Fully Virtualized AMD PCnet 32
  2: Fully Virtualized Intel e100
  3: Fully Virtualized Intel e1000
  4: Fully Virtualized NE2000 (ISA Bus)
  5: Fully Virtualized NE2000 (PCI Bus)
  6: Fully Virtualized Realtek 8139
  7: Paravirtualized
[6] > 7

Network Adapters
  Paravirtualized; Randomly generated MAC address
Do you want to add another virtual network adapter?
(Y / N) [N] >

Preparing to start the installation...

Installing...
You may also provide parameters on the command line. The wizard will then prompt you for any missing parameters. In the following all parameters from Example 4.1, “Interactive Setup on the Command Line Using vm-install” for which a command line switch exists, are specified. See man 8 vm-install for a full list of parameters.
Example 4.2. vm-install command line switches
vm-install --os-type sles11--name "sles11_test"
\ --vcpus 2
--memory 512
--max-memory 768
\ --disk /var/lib/kvm/images/sles11/hda,0,disk,w,8000,sparse=1
\ --disk /iso/SLES-11-SP1-DVD-x86_64-GM-DVD1.iso,1,cdrom
\ --nic mac=52:54:00:05:11:11,model=virtio
\ --graphics cirrus
--config-dir "/etc/libvirt/qemu"

|
Specifies the guest operating system to define suitable defaults. A
list of valid values can be obtained with vm-install
|
| Name of the VM Guest. This name must be unique. |
| Number of virtual processors. |
| Initial amount of memory. |
| Maximum amount of memory. Requires an operating system with a para-virtualized driver. |
|
Defines a virtual hard disk. The file is located at
|
|
Defines an ISO image for a CD-ROM as the second ( |
|
Configures a para-virtualized network device with the MAC address
|
| Specifies the graphics card. |
|
The directory in which the XML configuration file for the virtual
machine will be stored. It is strongly recommended to use the default
directory |
4.2.1. Defining a VM Guest without Starting the Installation
vm-install provides the --no-install
parameter. With this parameter the XML configuration file defining the
VM Guest is created, but the guest is not booted automatically. You may
use it regardless whether you start vm-install in
wizard mode or whether you specify all other options in the command
line. You can start the installation.
![[Warning]](static/images/warning.png) | No Virtual Disk Creation |
|---|---|
When using the | |
Once the VM Guest XML configuration file is successfully created, you need to “register” it so it is recognized by Virtual Machine Manager or virsh. Do so by running:
virsh -c qemu:///system define PATH_TO_XMLFILE4.3. Advanced Guest Installation Scenarios
This section provides instructions for operations exceeding the scope of a normal installation, such as including add-on packages.
4.3.1. Including Add-On Products in the Installation
Some operating systems such as openSUSE and SUSE Linux Enterprise Server offer to include add-on products in the installation process. In case the add-on product installation source is provided via network, no special VM Guest configuration is needed. If it is provided via CD/DVD or ISO image, it is necessary to provide the VM Guest installation system with both, the standard installation images and the image for the add-on product.
First add the standard installation image, and second the physical
CD/DVD-ROM or add-on image. The image or device added first is
automatically chosen as the boot image. In case you install openSUSE or SUSE Linux Enterprise Server, it will be configured as
/dev/sr0, while the add-on product source will be
configured as /dev/sr1.
Chapter 5. Basic VM Guest Management
Contents
Basic management tasks such as starting or stopping a VM Guest, can either be done using the graphical application Virtual Machine Manager or on the command line using virsh. Connecting to the graphical console via VNC is only possible from a graphical user interface.
5.1. Listing VM Guests
In order to be able to list VM Guests, you need to connect to a VM Host Server first. If you start the management tool on the VM Host Server itself, you are automatically connected. When operating from remote, refer to Section 6.3, “Connecting to a VM Host Server” for instructions.
5.1.1. Listing VM Guests with Virtual Machine Manager
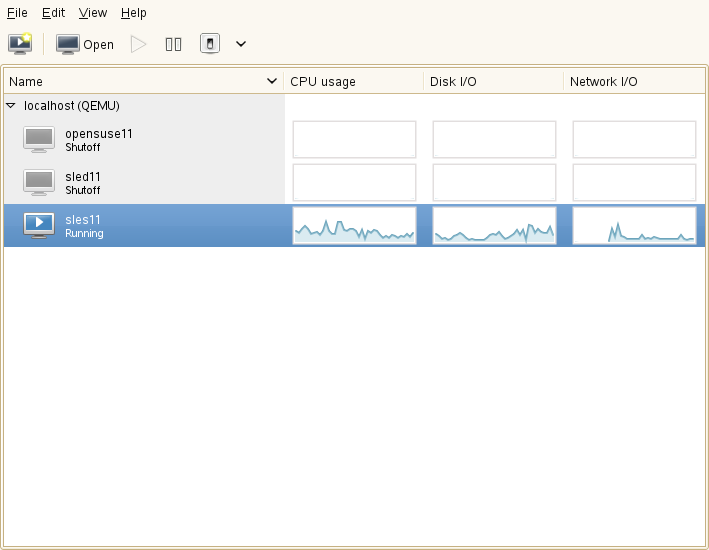
The main Window of the Virtual Machine Manager shows a list of all VM Guests for each VM Host Server it is connected to. Each VM Guest entry contains the machine's name, its status (, , or ) displayed as icon and literal, and a CPU usage bar.
5.1.2. Listing VM Guests with virsh
Use the command virsh list to get a
list of VM Guests:
- List running guests on
localhost virsh -c qemu:///system list
- List running and inactive guests as user
roots on a remote host over a TLS connection virsh -c qemu+tls://root@mercury.example.com/system list --all
- List running and inactive guests as user tux on a remote host over an SSH tunnel
virsh -c qemu+ssh://tux@mercury.example.com/system list --inactive
5.2. Opening a Graphical Console
Opening a Graphical Console to a VM Guest lets you interact with the machine like a physical host via a VNC connection. If accessing the VNC server requires authentication, you are prompted to enter a user name (if applicable) and a password.
Once you click into the VNC console, the cursor is “grabbed” and cannot be used outside the console anymore. To release it, press Alt+Ctrl.
| Seamless (Absolute) Cursor Movement |
|---|---|
In order to prevent the console from grabbing the cursor and to enable seamless cursor movement, add a tablet input device to the VM Guest. See Section 8.1, “Enabling Seamless and Synchronized Cursor Movement” for more information. | |
Certain key combinations such as Ctrl+Alt+Del are interpreted by the host system and are not passed to the VM Guest.
To pass such key combinations to a VM Guest, open the menu from the VNC window and choose the desired key combination entry. The menu is only available when using Virtual Machine Manager and virt-viewer
| Supported VNC Viewer |
|---|---|
Principally all VNC viewers are able to connect to the console of a
VM Guest. However, if you are using SASL authentication and/or TLS/SSL
connection to access the guest, the options become limited. Common VNC
viewers such as | |
5.2.1. Opening a Graphical Console with Virtual Machine Manager
In the Virtual Machine Manager, right-click on a VM Guest entry.
Choose from the pop-up menu.
5.2.2. Opening a Graphical Console with virt-viewer
virt-viewer is a simple VNC viewer with added functionality for displaying VM Guest consoles. It can, for example, be started in “wait” mode, where it waits for a VM Guest to start before it connects. It also supports automatically reconnecting to a VM Guest that is rebooted.
virt-viewer addresses VM Guests by name, by ID or by
UUID. Use virsh list --all to get
this data.
To connect to a guest that is running or paused, either use the ID, UUID, or name. VM Guests that are shut off do not have an ID—you can only connect by UUID or name.
- Local connect to guest with ID 8
virt-viewer -c qemu:///system 8
- Local connect to the inactive guest sles11; will connect once the guest starts
virt-viewer -c qemu:///system --wait sles11
With the
--waitoption, the connection will be upheld even if the VM Guest is not running at the moment. Once the guest starts, the viewer will be launched.- Remote connect via ssh:
virt-viewer -c qemu+ssh://root@mercury.example.com/system -w sles11
For more information, see virt-viewer
--help or man 1
virt-viewer.
5.3. Changing a VM Guest's State: Start, Stop, Pause
Starting, stopping or pausing a VM Guest can either be done with Virtual Machine Manager or virsh. You can also configure a VM Guest to be automatically started when booting the VM Host Server.
When shutting down a VM Guest, you may either shut it down gracefully, or force the shutdown. The latter is equivalent to pulling the power plug on a physical host and is only recommended if there are no alternatives. Forcing a shutdown may cause file system corruption and loss of data on the VM Guest.
| Graceful Shutdown | ||
|---|---|---|---|
In order to be able to perform a graceful shutdown, the VM Guest must be configured to support ACPI. If you have created the guest with vm-install or with Virtual Machine Manager, ACPI should be available. Use the following procedure in Virtual Machine Manager to check: Double-click the VM Guest entry in Virtual Machine Manager. Choose + and then +. should be checked. Depending on the guest operating system, enabling ACPI may not be sufficient. It is strongly recommended to test shutting down and rebooting a guest before releasing it to production. openSUSE or SUSE Linux Enterprise Desktop, for example, may require PolicyKit authorization for shutdown and reboot. Make sure this policy is turned off on all VM Guests. If ACPI was enabled during a Windows XP/Server 2003 guest installation, turning it on in the VM Guest configuration alone is not sufficient. See the following articles for more information:
A graceful shutdown is of course always possible from within the guest operating system, regardless of the VM Guest's configuration. | |||
5.3.1. Changing a VM Guest's State with Virtual Machine Manager
Changing a VM Guest's state can either be done from Virtual Machine Manager's main window, or from a VNC window.
Procedure 5.1. State Change from the Virtual Machine Manager Window
Right-click on a VM Guest entry.
Choose , , or one of the from the pop-up menu.
Procedure 5.2. State change from the VNC Window
Open a VNC Window as described in Section 5.2.1, “Opening a Graphical Console with Virtual Machine Manager”.
Choose , , or one of the options either from the toolbar or from the menu.
5.3.1.1. Autostarting a VM Guest
Automatically starting a guest when the VM Host Server boots is not enabled by default. This feature needs to be turned on for each VM Guest individually. There is no way to activate it globally.
Double-click the VM Guest entry in Virtual Machine Manager to open its console.
Choose + to open the VM Guest configuration window.
Choose and check .
Save the new configuration with .
5.3.2. Changing a VM Guest's State with virsh
In the following examples the state of a VM Guest named “sles11” is changed.
- Start
virsh -c qemu:///system start sles11
- Pause
virsh -c qemu:///system suspend sles11
- Reboot
virsh -c qemu:///system reboot sles11
- Graceful shutdown
virsh -c qemu:///system shutdown sles11
- Force shutdown
virsh -c qemu:///system destroy sles11
- Turn on autostart
virsh -c qemu:///system autostart sles11
- Turn off autostart
virsh -c qemu:///system autostart --disable sles11
5.4. Saving and Restoring VM Guests
Saving a VM Guest preserves the exact state of the guest’s memory. The operation is slightly similar to hibernating a computer. A saved VM Guest can be quickly restored to its previously saved running condition.
When saved, the VM Guest is paused, its current memory state is saved to disk, and then the guest is stopped. The operation does not make a copy of any portion of the VM Guest’s virtual disk. The amount of time to save the virtual machine depends on the amount of memory allocated. When saved, a VM Guest’s memory is returned to the pool of memory available on the VM Host Server.
The restore operation loads a VM Guest’s previously saved memory state file and starts it. The guest is not booted but rather resumes at the point where it was previously saved. The operation is slightly similar to coming out of hibernation.
The VM Guest is saved to a state file. Make sure there is enough space on the partition you are going to save to. Issue the following command on the guest to get a rough estimation of the file size in megabytes to be expected:
free -m | awk '/^Mem:/ {print $3}' | |
After using the save operation, do not boot, start, or run the saved VM Guest. Doing so would cause the machine's virtual disk and the saved memory state getting out of sync and can result in critical errors when restoring the guest. | |
5.4.1. Saving / Restoring with Virtual Machine Manager
5.4.2. Saving / Restoring with virsh
Save a running VM Guest with the command virsh
save and specify the file to where it is
saved.
- Save the guest named opensuse11
virsh save opensuse11 /virtual/saves/opensuse11.vmsav
- Save the guest with the ID 37
virsh save 37 /virtual/saves/opensuse11.vmsave
To restore it, use virsh restore:
virsh restore /virtual/saves/opensuse11.vmsave
5.5. Deleting a VM Guest
Deleting a VM Guest removes its XML configuration by default. Since the attached storage is not deleted by default, you will be able to use it with another VM Guest. With Virtual Machine Manager you may also delete a guest's storage files as well—this will completely erase the guest.
In order to delete a VM Guest, it has to be shut down first (refer to Section 5.3, “Changing a VM Guest's State: Start, Stop, Pause” for instructions). It is not possible to delete a running guest.
5.5.1. Deleting a VM Guest with Virtual Machine Manager
In the Virtual Machine Manager, right-click on a VM Guest entry.
Choose from the pop-up menu.
A confirmation window opens. Clicking will permanently erase the VM Guest. The deletion is not recoverable.
You may also choose to permanently delete the guest's virtual disk by ticking . The deletion is not recoverable either.
5.5.2. Deleting a VM Guest with virsh
To delete a VM Guest with virsh run virsh
undefine VM_NAME.
There is no option to automatically delete the attached storage files.
Chapter 6. Connecting and Authorizing
Having to manage several VM Host Servers, each hosting a couple of VM Guests,
quickly becomes difficult to handle. One of the major benefits of
libvirt is the ability to connect to several VM Host Servers at once,
providing a single interface to manage all VM Guests and to connect to
their graphical console.
In order to ensure only authorized users can connect, libvirt offers
several connection types (via TLS, SSH, Unix sockets, and TCP) that can be
combined with different authorization mechanisms (socket, PolicyKit, SASL and
Kerberos).
6.1. Authentication
The power to manage VM Guests and to access their graphical console obviously is something that should be restricted to a well defined circle of persons. In order to achieve this goal, you can use the following authentication techniques on the VM Host Server:
Access control for UNIX sockets with permissions and group ownership. This method is available for
libvirtdconnections only.Access control for UNIX sockets with PolicyKit. This method is available for local
libvirtdconnections only.Username and password authentication with SASL (Simple Authentication and Security Layer). This method is available for both,
libvirtdand VNC connections. Using SASL does not require real user accounts on the server, since it uses its own database to store usernames and passwords. Connections authenticated with SASL are encrypted.Kerberos authentication. This method, available for
libvirtdconnections only, is not covered in this manual. Please refer to http://libvirt.org/auth.html#ACL_server_kerberos for details.Single password authentication. This method is available for VNC connections only.
| Authentication for libvirtd and VNC need to be configured separately |
|---|---|
Access to the VM Guest management functions (via | |
When accessing VM Guests from remote via TLS/SSL connections, access can be indirectly controlled on each client by restricting read permissions to the certificate's key file to a certain group. See Section 6.2.2.5, “Restricting Access (Security Considerations)” for details.
6.1.1. libvirtd Authentication
libvirtd authentication is configured in
/etc/libvirt/libvirtd.conf. The configuration made
here applies to all libvirt tools such as the Virtual Machine Manager or
virsh.
libvirt offers two sockets: a read-only socket for monitoring purposes
and a read-write socket to be used for management operations. Access to
both sockets can be configured independently. By default, both sockets
are owned by root.root. Default access permissions on
the read-write socket are restricted to the user root
(0700) and fully open on the read-only socket
(0777).
In the following instructions you learn how to configure access permissions for the read-write socket. The same instructions also apply to the read-only socket. All configuration steps have to be carried out on the VM Host Server.
| Default Authentication Settings on openSUSE |
|---|---|
The default authentication method on openSUSE is access control
for UNIX sockets. Only the user | |
Recommended Authorization Methods
- Local Connections
Section 6.1.1.2, “Local Access Control for UNIX Sockets with PolicyKit” Section 6.1.1.1, “Access Control for UNIX Sockets with Permissions and Group Ownership” - Remote Tunnel over SSH
Section 6.1.1.1, “Access Control for UNIX Sockets with Permissions and Group Ownership” - Remote TLS/SSL Connection
Section 6.1.1.3, “Username and Password Authentication with SASL” none (access controlled on the client side by restricting access to the certificates)
6.1.1.1. Access Control for UNIX Sockets with Permissions and Group Ownership
In order to grant access for non-root accounts, configure the
sockets to be owned and accessible by a certain group
(libvirt in the
following example). This authentication method can be used for local
and remote SSH connections.
In case it does not exist, create the group which should own the socket:
groupadd libvirt
Group Needs to Exist The group must exist prior to restarting
libvirtd. If not, the restart will fail.Add the desired users to the group:
usermod -A libvirt tux
Change the configuration in
/etc/libvirt/libvirtd.confas follows:unix_sock_group = "libvirt"
unix_sock_rw_perms = "0770"
auth_unix_rw = "none" Group ownership will be set to group
libvirt. Sets the access permissions for the socket (
srwxrwx---). Disables other authentication methods (PolicyKit or SASL). Access is solely controlled by the socket permissions.
Restart
libvirtd:rclibvirtd restart
6.1.1.2. Local Access Control for UNIX Sockets with PolicyKit
Access control for UNIX sockets with PolicyKit is the default authentication
method on openSUSE for non-remote connections. Therefore, no
libvirt configuration changes are needed. With PolicyKit authorization
enabled, permissions on both sockets default to 0777
and each application trying to access a socket needs to authenticate
via PolicyKit. openSUSE
| PolicyKit Authentication for Local Connections Only |
|---|---|
Authentication with PolicyKit can only be used for local connections on the VM Host Server itself, since PolicyKit does not handle remote authentication. | |
Two policies for accessing libvirt's sockets exist:
org.libvirt.unix.monitor: accessing the read-only socket
org.libvirt.unix.manage: accessing the read-write socket
By default, the policy for accessing the read-write socket is to
authenticate with root password once and grant the privilege for
the current and for future sessions (auth_admin_keep_always).
In order to grant users access to the read-write socket without having
to provide the root password, there are two possibilities:
Using the polkit-auth command, you can grant the privilege without any restrictions:
polkit-auth --user tux --grant org.libvirt.unix.manage    # grant privilege
polkit-auth --user tux --revoke org.libvirt.unix.manage   # revoke privilege
Editing
/etc/PolicyKit/PolicyKit.confoffers more advanced options. Add the following XML snippet in between the existing<config version="0.1">and</config>tags:<match action="org.libvirt.unix.manage">
<match user="tux">
<return result="yes"/>
</match>
</match> The name of the policy;
org.libvirt.unix.managestands for accessing the read-write socket. The username(s) which to grant the privilege. Use the
|symbol to separate entries (user="tux|wilber"). The privilege that is granted. The following options exist:
yes(no restrictions),no(block access completely),auth_selforauth_admin(authenticate with own password/rootpassword every time the privilege is requested),auth_self_keep_sessionorauth_admin_keep_session(authenticate with own password/rootpassword once per session) andauth_self_keep_alwaysorauth_admin_keep_always(authenticate only once with own password/rootpassword).
6.1.1.3. Username and Password Authentication with SASL
SASL provides username and password authentication as well as data encryption (digest-md5, by default). Since SASL maintains its own user database, the users do not need to exist on the VM Host Server. SASL is required by TCP connections and on top of TLS/SSL connections.
| Plain TCP and SASL with digest-md5 Encryption |
|---|---|
Using digest-md5 encryption on an otherwise unencrypted TCP connection does not provide enough security for production environments. It is recommended to only use it in testing environments. | |
| SASL Authentication on Top of TLS/SSL |
|---|---|
Access from remote TLS/SSL connections can be indirectly controlled on the client side by restricting access to the certificate's key file. However, this might prove error-prone when dealing with a large number of clients. Utilizing SASL with TLS adds security by additionally controlling access on the server side. | |
To configure SASL authentication, proceed as follows:
Change the configuration in
/etc/libvirt/libvirtd.confas follows:To enable SASL for TCP connections:
auth_tcp = "sasl"
To enable SASL for TLS/SSL connections:
auth_tls = "sasl"
Restart
libvirtd:rclibvirtd restart
The libvirt SASL configuration file is located at
/etc/sasl2/libvirtd.conf. Normally, there is no need to change the defaults. However, if using SASL on top of TLS, you may turn off session encryption to avoid additional overhead— TLS connections are already encrypted— by commenting themech_list. For TCP connections this parameter must be set to digest-md5:mech_list: digest-md5 # mandatory for TCP connections #mech_list: digest-md5 # apply default (username+password) TLS/SSL only!
By default, no SASL users are configured, so no logins are possible. Use the following commands to add, list, and delete users:
mercury:~ # saslpasswd2 -a libvirt tux                  # add user tux
Password:
Again (for verification):
mercury:~ # sasldblistusers2 -f /etc/libvirt/passwd.db  # list users
tux@mercury.example.com: userPassword
mercury:~ # saslpasswd2 -a libvirt -d tux               # delete user tux
| virsh and SASL Authentication |
|---|---|
When using SASL authentication you will be prompted for a username and password every time you issue a virsh command. Avoid this by using virsh in shell mode. | |
6.1.2. VNC Authentication
Since access to the graphical console of a VM Guest is not controlled
by libvirt, but rather by QEMU, it is always
necessary to additionally configure VNC authentication. The main
configuration file is /etc/libvirt/qemu.conf.
Two authentication types are available: SASL and single password
authentication. If you are using SASL for libvirt authentication, it
is strongly recommended to use it for VNC authentication as
well—it is possible to share the same database.
A third method to restrict access to the VM Guest is to enable the use of TLS encryption on the VNC server. This requires the VNC clients to have access to x509 client certificates. By restricting access to these certificates, access can indirectly be controlled on the client side. Refer to Section 6.2.2.4.2, “VNC over TLS/SSL: Client Configuration” for details.
6.1.2.1. Username and Password Authentication with SASL
SASL provides username and password authentication as well as data
encryption. Since SASL maintains its own user database, the users do
not need to exist on the VM Host Server. As with SASL authentication for
libvirt, you may use SASL on top of TLS/SSL connections. Refer to
Section 6.2.2.4.2, “VNC over TLS/SSL: Client Configuration” for
details on configuring these connections.
To configure SASL authentication for VNC, proceed as follows:
Create a SASL configuration file. It is recommended to use the existing
libvirtfile. If you have already configured SASL forlibvirtand are planning to use the same settings including the same username/password database, a simple link is suitable:ln -s /etc/sasl2/libvirt.conf /etc/sasl2/qemu.conf
In case you are setting up SASL for VNC only or planning to use a different configuration than for
libvirt, copy the existing file to use as a template and edit it according to your needs:cp /etc/sasl2/libvirt.conf /etc/sasl2/qemu.conf
By default, no SASL users are configured, so no logins are possible. Use the following commands to add, list, and delete users:
mercury:~ # saslpasswd2 -a libvirt tux                  # add user tux
Password:
Again (for verification):
mercury:~ # sasldblistusers2 -f /etc/libvirt/passwd.db  # list users
tux@mercury.example.com: userPassword
mercury:~ # saslpasswd2 -a libvirt -d tux               # delete user tux
Change the configuration in
/etc/libvirt/qemu.confas follows:vnc_listen = "0.0.0.0" vnc_sasl = 1
The first parameter enables VNC to listen on all public interfaces (rather than to the local host only), and the second parameter enables SASL authentication.
Restart
libvirtd:rclibvirtd restart
Restart all VM Guests that have been running prior to changing the configuration. VM Guests that have not been restarted will not use SASL authentication for VNC connects.
| Supported VNC Viewers |
|---|---|
Currently only the same VNC viewers that also support TLS/SSL connections, support SASL authentication, namely Virtual Machine Manager, virt-viewer, and vinagre. | |
6.1.2.2. Single Password Authentication
Access to the VNC server may also be controlled by setting a VNC password. You can either set a global password for all VM Guests or set individual passwords for each guest. The latter requires to edit the VM Guest's config files.
| Always Set a Global Password |
|---|---|
If you are using the single password authentication, it is good practice to set a global password even if setting passwords for each VM Guest. This will always leave your virtual machines protected with a “fallback” password if you forget to set a per-machine password. The global password will only be used if no other password is set for the machine. | |
Procedure 6.1. Setting a Global VNC Password
Change the configuration in
/etc/libvirt/qemu.confas follows:vnc_listen = "0.0.0.0" vnc_password = "PASSWORD"The first parameter enables VNC to listen on all public interfaces (rather than to the local host only), and the second parameter sets the password. The maximum length of the password is eight characters.
Restart
libvirtd:rclibvirtd restart
Restart all VM Guests that have been running prior to changing the configuration. VM Guests that have not been restarted will not use password authentication for VNC connects.
Procedure 6.2. Setting a VM Guest Specific VNC Password
Change the configuration in
/etc/libvirt/qemu.confas follows to enable VNC to listen on all public interfaces (rather than to the local host only).vnc_listen = "0.0.0.0"
Open the VM Guest's XML configuration file in an editor. Replace
VM NAMEin the following example with the name of the VM Guest. The editor that is used defaults to$EDITOR. If that variable is not set, vi is used.virsh edit
VM NAMESearch for the element
<graphics>with the attributetype='vnc', for example:<graphics type='vnc' port='-1' autoport='yes'/>
Add the
passwd=attribute, save the file and leave the editor. The maximum length of the password is eight characters.PASSWORD<graphics type='vnc' port='-1' autoport='yes' passwd='PASSWORD'/>
Restart
libvirtd:rclibvirtd restart
Restart all VM Guests that have been running prior to changing the configuration. VM Guests that have not been restarted will not use password authentication for VNC connects.
| Security |
|---|---|
The VNC protocol is not considered to be safe. Although the password is sent encrypted, it might be vulnerable, when an attacker is able to sniff both, the encrypted password and the encryption key. Therefore, it is recommended to use VNC with TLS/SSL or tunneled over SSH. virt-viewer, as well as the Virtual Machine Manager and vinagre from version 2.30 on, support both methods. | |
6.2. Configuring Remote Connections
A major benefit of libvirt is the ability to manage VM Guests on
different remote hosts from a central location. This section gives
detailed instructions on how to configure server and client to allow
remote connections.
6.2.1. Remote Tunnel over SSH (qemu+ssh)
Enabling a remote connection that is tunneled over SSH on the VM Host Server
only requires the ability to accept SSH connections. Make sure the SSH
daemon is started (rcsshd status) and that the ports
for service SSH are opened in
the firewall.
User authentication for SSH connections can be done using traditional
file user/group ownership and permissions as described in
Section 6.1.1.1, “Access Control for UNIX Sockets with Permissions and Group Ownership”.
Connecting as user root
(qemu+ssh://root@mercury.example.com/system) works out of the
box and does not require additional configuration on the libvirt side.
When connecting via SSH
qemu+ssh://
you need to provide the password for USER@SYSTEMUSER.
This can be avoided by copying your public key to
~
on the VM Host Server as explained in
Section “Copying an SSH Key” (Chapter 12, SSH: Secure Network Operations, ↑Security Guide). Using an ssh-agent on
the machine from which you are connecting adds even more
convenience—see Section “Using the ssh-agent” (Chapter 12, SSH: Secure Network Operations, ↑Security Guide) for
instructions.
USER/.ssh/authorized_keys
6.2.2. Remote TLS/SSL Connection with x509 Certificate (qemu+tls)
Using TCP connections with TLS/SSL encryption and authentication via x509 certificates is much more complicated to set up than SSH, but it is a lot more scalable. Use this method if you have to manage several VM Host Servers with a varying number of administrators.
6.2.2.1. Basic concept
Basically, TLS (Transport Layer Security) encrypts the communication between two computers by using certificates. The computer starting the connection is always considered as the “client” using a “client certificate”, while the receiving computer is always considered as the “server”, using a “server certificate”. This scenario applies, for example, if you manage your VM Host Servers from a central desktop.
If connections are initiated from both computers, each needs to have a client and a server certificate. This is the case, for example, if you migrate a VM Guest from one host to another.
Each x509 certificate has a matching private key file. Only the combination of certificate and private key file is able to identify itself correctly. In order to assure that a certificate was issued by the assumed owner, it is signed and issued by a central certificate called certification authority (CA). Both the client and the server certificates must be issued by the same CA.
| User Authentication |
|---|---|
Using a remote TLS/SSL connection basically only ensures that two
computers are allowed to communicate in a certain direction.
Restricting access to certain users can indirectly be achieved on the
client side by restricting access to the certificates. Refer to
Section 6.2.2.5, “Restricting Access (Security Considerations)” for
details. | |
6.2.2.2. Configuring the VM Host Server
The VM Host Server is the machine receiving connections. Therefore, the
server certificates have to be installed. The CA
certificate needs to be installed, as well. Once the certificates are
in place, TLS support can be turned on for libvirt.
Create the server certificate and export it together with the CA certificate as described in Section A.2, “Generating x509 Client/Server Certificates”.
Create the following directories on the VM Host Server:
mkdir -p /etc/pki/CA/ /etc/pki/libvirt/private/
Install the certificates as follows:
/etc/pki/CA/cacert.pem
/etc/pki/libvirt/servercert.pem
/etc/pki/libvirt/private/serverkey.pem
Restrict Access to Certificates Make sure to restrict access to certificates as explained in Section 6.2.2.5, “Restricting Access (Security Considerations)”.
Enable TLS support by editing
/etc/libvirt/libvirtd.confand settinglisten_tls = 1. Restartlibvirtd:rclibvirtd restart
By default,
libvirtuses the TCP port 16514 for accepting secure TLS connections. Open this port in the firewall.
| Restarting libvirtd with TLS enabled |
|---|---|
If you enable TLS for | |
6.2.2.3. Configuring the Client and Testing the Setup
The client is the machine initiating connections. Therefore the client certificates have to be installed. The CA certificate needs to be installed, as well.
Create the client certificate and export it together with the CA certificate as described in Section A.2, “Generating x509 Client/Server Certificates”.
Create the following directories on the client:
mkdir -p /etc/pki/CA/ /etc/pki/libvirt/private/
Install the certificates as follows:
/etc/pki/CA/cacert.pem
/etc/pki/libvirt/clientcert.pem
/etc/pki/libvirt/private/clientkey.pem
Restrict Access to Certificates Make sure to restrict access to certificates as explained in Section 6.2.2.5, “Restricting Access (Security Considerations)”.
Test the client/server setup by issuing the following command. Replace
mercury.example.comwith the name of your VM Host Server. Specify the same full qualified hostname as used when creating the server certificate.virsh -c qemu+tls://
mercury.example.com/system list --allIf your setup is correct, you will see a list of all VM Guests registered with
libvirton the VM Host Server.
6.2.2.4. Enabling VNC for TLS/SSL connections
Currently, VNC communication over TLS is only supported by few tools. The widespread tightvnc or tigervnc viewer, for example, do not support TLS. Known to work are the Virtual Machine Manager (virt-manager), virt-viewer and the GNOME VNC viewer vinagre.
6.2.2.4.1. VNC over TLS/SSL: VM Host Server Configuration
In order to access the graphical console via VNC over TLS/SSL, you need to configure the VM Host Server as follows:
Open ports for the service
VNCin your firewall.Create a directory
/etc/pki/libvirt-vncand link the certificates into this directory as follows:mkdir -p /etc/pki/libvirt-vnc && cd /etc/pki/libvirt-vnc ln -s /etc/pki/CA/cacert.pem ca-cert.pem ln -s /etc/pki/libvirt/servercert.pem server-cert.pem ln -s /etc/pki/libvirt/private/serverkey.pem server-key.pem
Edit
/etc/libvirt/qemu.confand set the following parameters:vnc_listen = "0.0.0.0" vnc_tls = 1 vnc_tls_x509_verify = 1
Restart the
libvirtd:rclibvirtd restart
VM Guests Need to be Restarted The VNC TLS setting is only set when starting a VM Guest. Therefore, you need to restart all machines that have been running prior to making the configuration change.
6.2.2.4.2. VNC over TLS/SSL: Client Configuration
The only action needed on the client side is to place the x509 client certificates in a location recognized by the client of choice. Unfortunately, each supported client—Virtual Machine Manager, virt-viewer, and vinagre—expects the certificates in a different location. However, Virtual Machine Manager and vinagre can either read from a system wide location applying to all users, or from a per user location.
- Virtual Machine Manager (virt-manager)
In order to connect to the remote host, Virtual Machine Manager requires the setup explained in Section 6.2.2.3, “Configuring the Client and Testing the Setup”. In order to be able to connect via VNC the client certificates also need to be placed in the following locations:
- System wide location
/etc/pki/CA/cacert.pem/etc/pki/libvirt-vnc/clientcert.pem/etc/pki/libvirt-vnc/private/clientkey.pem- Per user location
/etc/pki/CA/cacert.pem~/.pki/libvirt-vnc/clientcert.pem~/.pki/libvirt-vnc/private/clientkey.pem
- virt-viewer
virt-viewer only accepts certificates from a system wide location:
/etc/pki/CA/cacert.pem/etc/pki/libvirt-vnc/clientcert.pem/etc/pki/libvirt-vnc/private/clientkey.pem- vinagre
- System wide location
/etc/pki/CA/cacert.pem/etc/pki/vinagre/clientcert.pem/etc/pki/vinagre/private/clientkey.pem- Per user location
$HOME/.pki/CA/cacert.pem~/.pki/vinagre/clientcert.pem~/.pki/vinagre/private/clientkey.pem
| Restrict Access to Certificates |
|---|---|
Make sure to restrict access to certificates as explained in Section 6.2.2.5, “Restricting Access (Security Considerations)”. | |
6.2.2.5. Restricting Access (Security Considerations)
Each x509 certificate consists of two pieces: the public certificate and a private key. A client can only authenticate using both pieces. Therefore, any user that has read access to the client certificate and its private key can access your VM Host Server. On the other hand, an arbitrary machine equipped with the full server certificate can pretend to be the VM Host Server. Since this is probably not desirable, access to at least the private key files needs to be restricted as much as possible. The easiest way to control access to a key file is to use access permissions.
- Server Certificates
Server certificates need to be readable for QEMU processes. On openSUSE QEMU processes started from
libvirttools are owned byroot, so it is sufficient ifrootis able to read them certificates:chmod 700 /etc/pki/libvirt/private/ chmod 600 /etc/pki/libvirt/private/serverkey.pem
If you change the ownership for QEMU processes in
/etc/libvirt/qemu.conf, you also need to adjust the ownership of the key file.- System Wide Client Certificates
To control access to a key file that is available system wide, restrict read access a certain group, so that only members of that group can read the key file. In the following example, a group
libvirtis created and the group ownership of theclientkey.pemand its parent directory is set tolibvirt. Afterwards, the access permissions are restricted to owner and group. Finally the user tux is added to the grouplibvirt, so he will be able to access the key file.CERTPATH="/etc/pki/libvirt/" # create group libvirt groupadd libvirt # change ownership to user root and group libvirt chown root.libvirt $CERTPATH/private $CERTPATH/clientkey.pem # restrict permissions chmod 750 $CERTPATH/private chmod 640 $CERTPATH/private/clientkey.pem # add user tux to group libvirt usermod -A libvirt tux
- Per User Certificates
User specific client certificates for accessing the graphical console of a VM Guest via VNC need to be placed in the users home directory in
~/.pki. Contrary to, for example, the VNC viewer using these certificates do not check the access permissions of the private key file. Therefore, it is solely on the user's responsibility to make sure the key file is not readable by others.
6.2.2.5.1. Restricting Access from the Server Side
By default, every client that is equipped with appropriate client certificates may connect to a VM Host Server accepting TLS connections. Therefore, it is possible to use additional server side authentication with SASL as described in Section 6.1.1.3, “Username and Password Authentication with SASL”.
It is also possible to restrict access with a whitelist of DNs (distinguished names), so only clients with a certificate matching a DN from the list can connect.
Add a list of allowed DNs to tls_allowed_dn_list in
/etc/libvirt/libvirtd.conf. This list may contain
wildcards. Do not specify an empty list, since that would result in
refusing all connections.
tls_allowed_dn_list = [
   "C=US,L=Provo,O=SUSE Linux Products GmbH,OU=*,CN=venus.example.com,EMAIL=*",
   "C=DE,L=Nuremberg,O=SUSE Linux Products GmbH,OU=Documentation,CN=*"]
Get the distinguished name of a certificate with the following command:
certtool -i --infile /etc/pki/libvirt/clientcert.pem | grep "Subject:"
Restart libvirtd after having changed the configuration:
rclibvirtd restart
6.2.2.6. Central User Authentication with SASL for TLS Sockets
A direct user authentication via TLS is not possible - this is handled
indirectly on each client via the read permissions for the certificates
as explained in
Section 6.2.2.5, “Restricting Access (Security Considerations)”.
However, if a central, server based user authentication is needed
libvirt also allows to use SASL (Simple Authentication and Security
Layer) on top of TLS for direct user authentication. See
Section 6.1.1.3, “Username and Password Authentication with SASL” for
configuration details.
6.2.2.7. Troubleshooting
6.2.2.7.1. Virtual Machine Manager/virsh Cannot Connect to Server
Check the following in the given order:
| Is it a firewall issue (TCP port 16514 needs to be open on the server)? |
| Is the client certificate (certificate and key) readable by the user that has started Virtual Machine Manager/virsh? |
| Has the same full qualified hostname as in the server certificate been specified with the connection? |
Is TLS enabled on the server (listen_tls =
1)? |
Has libvirtd been
restarted on the server? |
6.2.2.7.2. VNC Connection fails
Ensure that you can basically connect to the remote server using Virtual Machine Manager. If so, check whether the virtual machine on the server has been started with TLS support. The virtual machine's name in the following example is “sles11”.
ps ax | grep qemu | grep "\-name sles11" | awk -F" -vnc " '{ print FS $2 }'If the output does not begin with a string similar to the following, the machine has not been started with TLS support and must be restarted.
-vnc 0.0.0.0:0,tls,x509verify=/etc/pki/libvirt
6.3. Connecting to a VM Host Server
In order to connect to a hypervisor with libvirt, you need to specify a
uniform resource identifier (URI). This URI is needed with
virsh and virt-viewer (except when
working as root on the VM Host Server) and is optional for the Virtual Machine Manager.
Although the latter can be called with a connection parameter (for
example, virt-manager -c qemu:///system), it also
offers a graphical interface to create connection URIs. See
Section 6.3.1, “Managing Connections with Virtual Machine Manager” for details.
HYPERVISOR+PROTOCOLUSER@REMOTECONNECTION_TYPE
|
Specify the hypervisor. openSUSE currently supports the following
hypervisors: |
|
When connecting to a remote host, specify the protocol here. Can be one
of: |
|
When connecting to a remote host, specify the user and the remote
hostname. If no user is specified, the username that has called the
command ( |
|
When connecting to |
Example Hypervisor Connection URIs
test:///defaultConnect to the local dummy hypervisor. Useful for testing.
qemu:///systemConnect to the QEMU hypervisor on the local host having full access (type system). This usually requires that the command is issued by the user
root.qemu+ssh://tux@mercury.example.com/systemConnect to the QEMU hypervisor on the remote host mercury.example.com. The connection is established via an SSH tunnel.
qemu+tls://saturn.example.com/systemConnect to the QEMU hypervisor on the remote host mercury.example.com. The connection is established TLS/SSL.
For more details and examples, refer to the libvirt documentation at
http://libvirt.org/uri.html.
| Usernames in URIs |
|---|---|
A username needs to be specified when using Unix socket authentication (regardless whether using the username/password authentication scheme or PolicyKit). This applies to all SSH and local connections. There is no need to specify a username when using SASL authentication (for TCP or TLS connections) or when doing no additional server side authentication for TLS connections. With SASL the username will not be evaluated—you will be prompted for a SASL user/password combination in any case. | |
6.3.1. Managing Connections with Virtual Machine Manager
The Virtual Machine Manager uses a Connection for every VM Host Server it
manages. Each connection contains all VM Guests on the respective host.
By default, a connection to the localhost is already configured and
connected.
All configured connections are displayed in the Virtual Machine Manager main window. Active connections are marked with a small triangle which you can click in order to fold or unfold the list of VM Guests for this connection.
Inactive connections are listed gray and are marked with Not
Connected. Either double-click or right-click it and choose
from the context menu. You can also
an existing connection from this menu.
| Editing Existing Connections |
|---|---|
It is not possible to edit an existing connection. In order to change a connection, create a new one with the desired parameters and delete the “old” one. | |
To add a new connection in the Virtual Machine Manager, proceed as follows:
Choose +
Choose the host's ( or )
Choose a type—either for connecting to the host the Virtual Machine Manager was started on, or one of the remote connections (see Section 6.2, “Configuring Remote Connections” for more information).
In case of a remote connection, enter the of the remote machine as
USERNAME@REMOTE_HOST. Usernames must be specified for local connections as well as for SSHSpecifying a Username There is no need to specify a username for TCP and TLS connections; it will not be evaluated anyway. A username must be specified for local connections as well as for SSH connections—if not, the default user
rootwill be used.If you do not want the connection to be automatically activated when starting the Virtual Machine Manager, remove the tick from .
Finish the configuration by clicking .
Chapter 7. Managing Storage
When managing a VM Guest on the VM Host Server itself, it is possible to access
the complete file system of the VM Host Server in order to attach or create
virtual hard disks or to attach existing images to the VM Guest. However,
this is not possible when managing VM Guests from a remote host. For this
reason, libvirt supports so called “Storage Pools” which
can be accessed from remote machines.
| CD/DVD ISO images |
|---|---|
In order to be able to access CD/DVD iso images on the VM Host Server from remote, they also need to be placed in a storage pool. | |
libvirt knows two different types of storage: volumes and pools.
- Storage Volume
A storage volume is a storage device that can be assigned to a guest—a virtual disk or a CD/DVD/floppy image. Physically (on the VM Host Server) it can be a block device (a partition, a logical volume, etc.) or a file.
- Storage Pool
A storage pool basically is a storage resource on the VM Host Server that can be used for storing volumes, similar to network storage for a desktop machine. Physically it can be one of the following types:
- File System Directory ()
A directory for hosting image files. The files can be either one of the supported disk formats (raw, qcow2, or qed), or ISO images.
- Physical Disk Device ()
Use a complete physical disk as storage. A partition is created for each volume that is added to the pool.
- Pre-Formatted Block Device ()
Specify a partition to be used in the same way as a file system directory pool (a directory for hosting image files). The only difference to using a file system directory is the fact that
libvirttakes care of mounting the device.- iSCSI Target (iscsi)
Set up a pool on an iSCSI target. You need to have been logged into the volume once before, in order to use it with
libvirt. Volume creation on iSCSI pools is not supported, instead each existing Logical Unit Number (LUN) represents a volume. Each volume/LUN also needs a valid (empty) partition table or disk label before you can use it. If missing, use fdisk to add it:~ # fdisk -cu /dev/disk/by-path/ip-192.168.2.100:3260-iscsi-iqn.2010-10.com.example:[...]-lun-2 Device contains neither a valid DOS partition table, nor Sun, SGI or OSF disklabel Building a new DOS disklabel with disk identifier 0xc15cdc4e. Changes will remain in memory only, until you decide to write them. After that, of course, the previous content won't be recoverable. Warning: invalid flag 0x0000 of partition table 4 will be corrected by w(rite) Command (m for help): w The partition table has been altered! Calling ioctl() to re-read partition table. Syncing disks.
- LVM Volume Group (logical)
Use a LVM volume group as a pool. You may either use a pre-defined volume group, or create a group by specifying the devices to use. Storage volumes are created as partitions on the volume.
Deleting the LVM Based Pool When the LVM based pool is deleted in the Storage Manager, the volume group is deleted as well. This results in a non-recoverable loss of all data stored on the pool!
- Multipath Devices ()
At the moment, multipathing support is limited to assigning existing devices to the guests. Volume creation or configuring multipathing from within
libvirtis not supported.- Network Exported Directory ()
Specify a network directory to be used in the same way as a file system directory pool (a directory for hosting image files). The only difference to using a file system directory is the fact that
libvirttakes care of mounting the directory. Supported protocols are NFS and glusterfs.- SCSI Host Adapter ()
Use an SCSI host adapter in almost the same way a an iSCSI target. It is recommended to use a device name from
/dev/disk/by-*rather than the simple/dev/sd, since the latter may change (for example when adding or removing hard disks). Volume creation on iSCSI pools is not supported, instead each existing LUN (Logical Unit Number) represents a volume.X
| Security Considerations |
|---|---|
In order to avoid data loss or data corruption, do not attempt to use
resources such as LVM volume groups, iSCSI targets, etc. that are used to
build storage pools on the VM Host Server, as well. There is no need to connect
to these resources from the VM Host Server or to mount them on the
VM Host Server— Do not mount partitions on the VM Host Server by label. Under certain circumstances it is possible that a partition is labeled from within a VM Guest with a name already existing on the VM Host Server. | |
7.1. Managing Storage with Virtual Machine Manager
The Virtual Machine Manager provides a graphical interface—the Storage Manager— to manage storage volumes and pools. To access it, either right-click on a connection and choose , or highlight a connection and choose +. Select the tab.
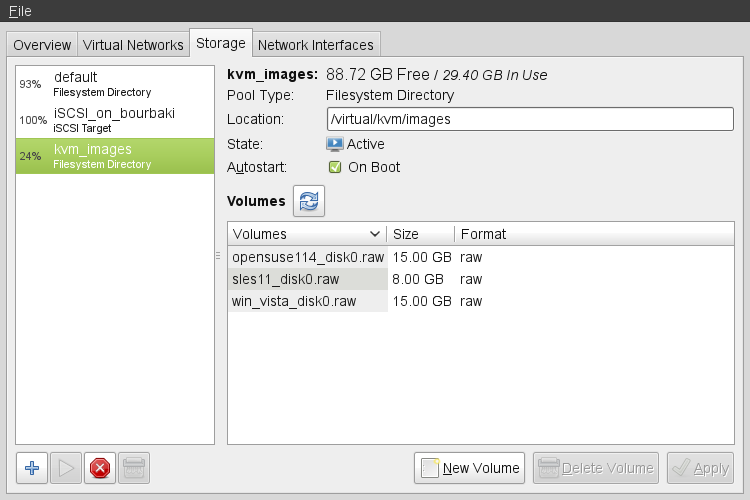 |
7.1.1. Adding a Storage Pool
To add a storage pool, proceed as follows:
Click the plus symbol in the bottom left corner to open the .
Provide a for the pool (consisting of alphanumeric characters plus _-.) and select a . Proceed with .
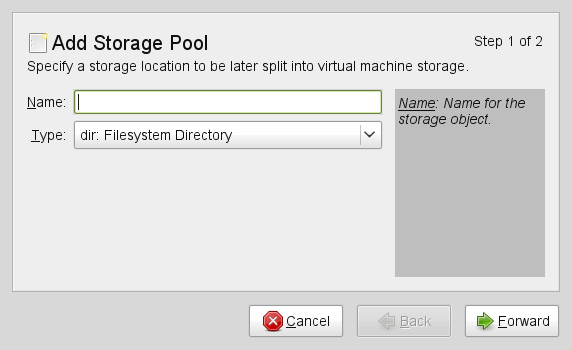
Specify the needed details in the following window. The data that needs to be entered depends on the type of pool you are creating.

- Type
: Specify an existing directory.
- Type
: The directory which hosts the devices. The default value
/devshould fit in most cases.: Format of the device's partition table. Using should work in most cases. If not, get the needed format by running the command parted
-lon the VM Host Server.Path to the device. It is recommended to use a device name from
/dev/disk/by-*rather than the simple/dev/sd, since the latter may change (for example when adding or removing hard disks). You need to specify the path that resembles the whole disk, not a partition on the disk (if existing).XActivating this option formats the device. Use with care— all data on the device will be lost!
- Type
Mount point on the VM Host Server file system.
File system format of the device. the default value
autoshould work.Path to the device file. It is recommended to use a device name from
/dev/disk/by-*rather than the simple/dev/sd, since the latter may change (for example when adding or removing hard disks).X
- Type
Get the necessary data by running the following command on the VM Host Server:
iscsiadm --mode node
It will return a list of iSCSI volumes with the following format. The elements highlighted with a bold font are the ones needed:
IP_ADDRESS:PORT,TPGT TARGET_NAME_(IQN)
The directory containing the device file. Use
/dev/disk/by-path(default) or/dev/disk/by-id.Host name or IP address of the iSCSI server.
The iSCSI target name (IQN).
- Type
In case you use an existing volume group, specify the existing device path. In case of building a new LVM volume group, specify a device name in the
/devdirectory that does not already exist.Leave empty when using an existing volume group. When creating a new one, specify its devices here.
Only activate when creating a new volume group.
- Type
Support of multipathing is currently limited to making all multipath devices available. Therefore you may enter an arbitrary string here (needed, otherwise the XML parser will fail), it will be ignored anyway.
- Type
Mount point on the VM Host Server file system.
Network file system protocol
IP address or hostname of the server exporting the network file system.
Directory on the server that is being exported.
- Type
The directory containing the device file. Use
/dev/disk/by-path(default) or/dev/disk/by-id.Name of the SCSI adapter.
File Browsing Using the file browser by clicking on is not possible when operating from remote.
Click to add the storage pool.
7.1.2. Managing Storage Pools
Virtual Machine Manager's Storage Manager lets you create or delete volumes in a pool. You may also temporarily deactivate or permanently delete existing storage pools. Changing the basic configuration of a pool is currently not supported by SUSE.
7.1.2.1. Starting, Stopping and Deleting Pools
The purpose of storage pools is to provide block devices located on the VM Host Server, that can be added to a VM Guest when managing it from remote. In order to make a pool temporarily inaccessible from remote, you may it by clicking on the stop symbol in the bottom left corner of the Storage Manager. Stopped pools are marked with and are grayed out in the list pane. By default, a newly created pool will be automatically started of the VM Host Server.
To an inactive pool and make it available from remote again click on the play symbol in the bottom left corner of the Storage Manager.
| A Pool's State Does not Affect Attached Volumes |
|---|---|
Volumes from a pool attached to VM Guests are always available, regardless of the pool's state ( (stopped) or (started)). The state of the pool solely affects the ability to attach volumes to a VM Guest via remote management. | |
To permanently make a pool inaccessible, you can it by clicking on the shredder symbol in the bottom left corner of the Storage Manager. You may only delete inactive pools. Deleting a pool does not physically erase its contents on VM Host Server—it only deletes the pool configuration. However, you need to be extra careful when deleting pools, especially when deleting LVM volume group-based tools:
| Deleting Storage Pools |
|---|---|
Deleting storage pools based on local file system directories, local partitions or disks has no effect on the availability of volumes from these pools currently attached to VM Guests. Volumes located in pools of type iSCSI, SCSI, LVM group or Network Exported Directory will become inaccessible from the VM Guest in case the pool will be deleted. Although the volumes themselves will not be deleted, the VM Host Server will no longer have access to the resources. Volumes on iSCSI/SCSI targets or Network Exported Directory will be accessible again when creating an adequate new pool or when mounting/accessing these resources directly from the host system. When deleting an LVM group-based storage pool, the LVM group definition will be erased and the LVM group will no longer exist on the host system. The configuration is not recoverable and all volumes from this pool are lost. | |
7.1.2.2. Adding Volumes to a Storage Pool
Virtual Machine Manager lets you create volumes in all storage pools, except in pools of
types Multipath, iSCSI, or SCSI. A volume in these pools is equivalent
to a LUN and cannot be changed from within libvirt.
A new volume can either be created using the Storage Manager or while adding a new storage device to a VM Guest. In both cases, select a and then click .
Specify a for the image and choose an image format (note that SUSE currently only supports
raw,qcow2, orqedimages). The latter option is not available on LVM group-based pools.Specify a and the amount of space that should initially be allocated. If both values differ, a
sparseimage file, growing on demand, will be created.Start the volume creation by clicking .
7.1.2.3. Deleting Volumes From a Storage Pool
Deleting a volume can only be done from the Storage Manager, by selecting a volume and clicking . Confirm with . Use this function with extreme care!
| No Checks Upon Volume Deletion |
|---|---|
A volume will be deleted in any case, regardless whether it is currently used in an active or inactive VM Guest. There is no way to recover a deleted volume. Whether a volume is used by a VM Guest is indicated in the column in the Storage Manager. | |
7.2. Managing Storage with virsh
Managing storage from the command line is also possible by using virsh. However, creating storage pools is currently not supported by SUSE. Therefore this section is restricted to document functions like starting, stopping and deleting pools and volume management.
A list of all virsh subcommands for managing pools and volumes is available by running virsh help pool and virsh help volume, respectively.
7.2.1. Listing Pools and Volumes
List all pools currently active by executing the following command. To
also list inactive pools, add the option --all:
virsh pool-list --details
Details about a specific pool can be obtained with the
pool-info subcommand:
virsh pool-info POOLVolumes can only be listed per pool by default. To list all volumes from a pool, enter the following command.
virsh vol-list --details POOLAt the moment virsh offers no tools to show whether a volume is used by a guest or not. The following procedure describes a way to list volumes from all pools that are currently used by a VM Guest.
Procedure 7.1. Listing all Storage Volumes Currently Used on a VM Host Server
Create an XSLT style sheet by saving the following content to a file, for example, ~/libvirt/guest_storage_list.xsl:
<?xml version="1.0" encoding="UTF-8"?> <xsl:stylesheet version="1.0" xmlns:xsl="http://www.w3.org/1999/XSL/Transform"> <xsl:output method="text"/> <xsl:template match="text()"/> <xsl:strip-space elements="*"/> <xsl:template match="disk"> <xsl:text> </xsl:text> <xsl:value-of select="(source/@file|source/@dev|source/@dir)[1]"/> <xsl:text> </xsl:text> </xsl:template> </xsl:stylesheet>Run the following commands in a shell. It is assumed that the guest's XML definitions are all stored in the default location (
/etc/libvirt/qemu). xsltproc is provided by the packagelibxslt.SSHEET="$HOME/libvirt/guest_storage_list.xsl" cd /etc/libvirt/qemu for FILE in *.xml; do basename $FILE .xml xsltproc $SSHEET $FILE done
7.2.2. Starting, Stopping and Deleting Pools
Use the virsh pool subcommands to start, stop or
delete a pool. Replace POOL with the pool's
name or its UUID in the following examples:
- Stopping a Pool
virsh pool-destroy
POOLA Pool's State Does not Affect Attached Volumes Volumes from a pool attached to VM Guests are always available, regardless of the pool's state ( (stopped) or (started)). The state of the pool solely affects the ability to attach volumes to a VM Guest via remote management.
- Deleting a Pool
virsh pool-delete
POOLDeleting Storage Pools Deleting storage pools based on local file system directories, local partitions or disks has no effect on the availability of volumes from these pools currently attached to VM Guests.
Volumes located in pools of type iSCSI, SCSI, LVM group or Network Exported Directory will become inaccessible from the VM Guest in case the pool will be deleted. Although the volumes themselves will not be deleted, the VM Host Server will no longer have access to the resources.
Volumes on iSCSI/SCSI targets or Network Exported Directory will be accessible again when creating an adequate new pool or when mounting/accessing these resources directly from the host system.
When deleting an LVM group-based storage pool, the LVM group definition will be erased and the LVM group will no longer exist on the host system. The configuration is not recoverable and all volumes from this pool are lost.
- Starting a Pool
virsh pool-start
POOL- Enable Autostarting a Pool
virsh pool-autostart
POOLOnly pools that are marked to autostart start will automatically be started in case the VM Host Server reboots.
- Disable Autostarting a Pool
virsh pool-autostart
POOL--disable
7.2.3. Adding Volumes to a Storage Pool
virsh offers two ways to create storage pools: either
from an XML definition with vol-create and
vol-create-from or via command line arguments with
vol-create-as. The first two methods are currently
not supported by SUSE, therefore this section focuses on the
subcommand vol-create-as.
To add a volume to an existing pool, enter the following command:
virsh vol-create-asPOOLNAMEraw|qcow2|qed
| Name of the pool to which the volume should be added |
| Name of the volume |
| Size of the image, in this example 12 gigabyte. Use the suffixes k,M,G,T for kilobyte, megabyte, gigabyte, and terabyte, respectively. |
|
Format of the volume. SUSE currently supports
|
| Optional parameter. By default virsh creates a sparse image file that grows on demand. Specify the amount of space that should be allocated with this parameter (4 gigabyte in this example). Use the suffixes k,M,G,T for kilobyte, megabyte, gigabyte, and terabyte, respectively.
When not specifying this parameter, a sparse image file with no
allocation will be generated. If you want to create a non-sparse
volume, specify the whole image size with this parameter (would be
|
7.2.3.1. Cloning Existing Volumes
Another way to add volumes to a pool is to clone an existing volume. The new instance is always created in the same pool as the original.
vol-cloneNAME_EXISTING_VOLUMENAME_NEW_VOLUMEPOOL
| Name of the existing volume that should be cloned |
| Name of the new volume |
|
Optional parameter. |
7.2.4. Deleting Volumes from a Storage Pool
To permanently delete a volume from a pool, use the subcommand
vol-delete:
virsh vol-deleteNAME--poolPOOL
--pool is optional. libvirt tries to locate the
volume automatically. If that fails, specify this parameter.
| No Checks Upon Volume Deletion |
|---|---|
A volume will be deleted in any case, regardless whether it is currently used in an active or inactive VM Guest. There is no way to recover a deleted volume. Whether a volume is used by a VM Guest can only be detected by using by the method described in Procedure 7.1, “Listing all Storage Volumes Currently Used on a VM Host Server”. | |
Chapter 8. Configuring Virtual Machines
Contents
Virtual Machine Manager's view offers in-depth information about the VM Guest's complete configuration and hardware equipment. Using this view, you can also change the guest configuration or add and modify virtual hardware. To access this view, open the guests console in Virtual Machine Manager and either choose + from the menu, or click on the blue information icon in the toolbar.
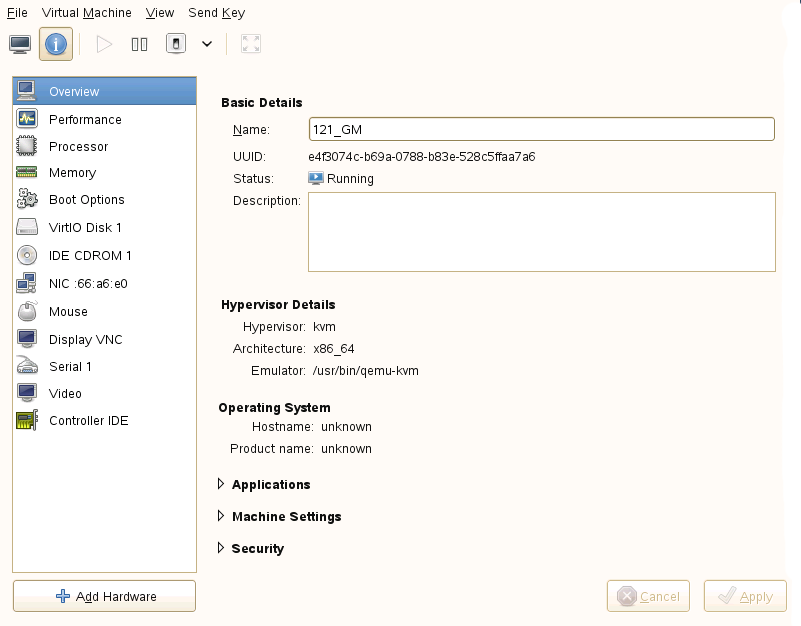
8.1. Enabling Seamless and Synchronized Cursor Movement
When you click within a VM Guest's console with the mouse, the cursor is captured by the console window and cannot be used outside the console unless it is explicitly released (by pressing Alt+Ctrl ). To prevent the console from grabbing the key and to enable seamless cursor movement between host and guest instead, add a tablet to the VM Guest.
Adding a tablet has the additional advantage of synchronizing the cursor movement between VM Host Server and VM Guest when using a graphical environment on the guest. With no tablet configured on the guest, you will often see two cursor symbols with one dragging behind the other.
Double-click a VM Guest entry in the Virtual Machine Manager to open its console and switch to the view with +.
Click and choose and then in the pop-up window. Proceed with .
In case you tried to add the tablet while the guest was still running, you will be asked whether to enable the tablet after the next reboot. Confirm with .
Once you (re)start the VM Guest the tablet is available in the VM Guest.
8.2. Adding a CD/DVD-ROM Device with Virtual Machine Manager
KVM supports CD or DVD-ROMs in VM Guest either by directly accessing a physical drive on the VM Host Server or by accessing ISO images. To create an ISO image from an existing CD or DVD, use dd:
dd if=/dev/cd_dvd_device of=my_distro.iso bs=2048To add a CD/DVD-ROM device to your VM Guest proceed as follows:
Double-click a VM Guest entry in the Virtual Machine Manager to open its console and switch to the view with +.
Click and choose in the pop-up window. Proceed with .
Change the to .
Select .
To assign the device to a physical medium, enter the path to the VM Host Server's CD/DVD-ROM device (for example,
/dev/cdrom) next to the button. Alternatively you may use the button to open a file browser and then click to select the device. Assigning the device to a physical medium is only possible, when the Virtual Machine Manager was started on the VM Host Server.To assign the device to an existing image, click to choose an image from a storage pool. If the Virtual Machine Manager was started on the VM Host Server, you may alternatively choose an image from another location on the file system by clicking . Select an image and close the file browser with .
Proceed with to review the settings. Apply them with , , and .
Reboot the VM Guest to make the new device available. For further information also see Section 8.4, “Ejecting and Changing Floppy or CD/DVD-ROM Media with Virtual Machine Manager”.
8.3. Adding a Floppy Device with Virtual Machine Manager
Currently KVM only supports the use of floppy disk images—using a physical floppy drive is not supported. Create a floppy disk image from an existing floppy using dd:
dd if=/dev/fd0 of=/var/lib/libvirt/images/floppy.img
To create an empty floppy disk image use one of the following commands:
# raw image
dd if=/dev/zero of=/var/lib/libvirt/images/floppy.img bs=512 count=2880

# FAT formatted image
mkfs.msdos -C /var/lib/libvirt/images/floppy.img 1440
To add a floppy device to your VM Guest proceed as follows:
Double-click a VM Guest entry in the Virtual Machine Manager to open its console and switch to the view with +.
Click and choose in the pop-up window. Proceed with .
Change the to .
Choose and click to choose an existing image from a storage pool. If Virtual Machine Manager was started on the VM Host Server, you may alternatively choose an image from another location on the file system by clicking . Select an image and close the file browser with .
Proceed with to review the settings. Apply them with , , and .
Reboot the VM Guest to make the new device available. For further information also see Section 8.4, “Ejecting and Changing Floppy or CD/DVD-ROM Media with Virtual Machine Manager”.
8.4. Ejecting and Changing Floppy or CD/DVD-ROM Media with Virtual Machine Manager
Regardless whether you are using the VM Host Server's physical CD/DVD-ROM
device or an ISO/Floppy image: before you can change the media or image
of an existing device in the VM Guest, you first need to
disconnect the media from the guest.
Double-click a VM Guest entry in the Virtual Machine Manager to open its console and switch to the view with +.
Choose the Floppy or CD/DVD-ROM device and “eject” the media by clicking .
To “insert” a new media, click .
If using the VM Host Server's physical CD/DVD-ROM device, first change the media in the device (this may require to unmount it on the VM Host Server before it can be ejected). Then choose and select the device from the drop-down list.
If using an ISO image, choose and select an image by clicking . When connecting from a remote host, you may only choose images from existing storage pools.
Click to finish. The new media can now be accessed in the VM Guest.
8.5. Clock Settings
Keeping the correct time in a VM Guest is one of the more difficult aspects of virtualization. Keeping the correct time is especially important for network applications and is also a prerequisite to do a live migration of a VM Guest.
| Time Keeping on the VM Host Server |
|---|---|
It is strongly recommended to ensure the VM Host Server keeps the correct time as well, for example, by utilizing NTP (see Chapter 17, Time Synchronization with NTP (↑Reference) for more information). | |
8.5.1. Using kvm_clock
KVM provides a para-virtualized clock which is currently supported by
openSUSE, SUSE Linux Enterprise Server 10 SP3 and newer and RedHat
Enterprise Linux 5.4 and newer via the kvm_clock
driver. It is strongly recommended to use
kvm_clock when available.
Use the following command inside a VM Guest running Linux to check
whether the driver kvm_clock has been loaded:
~ # dmesg | grep kvm-clock
[    0.000000] kvm-clock: cpu 0, msr 0:7d3a81, boot clock
[    0.000000] kvm-clock: cpu 0, msr 0:1206a81, primary cpu clock
[    0.012000] kvm-clock: cpu 1, msr 0:1306a81, secondary cpu clock
[    0.160082] Switching to clocksource kvm-clock
To check which clock source is currently used, run the following command
in the VM Guest. It should output kvm-clock:
cat /sys/devices/system/clocksource/clocksource0/current_clocksource
| kvm-clock and NTP |
|---|---|
When using | |
8.5.2. Other Time Keeping Methods
The para-virtualized kvm-clock is currently not
available for SUSE Linux Enterprise Server 9 and Windows operating systems. For Windows, use
the Windows Time Service Tools for time
synchronization (see
http://technet.microsoft.com/en-us/library/cc773263%28WS.10%29.aspx
for more information).
Correct time keeping in SUSE Linux Enterprise Server 9 SP4 can be achieved by using special boot parameters:
32-bit Kernel:clock=pmtmr
|
64-bit Kernel:ignore_lost_ticks
|
Chapter 9. Administrating VM Guests
9.1. Migrating VM Guests
One of the major advantages of virtualization is the fact that VM Guests are portable. When a VM Host Server needs to go down for maintenance, or when the host gets overloaded, the guests can easily be moved to another VM Host Server. KVM and Xen even support “live” migrations during which the VM Guest is constantly available.
In order to successfully migrate a VM Guest to another VM Host Server, the following requirements need to be met:
Host and target must have same processor manufacturer (Intel or AMD).
VM Guests running a 64-bit operating system can only be migrated to a 64-bit host (whereas 32-bit VM Guests can be moved to a 64 or 32-bit host).
Storage devices must be accessible from both machines (for example, via NFS or iSCSI) and must be configured as a storage pool on both machines (see Chapter 7, Managing Storage for more information). This is also true for CD-ROM or floppy images that are connected during the move (however, you may disconnect them prior to the move as described in Section 8.4, “Ejecting and Changing Floppy or CD/DVD-ROM Media with Virtual Machine Manager”).
libvirtdneeds to run on both VM Host Servers and you must be able to open a remotelibvirtconnection between the target and the source host (or vice versa). Refer to Section 6.2, “Configuring Remote Connections” for details.If a firewall is running on the target host ports need to be opened to allow the migration. If you do not specify a port during the migration process,
libvirtchooses one from the range 49152:49215. Make sure that either this range (recommended) or a dedicated port of your choice is opened in the firewall on the target host.Host and target machine should be in the same subnet on the network, otherwise networking will not work after the migration.
No running or paused VM Guest with the same name must exist on the target host. If a shut down machine with the same name exists, its configuration will be overwritten.
9.1.1. Migrating with virt-manager
When using the Virtual Machine Manager to migrate VM Guests, it does not matter on which machine it is started. You can start Virtual Machine Manager on the source or the target host or even on a third host. In the latter case you need to be able to open remote connections to both the target and the source host.
Start Virtual Machine Manager and establish a connection to the target or the source host. If the Virtual Machine Manager was started neither on the target nor the source host, connections to both hosts need to be opened.
Right-click on the VM Guest that is to be migrated and choose . Make sure the guest is running or paused - it is not possible to migrate guests that are shut off.
Choose a for the VM Guest. If the desired target host does not show up, make sure a connection to this host has been established.
By default, a “live” migration is performed. If you prefer an “offline” migration where the VM Guest is paused during the migration, tick .
Click to start a migration with the default port and bandwidth.
In order to change these defaults, make the advanced options available by clicking the triangle at . Here you can enter the target host's (IP address or hostname), a port and the bandwidth in megabit per second (Mbps). If you specify a , you must also specify an ; the is optional.
Once the migration is complete, the window closes and the VM Guest is now listed on the new host in the Virtual Machine Manager Window. The original VM Guest will still be available on the target host (in state shut off).
9.1.2. Migrating with virsh
To migrate a VM Guest with virsh
migrate, you need to have direct or remote
shell access to the VM Host Server, because the command needs to be run on the
host. Basically the migration command looks like this
virsh migrate [OPTIONS]VM_ID_or_NAMECONNECTION URI[--migrateuri tcp://REMOTE_HOST:PORT]
The most important options are listed below. See virsh help migrate for a full list.
--liveDoes a live migration. If not specified, an offline migration where the VM Guest is paused during the migration, will be performed.
--suspendDoes an offline migration and does not restart the VM Guest on the target host.
--persistentBy default a migrated VM Guest will be migrated transient, so its configuration is automatically deleted on the target host if it is shut down. Use this switch to make the migration persistent.
--undefinesourceWhen specified, the VM Guest definition on the source host will be deleted after a successful migration (however, virtual disks attached to this guest will not be deleted).
The following examples use mercury.example.com as the source system and jupiter.example.com
as the target system, the VM Guest's name is
opensuse11 with Id 37.
- Offline migration with default parameters
virsh migrate 37 qemu+ssh://root@jupiter.example.com/system
- Transient live migration with default parameters
virsh migrate --live opensuse11 qemu+ssh://root@jupiter.example.com/system
- Persistent live migration; delete VM definition on source
virsh migrate --live --persistent --undefinesource 37 \
qemu+tls://root@jupiter.example.com/system
- Offline migration using port 49152
virsh migrate opensuse11 qemu+ssh://root@jupiter.example.com/system \
--migrateuri tcp://@jupiter.example.com:49152
| Transient vs. Persistant Migrations |
|---|---|
By default virsh migrate creates a temporary (transient) copy of the VM Guest on the target host. A shut down version of the original guest description remains on the source host. A transient copy will be deleted from the server once it is shut down.
In order to create a permanent copy of a guest on the target host, use
the switch
It is not recommended to use | |
9.2. Monitoring
9.2.1. Monitoring with Virtual Machine Manager
After starting Virtual Machine Manager and connecting to the VM Host Server, a CPU usage graph of all the running guests is displayed.
It is also possible to get information about disk and network usage with this tool, however, you must first activate this in the :
Run virt-manager.
Select +.
Change the tab from to .
Activate the check boxes for and .
If desired, also change the update interval or the number of samples that are kept in the history.
Close the dialog.
Activate the graphs that should be displayed under +.
Afterwards, the disk and network statistics are also displayed in the main window of the Virtual Machine Manager.
More precise data is available from the VNC window. Open a VNC window as described in Section 5.2, “Opening a Graphical Console”. Choose from the toolbar or the menu. The statistics are displayed from the entry of the left-hand tree menu.
9.2.2. Monitoring with kvm_stat
kvm_stat can be used to trace KVM performance
events. It monitors /sys/kernel/debug/kvm, so it
needs the debugfs to be mounted. On openSUSE it should be mounted
by default. In case it is not mounted, use the following command:
mount -t debugfs none /sys/kernel/debug
kvm_stat can be used in three different modes:
kvm_stat                    # update in 1 second intervals
kvm_stat -1                 # 1 second snapshot
kvm_stat -l > kvmstats.log  # update in 1 second intervals in log format
                            # can be imported to a spreadsheet
Example 9.1. Typical Output of kvm_stat
kvm statistics

 efer_reload                  0       0
 exits                 11378946  218130
 fpu_reload               62144     152
 halt_exits              414866     100
 halt_wakeup             260358      50
 host_state_reload       539650     249
 hypercalls                   0       0
 insn_emulation         6227331  173067
 insn_emulation_fail          0       0
 invlpg                  227281      47
 io_exits                113148      18
 irq_exits               168474     127
 irq_injections          482804     123
 irq_window               51270      18
 largepages                   0       0
 mmio_exits                6925       0
 mmu_cache_miss           71820      19
 mmu_flooded              35420       9
 mmu_pde_zapped           64763      20
 mmu_pte_updated              0       0
 mmu_pte_write           213782      29
 mmu_recycled                 0       0
 mmu_shadow_zapped       128690      17
 mmu_unsync                  46      -1
 nmi_injections               0       0
 nmi_window                   0       0
 pf_fixed               1553821     857
 pf_guest               1018832     562
 remote_tlb_flush        174007      37
 request_irq                  0       0
 signal_exits                 0       0
 tlb_flush               394182     148
See http://clalance.blogspot.com/2009/01/kvm-performance-tools.html for further information on how to interpret these values.
Contents
- 10. QEMU Overview
- 11. Guest Installation
- 12. Running Virtual Machines with qemu-kvm
- 13. Administrating Virtual Machines with QEMU Monitor
- 13.1. Accessing Monitor Console
- 13.2. Getting Information about the Guest System
- 13.3. Changing VNC Password
- 13.4. Managing Devices
- 13.5. Controlling Keyboard and Mouse
- 13.6. Changing Available Memory
- 13.7. Dumping Virtual Machine Memory
- 13.8. Managing Virtual Machine Snapshots
- 13.9. Suspending and Resuming Virtual Machine Execution
- 13.10. Live Migration
Chapter 10. QEMU Overview
QEMU is a fast, cross-platform Open Source machine emulator which can emulate a huge number of hardware architectures for you. QEMU lets you run a complete unmodified operating system (VM Guest) on top of your existing system (VM Host Server).
You can also use QEMU for debugging purposes - you can easily stop your running virtual machine, inspect its state and save and restore it later.
QEMU consists of the following parts:
processor emulator (x86, PowerPC, Sparc ...)
emulated devices (graphic card, network card, hard drives, mice ...)
generic devices used to connect the emulated devices to the related host devices
descriptions of the emulated machines (PC, Power Mac ...)
debugger
user interface used to interact with the emulator
As a virtualization solution, QEMU can be run together with the KVM kernel module. If the VM Guest hardware architecture is the same as VM Host Server's architecture, QEMU can take advantage of the KVM acceleration.
Chapter 11. Guest Installation
A virtual machine is comprised of data and operating system files that define the virtual environment. Virtual machines are hosted and controlled by the VM Host Server. This chapter provides generalized instructions for installing virtual machines.
Before creating a virtual machine, consider the following:
If you want to use an automated installation file (AutoYaST, NetWare® Response File, or RedHat Kickstart), you need to download it to a directory on the host machine server, or make it available through a network filesystem.
When creating sparse image files, make sure the partition on which you create them always has sufficient free space. The guest system has no means to check the host's disk space. Having no space left on the host partition causes write errors and loss of data on the guest system.
NetWare and OES Linux virtual machines need a static IP address for each virtual machine you create.
If you are installing Open Enterprise Server (OES) 2 Linux, you need a network installation source for OES 2 Linux software.
For further prerequisites, consult the manuals of the respective operating system to install.
11.1. Basic Installation with qemu-kvm
The libvirt-based tools such as
virt-manager or vm-install offer
convenient interfaces to set up and manage virtual machines. They act as
a kind of wrapper for qemu-kvm. However, it is also
possible to utilize qemu-kvm directly without using
libvirt-based tools at all.
| |
Virtual machines created with qemu-kvm are not
"visible" for the | |
In the following example, a virtual machine with the same parameters as in Example 4.1, “Interactive Setup on the Command Line Using vm-install” will be set up using qemu-kvm. For detailed information on the commands, refer to the respective man pages.
If you do not already have an image of a system which you want to run in a virtualized environment, you need to create one from the installation media. In such case, you need to prepare a hard disk image, and obtain an image of the installation media or the media itself.
Create a hard disk with qemu-img.
qemu-img create
|
The subcommand |
|
Specify the disk's format with the |
| The full path to the image file. |
| The size of the image—8 GB in this case. The image is created as a sparse file that grows when the disk is filled with data. The specified size defines the maximum size to which the image file can grow. |
After at least one hard disk image is created, you can set up a virtual machine with qemu-kvm that will boot into the installation system:
qemu-kvm -name "sles11"
| Name of the virtual machine that will be displayed in the window caption and also used for the VNC server. This name must be unique. |
|
Specifies the machine type (,
, or ). Use
qemu-kvm |
| Maximum amount of memory for the virtual machine. |
| Defines an SMP system with two processors. |
|
Specifies the boot order. Valid values are |
|
Defines the first ( |
|
The second ( |
|
Defines a paravirtualized ( |
|
Specifies the graphic card. If you specify
|
|
Defines the paravirtualized balloon device that allows to dynamically
change the amount of memory (up to the maximum value specified with the
parameter |
After the installation of the guest operating system finishes, you can easily start the related virtual machine without the need to specify the CD-ROM device:
qemu-kvm -name "sles11" -M pc-0.12 -m 768 \
-smp 2 -boot c \
-drive file=/images/sles11/hda,if=virtio,index=0,media=disk,format=raw \
-net nic,model=virtio,macaddr=52:54:00:05:11:11 \
-vga cirrus -balloon virtio
11.2. Managing Disk Images with qemu-img
In the previous section (see Section 11.1, “Basic Installation with qemu-kvm”, we used the qemu-img command to create an image of a hard disk. You can, however, use qemu-img for general disk image manipulation. This section introduces useful qemu-img subcommands to help manage the disk images flexibly.
11.2.1. General Information on qemu-img Invocation
qemu-img uses subcommands (like zypper does) to do specific tasks. Each subcommand understands a different set of options. Some of these options are general and used by more of these subcommands, while some of them are unique to the related subcommand. See the qemu-img manual page (man 1 qemu-img) for a complete list of all supported options. qemu-img uses the following general syntax:
qemu-img subcommand [options]
and supports the following subcommands:
createCreates a new disk image on the filesystem.
checkChecks an existing disk image for errors.
convertConverts an existing disk image to a new one in a different format.
infoDisplays information about the relevant disk image.
snapshotManages snapshots of existing disk images.
commitApplies changes made to an existing disk image.
rebaseCreates a new base image based on an existing image.
resizeIncreases or decreases the size of an existing image.
11.2.2. Creating, Converting and Checking Disk Images
This section describes how to create disk images, check their condition, convert a disk image from one format to another, and get detailed information about a particular disk image.
11.2.2.1. qemu-img create
Use qemu-img create to create a new disk image for your VM Guest operating system. The command uses the following syntax:
qemu-img create -f fmt
|
The format of the target image. To get a complete list of image
formats supported by QEMU, run qemu-img
|
|
Some of the image formats support additional options to be passed on
the command line. You can specify them here with the
|
| Path to the target disk image to be created. |
|
Size of the target disk image (if not already specified with the
|
To create a new disk image sles11sp1.raw in the
directory /images growing up to a maximum size of
4 GB, run the following command:
tux@venus:~> qemu-img create -f raw -o size=4G /images/sles11sp1.raw
Formatting '/images/sles11sp1.raw', fmt=raw size=4294967296

tux@venus:~> ls -l /images/sles11sp1.raw
-rw-r--r-- 1 tux users 4294967296 Nov 15 15:56 /images/sles11sp1.raw

tux@venus:~> qemu-img info /images/sles11sp1.raw
image: /images/sles11sp1.raw
file format: raw
virtual size: 4.0G (4294967296 bytes)
disk size: 0
As you can see, the virtual size of the newly created image is 4 GB, but the actual reported disk size is 0 as no data has been written to the image yet.
11.2.2.2. qemu-img convert
Use qemu-img convert to convert disk images to
another format. To get a complete list of image formats supported by
QEMU, run qemu-img -h and look at
the last line of the output. The command uses the following syntax:
qemu-img convert -c
|
Applies compression on the target disk image. Only
|
| The format of the source disk image. It is autodetected in most cases and can therefore be omitted. |
| The format of the target disk image. |
|
Specify additional options relevant for the target image format. Use
|
| Path to the source disk image to be converted. |
| Path to the converted target disk image. |
tux@venus:~> qemu-img convert -O vmdk /images/sles11sp1.raw \
/images/sles11sp1.vmdk

tux@venus:~> ls -l /images/
-rw-r--r-- 1 tux users 4294967296 16. lis 10.50 sles11sp1.raw
-rw-r--r-- 1 tux users 2574450688 16. lis 14.18 sles11sp1.vmdk
To see a list of options relevant for the selected target image format,
run the following command (replace vmdk with your
image format):
tux@venus:~> qemu-img convert -O vmdk /images/sles11sp1.raw \
/images/sles11sp1.vmdk -o ?
Supported options:
size             Virtual disk size
backing_file     File name of a base image
compat6          VMDK version 6 image
subformat        VMDK flat extent format, can be one of {monolithicSparse \
    (default) | monolithicFlat | twoGbMaxExtentSparse | twoGbMaxExtentFlat}
scsi             SCSI image
11.2.2.3. qemu-img check
Use qemu-img check to check the existing disk image for errors. Not all disk image formats support this feature. The command uses the following syntax:
qemu-img check -f fmt
| The format of the source disk image. It is autodetected in most cases and can therefore be omitted. |
| Path to the source disk image to be checked. |
If no error is found, the command returns no output. Otherwise, the type and number of errors found is shown.
tux@venus:~> qemu-img check -f qcow2 /images/sles11sp1.qcow2
ERROR: invalid cluster offset=0x2af0000
[...]
ERROR: invalid cluster offset=0x34ab0000
378 errors were found on the image.
11.2.2.4. Increasing the Size of an Existing Disk Image
When creating a new image, you must specify its maximum size before the image is created (see Section 11.2.2.1, “qemu-img create”). After you install and run VM Guest for some time, the initial size of the image may no longer be sufficient and you need to add more space to it.
To increase the size of an existing disk image by 2 Gigabytes, use
qemu-img resize /images/sles11sp1.raw +2GB
| |
You can resize the | |
The image now contains an empty space of 2 GB after the final partition. You can resize the existing partitions or add new ones.
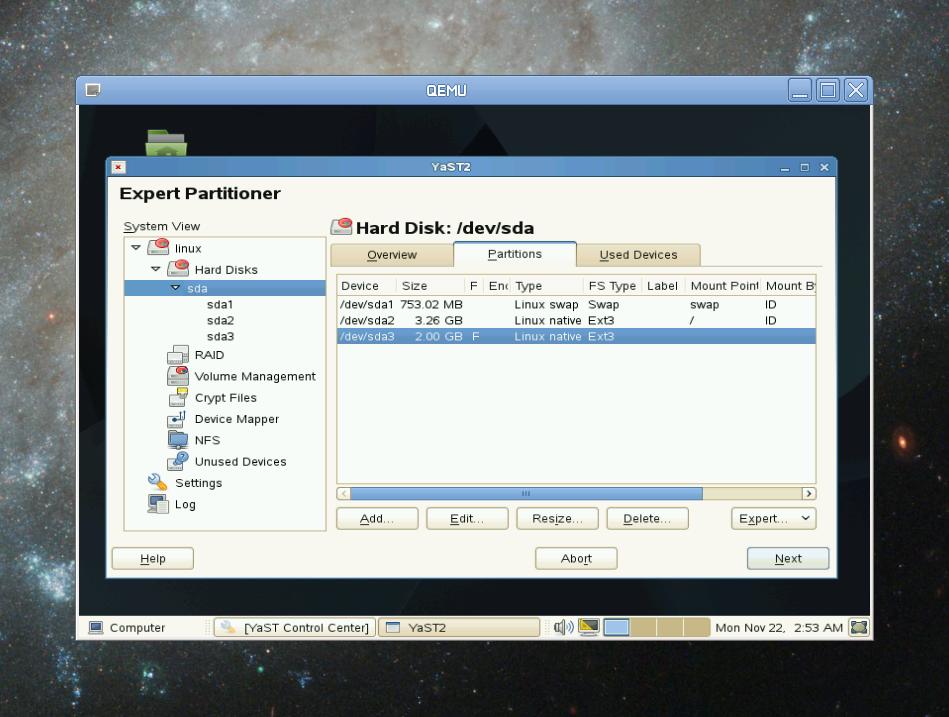
11.2.3. Managing Snapshots of Virtual Machines with qemu-img
Virtual machine snapshots are snapshots of the complete environment in which a VM Guest is running. The snapshot includes the state of the processor (CPU), memory (RAM), devices, and all writable disks.
Snapshots are helpful when you need to save your virtual machine in a particular state. For example, after you configured network services on a virtualized server and want to quickly start the virtual machine in the same state you last saved it. Or you can create a snapshot after the virtual machine has been powered off to create a backup state before you try something experimental and possibly make VM Guest unstable. This section introduces the latter case, while the former is described in Chapter 13, Administrating Virtual Machines with QEMU Monitor.
To use snapshots, your VM Guest must contain at least one writable hard
disk image in qcow2 format. This device is usually
the first virtual hard disk.
Virtual machine snapshots are created with the savevm
command in the interactive QEMU monitor. You can assign a 'tag' to
each snapshot which makes its identification easier. For more
information on QEMU monitor, see Chapter 13, Administrating Virtual Machines with QEMU Monitor.
Once your qcow2 disk image contains saved snapshots,
you can inspect them with the qemu-img snapshot
command.
| |
Do not create or delete virtual machine snapshots with the qemu-img snapshot command while the virtual machine is running. Otherwise, you can damage the disk image with the state of the virtual machine saved. | |
11.2.3.1. Listing Existing Snapshots
Use qemu-img snapshot -l
disk_image to view a list of all
existing snapshots saved in the disk_image image.
You can get the list even while the VM Guest is running.
tux@venus:~> qemu-img snapshot -l /images/sles11sp1.qcow2 Snapshot list: ID
| Unique identification number of the snapshot. Usually auto-incremented. |
| Unique description string of the snapshot. It is meant as a human readable version of the ID. |
| The disk space occupied by the snapshot. Note that the more memory is consumed by running applications, the bigger the snapshot is. |
| Time and date the snapshot was created. |
| The current state of the virtual machine's clock. |
11.2.3.2. Creating Snapshots of a Powered-Off Virtual Machine
Use qemu-img snapshot -c
snapshot_title
disk_image to create a snapshot of
the current state of a virtual machine which was previously powered
off.
tux@venus:~> qemu-img snapshot -c backup_snapshot /images/sles11sp1.qcow2
tux@venus:~> qemu-img snapshot -l /images/sles11sp1.qcow2 Snapshot list: ID TAG VM SIZE DATE VM CLOCK 1 booting 4.4M 2010-11-22 10:51:10 00:00:20.476 2 booted 184M 2010-11-22 10:53:03 00:02:05.394 3 logged_in 273M 2010-11-22 11:00:25 00:04:34.843 4 ff_and_term_running 372M 2010-11-22 11:12:27 00:08:44.965 5 backup_snapshot 0 2010-11-22 14:14:00 00:00:00.000
Once something breaks in your VM Guest and you need to restore the state of the saved snapshot (id 5 in our example), power off your VM Guest and do the following:
tux@venus:~> qemu-img snapshot -a 5 /images/sles11sp1.qcow2
Next time you run the virtual machine with qemu-kvm, it will be in the state of snapshot number 5.
| |
The qemu-img snapshot -c command is not related to
the | |
11.2.3.3. Deleting Snapshots
Use qemu-img snapshot -d
snapshot_id
disk_image to delete old or
unneeded snapshots of a virtual machine. This saves some disk space
inside the qcow2 disk image as the space occupied by
the snapshot data is restored:
tux@venus:~> qemu-img snapshot -d 2 /images/sles11sp1.qcow2
11.2.4. Manipulate Disk Images Effectively
Imagine the following real-life situation: you are a server administrator who runs and manages a number of virtualized operating systems. One group of these systems are based on one specific distribution, while another group (or groups) is based on different versions of the distribution or even on a different (and maybe non-Unix) platform. And to make the case even more complex, individual virtual guest systems based on the same distribution usually differ according to the department and deployment: a file server typically uses different setup and services than a Web server does, while both may still be based on SUSE® Linux Enterprise Server 11 SP1.
With QEMU it is possible to create “base” disk images. You can use them as template virtual machines. These base images will save you plenty of time because you will never need to install the same operating system more than once.
11.2.4.1. Base and Derived Images
First, build a disk image as usual and install the target system on it. For more information, see Section 11.1, “Basic Installation with qemu-kvm” and Section 11.2.2, “Creating, Converting and Checking Disk Images”. Then build a new image while using the first one as a base image. The base image is also called a 'backing' file. After your new 'derived' image is built, never boot the base image again, but boot the derived image instead. Several derived images may depend on one base image at the same time. Therefore, changing the base image can damage the dependencies. While using your derived image, QEMU writes changes to it and uses the base image only for reading.
It is a good practice to create a base image from a freshly installed (and, if needed, registered) operating system with no patches applied and no additional applications installed or removed. Later on, you can create another base image with the latest patches applied and based on the original base image.
11.2.4.2. Creating Derived Images
| |
While you can use the | |
For example, /images/sles11sp1_base.raw is the
base image holding a freshly installed system.
tux@venus:~> qemu-img info /images/sles11sp1_base.raw
image: /images/sles11sp1_base.raw
file format: raw
virtual size: 4.0G (4294967296 bytes)
disk size: 2.4G
The image's reserved size is 4 GB, the actual size is 2.4 GB, and its
format is raw. Create an image derived from the
/images/sles11sp1_base.raw base image with:
tux@venus:~> qemu-img create -f qcow2 /images/sles11sp1_derived.qcow2 \
-o backing_file=/images/sles11sp1_base.raw
Formatting '/images/sles11sp1_derived.qcow2', fmt=qcow2 size=4294967296 \
backing_file='/images/sles11sp1_base.raw' encryption=off cluster_size=0
Look at the derived image details:
tux@venus:~> qemu-img info /images/sles11sp1_derived.qcow2
image: /images/sles11sp1_derived.qcow2
file format: qcow2
virtual size: 4.0G (4294967296 bytes)
disk size: 140K
cluster_size: 65536
backing file: /images/sles11sp1_base.raw \
(actual path: /images/sles11sp1_base.raw)
Although the reserved size of the derived image is the same as the size of the base image (4 GB), the actual size is 140 KB only. The reason is that only changes made to the system inside the derived image are saved. Run the derived virtual machine, register it, if needed, and apply the latest patches. Do any other changes in the system such as removing unneeded or installing new software packages. Then shut the VM Guest down and examine its details once more:
tux@venus:~> qemu-img info /images/sles11sp1_derived.qcow2
image: /images/sles11sp1_derived.qcow2
file format: qcow2
virtual size: 4.0G (4294967296 bytes)
disk size: 1.1G
cluster_size: 65536
backing file: /images/sles11sp1_base.raw \
(actual path: /images/sles11sp1_base.raw)
The disk size value has grown to 1.1 GB, which is
the disk space occupied by the changes on the filesystem compared to
the base image.
11.2.4.3. Rebasing Derived Images
Once you modify the derived image (apply patches, install specific
applications, or change the environment settings etc.) into a
satisfactory shape, at some point you probably want to create a new
base image 'merged' from the base image and the derived one. Your first
base image (/images/sles11sp1_base.raw) holds a
freshly installed system and can be a template for new modified base
images, while the new one can contain the same system as the first one
plus all security and update patches applied, for example. After you
created this new base image, you can use it as a template for more
specialized derived images as well. The new base image becomes
independent of the original one. The process of creating base images
from derived ones is called 'rebasing':
tux@venus:~> qemu-img convert /images/sles11sp1_derived.qcow2 \
-O raw /images/sles11sp1_base2.raw
This command created the new base image
/images/sles11sp1_base2.raw using the
raw format.
tux@venus:~> qemu-img info /images/sles11sp1_base2.raw
image: /images/sles11sp1_base2.raw
file format: raw
virtual size: 4.0G (4294967296 bytes)
disk size: 2.8G
The new image is 0.4 gigabytes bigger than the original base image. It uses no backing file, and you can easily create new derived images based upon it. This lets you create a sophisticated hierarchy of virtual disk images for your organization, saving a lot of time and work.
11.2.4.4. Mounting an Image on a VM Host Server
Sometimes it is useful to mount a virtual disk image under the host system. For example, if VM Host Server does not have a network support, this can be the only way to transfer files in and out of a VM Guest.
Linux systems can mount an internal partition of a
raw disk image using a 'loopback' device. The first
example procedure is more complex but more illustrative, while the
second one is straightforward:
Procedure 11.1. Mounting Disk Image by Calculating Partition Offset
Set a loop device on the disk image whose partition you want to mount.
tux@venus:~> losetup /dev/loop0 /images/sles11sp1_base.raw
Find the sector size and the starting sector number of the partition you want to mount.
tux@venus:~> fdisk -lu /dev/loop0

Disk /dev/loop0: 4294 MB, 4294967296 bytes
255 heads, 63 sectors/track, 522 cylinders, total 8388608 sectors
Units = sectors of 1 * 512 = 512 bytes
Disk identifier: 0x000ceca8

       Device Boot      Start         End      Blocks   Id  System
/dev/loop0p1              63     1542239      771088+  82  Linux swap
/dev/loop0p2   *     1542240    8385929     3421845   83  Linux
The disk sector size.
The starting sector of the partition.
Calculate the partition start offset:
sector_size * sector_start = 512 * 1542240 = 789626880Delete the loop and mount the partition inside the disk image with the calculated offset on a prepared directory.
tux@venus:~> losetup -d /dev/loop0
tux@venus:~> mount -o loop,offset=789626880 \
/images/sles11sp1_base.raw /mnt/sles11sp1/
tux@venus:~> ls -l /mnt/sles11sp1/
total 112
drwxr-xr-x   2 root root  4096 Nov 16 10:02 bin
drwxr-xr-x   3 root root  4096 Nov 16 10:27 boot
drwxr-xr-x   5 root root  4096 Nov 16 09:11 dev
[...]
drwxrwxrwt  14 root root  4096 Nov 24 09:50 tmp
drwxr-xr-x  12 root root  4096 Nov 16 09:16 usr
drwxr-xr-x  15 root root  4096 Nov 16 09:22 var
Copy one or more files onto the mounted partition and unmount it when finished.
tux@venus:~> cp /etc/X11/xorg.conf /mnt/sles11sp1/root/tmp
tux@venus:~> ls -l /mnt/sles11sp1/root/tmp
tux@venus:~> umount /mnt/sles11sp1/
Procedure 11.2. Mounting Disk Image while Utilizing kpartx
Set a loop device on the disk image whose partition you want to mount.
tux@venus:~> losetup /dev/loop0 /images/sles11sp1_base.raw
Create a device map from the disk image's partitions.
tux@venus:~> kpartx -a /dev/loop0
Mount any partition of the disk image on a prepared mount point.
tux@venus:~> mount /dev/mapper/loop0p1 /mnt/p1
You can replace
loop0p1with the number of the partition you want to mount, for exampleloop0p3to mount the third partition on the disk image.Copy or move files or directories to and from the mounted partition as you like. Once you finish, unmount the partition and delete the loop.
tux@venus:~> umount /mnt/p1
tux@venus:~> losetup -d /dev/loop0
| |
Never mount a partition of an image of a running virtual machine in a
| |
Chapter 12. Running Virtual Machines with qemu-kvm
Contents
Once you have a virtual disk image ready (for more information on disk images, see Section 11.2, “Managing Disk Images with qemu-img”), it is time to start the related virtual machine. Section 11.1, “Basic Installation with qemu-kvm” introduced simple commands to install and run a VM Guest. This chapter focuses on a more detailed explanation of qemu-kvm usage, and shows solutions of more specific tasks. For a complete list of qemu-kvm's options, see its manual page (man 1 qemu-kvm).
12.1. Basic qemu-kvm Invocation
The qemu-kvm command uses the following syntax:
qemu-kvm options
| qemu-kvm understands a large number of options. Most of them define parameters of the emulated hardware, while others affect more general emulator behavior. If you do not supply any options, default values are used, and you need to supply the path to a disk image to be run. |
|
Path to the disk image holding the guest system you want to virtualize.
qemu-kvm supports a large number of image formats.
Use qemu-img --help to list them. If you do not
supply the path to a disk image as a separate argument, you have to use
the |
12.2. General qemu-kvm Options
This section introduces general qemu-kvm options and options related to the basic emulated hardware, such as virtual machine's processor, memory, model type, or time processing methods.
-namename_of_guestSpecifies the name of the running guest system. The name is displayed in the window caption and also used for the VNC server.
-bootoptionsSpecifies the order in which the defined drives will be booted. Drives are represented by letters, where 'a' and 'b' stands for the floppy drives 1 and 2, 'c' stands for the first hard disk, 'd' stands for the first CD-ROM drive, and 'n' to 'p' stand for Ether-boot network adapters.
For example,
qemu-kvm [...] -boot order=ndcfirst tries to boot from network, then from the first CD-ROM drive, and finally from the first hard disk.-pidfilefnameStores the QEMU's process identification number (PID) in a file. This is useful if you run QEMU from a script.
-nodefaultsBy default QEMU creates basic virtual devices even if you do not specify them on the command line. This option turns this feature off, and you must specify every single device manually, including graphical and network cards, parallel or serial ports, or virtual consoles. Even QEMU monitor is not attached by default.
-daemonize'Daemonizes' the QEMU process after it is started. QEMU will detach from the standard input and standard output after it is ready to receive connections on any of its devices.
12.2.1. Basic Virtual Hardware
-Mmachine_typeSpecifies the type of the emulated machine. Run qemu-kvm -M ? to view a list of supported machine types.
tux@venus:~> qemu-kvm -M ?
Supported machines are:
pc         Standard PC (alias of pc-0.12)
pc-0.12    Standard PC (default)
pc-0.11    Standard PC, qemu 0.11
pc-0.10    Standard PC, qemu 0.10
isapc      ISA-only PC
Currently, SUSE supports only
pc-0.12andpc-0.14machine types.-mmegabytesSpecifies how many megabytes are used for the virtual RAM size. Default is 512 MB.
-balloon virtioSpecifies a paravirtualized device to dynamically change the amount of virtual RAM memory assigned to VM Guest. The top limit is the amount of memory specified with
-m.-cpucpu_modelSpecifies the type of the processor (CPU) model. Run qemu-kvm -cpu ? to view a list of supported CPU models.
tux@venus:~> qemu-kvm -cpu ?
x86           qemu64
x86           phenom
x86         core2duo
x86            kvm64
x86           qemu32
x86          coreduo
x86              486
x86          pentium
x86         pentium2
x86         pentium3
x86           athlon
x86             n270
-smpnumber_of_cpusSpecifies how many CPUs will be emulated. QEMU supports up to 255 CPUs on the PC platform (up to 64 with KVM acceleration used). This option also takes other CPU-related parameters, such as number of sockets, number of cores per socket, or number of threads per core.
Following is an example of a working qemu-kvm command line:
qemu-kvm -name "SLES 11 SP1" -M pc-0.12 -m 512 -cpu kvm64 \
-smp 2 /images/sles11sp1.raw
-no-acpiDisables ACPI support. Try to use it if VM Guest reports problems with ACPI interface.
-SQEMU starts with CPU stopped. To start CPU, enter
cin QEMU monitor. For more information, see Chapter 13, Administrating Virtual Machines with QEMU Monitor.
12.2.2. Storing and Reading Configuration of Virtual Devices
-readconfigcfg_fileInstead of entering the devices configuration options on the command line each time you want to run VM Guest, qemu-kvm can read it from a file which was either previously saved with
-writeconfigor edited manually.-writeconfigcfg_fileDumps the current virtual machine devices configuration to a text file. It can be consequently re-used with the
-readconfigoption.tux@venus:~> qemu-kvm -name "SLES 11 SP1" -M pc-0.12 -m 512 -cpu kvm64 \ -smp 2 /images/sles11sp1.raw -writeconfig /images/sles11sp1.cfg (exited) tux@venus:~> more /images/sles11sp1.cfg # qemu config file [drive] index = "0" media = "disk" file = "/images/sles11sp1_base.raw"
This way you can effectively manage the configuration of your virtual machines' devices in a well-arranged way.
12.2.3. Guest Real-time Clock
-rtcoptionsSpecifies the way the RTC is handled inside a VM Guest. By default, the clock of the guest is derived from that of the host system. Therefore, it is recommended that the host system clock is synchronized with an accurate external clock (for example, via NTP service).
If you need to isolate the VM Guest clock from the host one, specify
clock=vminstead of the defaultclock=host.You can also specify a 'starting point' for VM Guest clock with the
baseoption:qemu-kvm [...] -rtc clock=vm,base=2010-12-03T01:02:00
Instead of a timestamp, you can specify
utcorlocaltime. The former instructs VM Guest to start at the current UTC value (Coordinated Universal Time, see http://en.wikipedia.org/wiki/UTC), while the latter applies the local time setting.
12.3. Using Devices in QEMU
QEMU virtual machines emulate all devices needed to run a VM Guest. QEMU supports, for example, several types of network cards, block devices (hard and removable drives), USB devices, character devices (serial and parallel ports), or multimedia devices (graphic and sound cards). For satisfactory operation and performance of the virtual machine, some or all of these devices must be configured correctly. This section introduces options to configure various types of supported devices.
12.3.1. Block Devices
Block devices are vital for virtual machines. In general, these are fixed or removable storage media usually referred to as 'drives'. One of the connected hard drives typically holds the guest operating system to be virtualized.
Virtual machine drives are defined with -drive. This
option uses many suboptions, some of which are described in this
section. For their complete list, see the manual page (man 1
qemu-kvm).
Sub-options for the -drive Option
file=image_fnameSpecifies the path to the disk image which will be used with this drive. If not specified, an empty (removable) drive is assumed.
if=drive_interfaceSpecifies the type of interface to which the drive is connected. Currently only
floppy,ide, orvirtioare supported by SUSE.virtiodefines a paravirtualized disk driver. Default iside.index=index_of_connectorSpecifies the index number of a connector on the disk interface (see the
ifoption) where the drive is connected. If not specified, the index is automatically incremented.media=typeSpecifies the type of the media. Can be
diskfor hard disks, orcdromfor removable CD-ROM drives.format=img_fmtSpecifies the format of the connected disk image. If not specified, the format is autodetected. Currently, SUSE supports
qcow2,qedandrawformats.cache=methodSpecifies the caching method for the drive. Possible values are
unsafe,writethrough,writeback, ornone. For theqcow2image format, choosewritebackif you care about performance.nonedisables the host page cache and, therefore, is the safest option. Default iswritethrough.
| |
To simplify defining of block devices, QEMU understands several
shortcuts which you may find handy when entering the
You can use qemu-kvm -cdrom /images/cdrom.iso instead of qemu-kvm -drive file=/images/cdrom.iso,index=2,media=cdrom and qemu-kvm -hda /images/imagei1.raw -hdb /images/image2.raw -hdc \ /images/image3.raw -hdd /images/image4.raw instead of qemu-kvm -drive file=/images/image1.raw,index=0,media=disk \ -drive file=/images/image2.raw,index=1,media=disk \ -drive file=/images/image3.raw,index=2,media=disk \ -drive file=/images/image4.raw,index=3,media=disk | |
| Using Host Drives Instead of Images |
|---|---|
Normally you will use disk images (see Section 11.2, “Managing Disk Images with qemu-img”) as disk drives of the virtual machine. However, you can also use existing VM Host Server disks, connect them as drives, and access them from VM Guest. Use the host disk device directly instead of disk image filenames. To access the host CD-ROM drive, use qemu-kvm [...] -drive file=/dev/cdrom,media=cdrom To access the host hard disk, use qemu-kvm [...] -drive file=/dev/hdb,media=disk When accessing the host hard drive from VM Guest, always make sure the access is read-only. You can do so by modifying the host device permissions. | |
12.3.2. Graphic Devices and Display Options
This section describes QEMU options affecting the type of the emulated video card and the way VM Guest graphical output is displayed.
12.3.2.1. Defining Video Cards
QEMU uses -vga to define a video card used to
display VM Guest graphical output. The -vga option
understands the following values:
noneDisables video cards on VM Guest (no video card is emulated). You can still access the running VM Guest via the QEMU monitor and the serial console.
stdEmulates a standard VESA 2.0 VBE video card. Use it if you intend to use high display resolution on VM Guest.
cirrusEmulates Cirrus Logic GD5446 video card. Good choice if you insist on high compatibility of the emulated video hardware. Most operating systems (even Windows 95) recognize this type of card.
For best video performance with the
cirrustype, use 16-bit color depth both on VM Guest and VM Host Server.
12.3.2.2. Display Options
The following options affect the way VM Guest graphical output is displayed.
-nographicDisables QEMU's graphical output. The emulated serial port is redirected to the console.
After starting the virtual machine with
-nographic, press Ctrl+A H in the virtual console to view the list of other useful shortcuts, for example, to toggle between the console and the QEMU monitor.tux@venus:~> qemu-kvm -hda /images/sles11sp1_base.raw -nographic C-a h print this help C-a x exit emulator C-a s save disk data back to file (if -snapshot) C-a t toggle console timestamps C-a b send break (magic sysrq) C-a c switch between console and monitor C-a C-a sends C-a (pressed C-a c) QEMU 0.12.5 monitor - type 'help' for more information (qemu)
-no-frameDisables decorations for the QEMU window. Convenient for dedicated desktop workspace.
-full-screenStarts QEMU graphical output in full screen mode.
-no-quitDisables the 'close' button of QEMU window and prevents it from being closed by force.
-alt-grab, -ctrl-grabBy default QEMU window releases the 'captured' mouse after Ctrl+Alt is pressed. You can change the key combination to either Ctrl+Alt+Shift (
-alt-grab), or Right Ctrl (-ctrl-grab).
12.3.3. USB Devices
There are basically two ways to create USB devices usable by the
VM Guest in KVM: you can either emulate new USB devices inside a
VM Guest, or assign an existing host USB device to a VM Guest. To use
USB devices in QEMU you first need to enable the generic USB driver
with the -usb option. Then you can specify individual
devices with the -usbdevice option.
12.3.3.1. Emulating USB Devices in VM Guest
Although QEMU supports much more types of USB devices, SUSE
currently only supports the types mouse and
tablet.
Types of USB devices for the -usbdevice Option
mouseEmulates a virtual USB mouse. This option overrides the default PS/2 mouse emulation. The following example shows the hardware status of a mouse on VM Guest started with
qemu-kvm [...] -usbdevice mouse:tux@venus:~> hwinfo --mouse 20: USB 00.0: 10503 USB Mouse [Created at usb.122] UDI: /org/freedesktop/Hal/devices/usb_device_627_1_1_if0 [...] Hardware Class: mouse Model: "Adomax QEMU USB Mouse" Hotplug: USB Vendor: usb 0x0627 "Adomax Technology Co., Ltd" Device: usb 0x0001 "QEMU USB Mouse" [...]
tabletEmulates a pointer device that uses absolute coordinates (such as touchscreen). This option overrides the default PS/2 mouse emulation. The tablet device is useful if you are viewing VM Guest via the VNC protocol. See Section 12.5, “Viewing a VM Guest with VNC” for more information.
12.3.3.2. USB Pass-Through
To assign an existing host USB device to a VM Guest, you need to find out its host bus and device ID.
tux@vmhost:~> lsusb
[...]
Bus 002 Device 005: ID 12d1:1406 Huawei Technologies Co., Ltd. E1750
[...]
In the above example, we want to assign a USB stick connected to the host's USB bus number 2 with device number 5. Now run the VM Guest with the following additional options:
qemu-kvm [...] -usb -device usb-host,hostbus=2,hostaddr=5
After the guest is booted, check that the assigned USB device is present on it.
tux@vmguest:~> lsusb
[...]
Bus 001 Device 002: ID 12d1:1406 Huawei Technologies Co., Ltd. E1750
[...]
| |
The guest operating system must take care of mounting the assigned USB device so that it is accessible for the user. | |
12.3.4. PCI Pass-Through
PCI Pass-Through is a technique to give your VM Guest exclusive access to a PCI device.
| |
To make use of PCI Pass-Through, your motherboard chipset, BIOS, and CPU must have support for AMD's IOMMU (or VT-d in Intel speak) virtualization technology. To make sure that your computer supports this feature, ask your supplier specifically to deliver a system that supports PCI Pass-Through. | |
| |
Assignment of graphics cards is not supported by SUSE. | |
Procedure 12.1. Configuring PCI Pass-Through
Make sure that
CONFIG_DMAR_DEFAULT_ONis set in the host's running Kernel:grep CONFIG_DMAR_DEFAULT_ON /boot/config-`uname -r`
If this option is not set, edit your boot loader configuration and add
intel_iommu=on(Intel machines) oriommu=pt iommu=1(AMD machines). Then reboot the host machine.Check that IOMMU is actively enabled and recognized on the host. Run dmesg | grep -e DMAR -e IOMMU on Intel machines, or dmesg | grep AMD-Vi on AMD machines. If you get no output, check carefully if your hardware supports IOMMU (VT-d) and check that it has been enabled in BIOS.
Identify the host PCI device to assign to the guest.
tux@vmhost:~> lspci -nn
[...] 00:1b.0 Audio device [0403]: Intel Corporation 82801H (ICH8 Family) \
HD Audio Controller [8086:284b] (rev 02) [...]
Note down the device (
00:1b.0) and vendor (8086:284b) ID.Unbind the device from host Kernel driver and bind it to the PCI stub driver.
tux@vmhost:~> modprobe pci_stub
tux@vmhost:~> echo "8086 284b" > /sys/bus/pci/drivers/pci-stub/new_id
tux@vmhost:~> echo "0000:00:1b.0" > /sys/bus/pci/devices/0000:00:1b.0/driver/unbind
tux@vmhost:~> echo "0000:00:1b.0" > /sys/bus/pci/drivers/pci-stub/bind
Now run the VM Guest with the PCI device assigned.
qemu-kvm [...] -device pci-assign,host=00:1b.0
| |
If the PCI device shares IRQ with other devices, it cannot be assigned to a VM Guest. | |
KVM also supports PCI device hotplugging to a VM Guest. To achieve this, you need to switch to a QEMU monitor (see Chapter 13, Administrating Virtual Machines with QEMU Monitor for more information) and issue the following commands:
hot add:
device_add pci-assign,host=00:1b.0,id=new_pci_device
hot remove:
device_del new_pci_device
12.3.5. Character Devices
Use -chardev to create a new character device. The
option uses the following general syntax:
qemu-kvm [...] -chardevbackend_type,id=id_string
where backend_type can be one of
null, socket,
udp, msmouse,
vc, file, pipe,
console, serial,
pty, stdio,
braille, tty, or
parport. All character devices must have a unique
identification string up to 127 characters long. It is used to identify
the device in other related directives. For the complete description of
all backend's suboptions, see the manual page (man 1
qemu-kvm). A brief description of the available
backends follows:
nullCreates an empty device which outputs no data and drops any data it receives.
stdioConnects to QEMU's process standard input and standard output.
socketCreates a two-way stream socket. If
pathis specified, a Unix socket is created:qemu-kvm [...] -chardev \ socket,id=unix_socket1,path=/tmp/unix_socket1,server
The
serversuboption specifies that the socket is a listening socket.If
portis specified, a TCP socket is created:qemu-kvm [...] -chardev \ socket,id=tcp_socket1,host=localhost,port=7777,server,nowait
The command creates a local listening (
server) TCP socket on port 7777. QEMU will not block waiting for a client to connect to the listening port (nowait).udpSends all network traffic from VM Guest to a remote host over the UDP protocol.
qemu-kvm [...] -chardev udp,id=udp_fwd,host=mercury.example.com,port=7777
The command binds port 7777 on the remote host mercury.example.com and sends VM Guest network traffic there.
vcCreates a new QEMU text console. You can optionally specify the dimensions of the virtual console:
qemu-kvm [...] -chardev vc,id=vc1,width=640,height=480 -mon chardev=vc1
The command creates a new virtual console called
vc1of the specified size, and connects the QEMU monitor to it.fileLogs all traffic from VM Guest to a file on VM Host Server. The
pathis required and will be created if it does not exist.qemu-kvm [...] -chardev file,id=qemu_log1,path=/var/log/qemu/guest1.log
By default QEMU creates a set of character devices for serial and parallel ports, and a special console for QEMU monitor. You can, however, create your own character devices and use them for just mentioned purposes. The following options will help you:
-serialchar_devRedirects the VM Guest's virtual serial port to a character device
char_devon VM Host Server. By default, it is a virtual console (vc) in graphical mode, andstdioin non-graphical mode. The-serialunderstands many suboptions. See the manual page man 1 qemu-kvm for their complete list.You can emulate up to 4 serial ports. Use
-serial
       none
to disable all serial ports.-paralleldeviceRedirects the VM Guest's parallel port to a
device. This option supports the same devices as-serial.With openSUSE or SUSE Linux Enterprise Server as a VM Host Server, you can directly use the hardware parallel port devices
/dev/parportNwhereNis the number of the port.You can emulate up to 3 parallel ports. Use
-parallel
       none
to disable all parallel ports.-monitorchar_devRedirects the QEMU monitor to a character device
char_devon VM Host Server. This option supports the same devices as-serial. By default, it is a virtual console (vc) in a graphical mode, andstdioin non-graphical mode.
12.4. Networking in QEMU
Use the -net option to define a network interface and
a specific type of networking for your VM Guest. Currently, SUSE
supports the following options: none,
nic, user, and
tap. For a complete list of -net
suboptions, see the manual page (man 1 qemu-kvm).
Supported -net Suboptions
noneDisables a network card emulation on VM Guest. Only the loopback
lonetwork interface is available.nicCreates a new Network Interface Card (NIC) and connects it to a specified Virtual Local Area Network (VLAN). For more information, see Section 12.4.1, “Defining a Network Interface Card”
userSpecifies a user-mode networking. For more information , see Section 12.4.2, “User-mode Networking”.
tapSpecifies a bridged or routed networking. For more information, see Section 12.4.3, “Bridged Networking”.
12.4.1. Defining a Network Interface Card
Use -net nic to add a new emulated network card:
qemu-kvm [...] -net nic,vlan=1
| Connects the network interface to VLAN number 1. You can specify your own number, it is mainly useful for identification purpose. If you omit this suboption, QEMU uses the default 0. |
| Specifies the Media Access Control (MAC) address for the network card. It is a unique identifier and you are advised to always specify it. If not, QEMU supplies its own default MAC address and creates a possible MAC address conflict within the related VLAN. |
|
Specifies the model of the network card. Use
Currently, SUSE supports the models |
12.4.2. User-mode Networking
The -net user option instructs QEMU to use a
user-mode networking. This is the default if no networking mode is
selected. Therefore, these command lines are equivalent:
qemu-kvm -hda /images/sles11sp1_base.raw
qemu-kvm -hda /images/sles11sp1_base.raw -net nic -net user
This mode is useful if you want to allow the VM Guest to access the external network resources, such as Internet. By default, no incoming traffic is permitted and therefore, the VM Guest is not visible to other machines on the network. No administrator privileges are required in this networking mode. The user-mode is also useful to do a 'network-booting' on your VM Guest from a local directory on VM Host Server.
The VM Guest allocates an IP address from a virtual DHCP server. VM Host Server (the DHCP server) is reachable at 10.0.2.2, while the IP address range for allocation starts from 10.0.2.15. You can use ssh to connect to VM Host Server at 10.0.2.2, and scp to copy files back and forth.
12.4.2.1. Command Line Examples
This section shows several examples on how to set up user-mode networking with QEMU.
Example 12.1. Restricted User-mode Networking
qemu-kvm [...] -net user
| Specifies user-mode networking. |
| Connect to VLAN number 1. If omitted, defaults to 0. |
| Specifies a human readable name of the network stack. Useful when identifying it in the QEMU monitor. |
| Isolates VM Guest. It will not be able to communicate with VM Host Server and no network packets will be routed to the external network. |
Example 12.2. User-mode Networking with Custom IP Range
qemu-kvm [...] -net user,net=10.2.0.0/8
| Specifies the IP address of the network that VM Guest sees and optionally the netmask. Default is 10.0.2.0/8. |
| Specifies the VM Host Server IP address that VM Guest sees. Default is 10.0.2.2. |
| Specifies the first of the 16 IP addresses that the built-in DHCP server can assign to VM Guest. Default is 10.0.2.15. |
| Specifies the hostname that the built-in DHCP server will assign to VM Guest. |
Example 12.3. User-mode Networking with Network-boot and TFTP
qemu-kvm [...] -net user,tftp=/images/tftp_dir
| Activates a built-in TFTP (a file transfer protocol with the functionality of a very basic FTP) server. The files in the specified directory will be visible to a VM Guest as the root of a TFTP server. |
|
Broadcasts the specified file as a BOOTP (a network protocol which
offers an IP address and a network location of a boot image, often
used in diskless workstations) file. When used together with
|
Example 12.4. User-mode Networking with Host Port Forwarding
qemu-kvm [...] -net user,hostfwd=tcp::2222-:22
Forwards incoming TCP connections to the port 2222 on the host to the
port 22 (SSH) on VM Guest.
If sshd is running on
VM Guest, enter
ssh qemu_host -p 2222
where qemu_host is the hostname or IP address of
the host system, to get a SSH
prompt from VM Guest.
12.4.3. Bridged Networking
With the -net tap option, QEMU creates a network
bridge by connecting the host TAP network device to a specified VLAN of
VM Guest. Its network interface is then visible to the rest of the
network. This method does not work by default and has to be explicitly
specified.
First, create a network bridge and add a VM Host Server physical network
interface (usually eth0) to it:
Start YaST Control Center and select +.
Click and select from the drop-down list in the window. Click .
Choose whether you need a dynamically or statically assigned IP address, and fill the related network settings if applicable.
In the pane, select the Ethernet device to add to the bridge.
Click . When asked about adapting an already configured device, click .
Click to apply the changes. Check if the bridge is created:
tux@venus:~> brctl show
bridge name bridge id          STP enabled  interfaces
br0         8000.001676d670e4  no           eth0
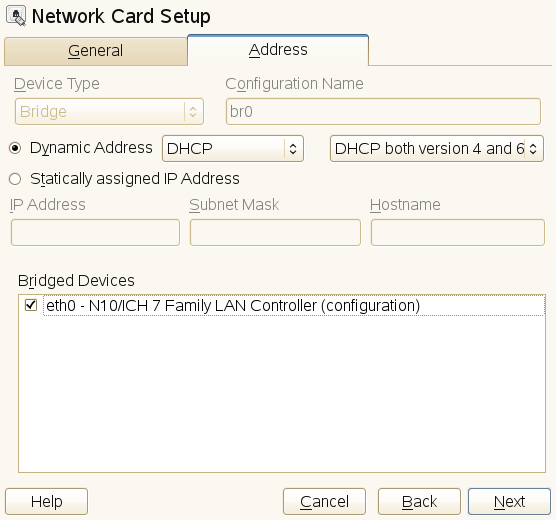
Use the following example script to connect VM Guest to the newly
created bridge interface br0. Several commands in the
script are run via the sudo mechanism because they
require root privileges.
| |
Make sure the | |
#!/bin/bash bridge=br0
| Name of the bridge device. |
| Prepare a new TAP device and assign it to the user who runs the script. TAP devices are virtual network devices often used for virtualization and emulation setups. |
| Bring up the newly created TAP network interface. |
| Make a 1 second pause to make sure the new TAP network interface is really up. |
|
Add the new |
|
The |
|
Before qemu-kvm connects to a network bridge, it
checks the |
|
Deletes the TAP interface from a network bridge
|
| Sets the state of the TAP device to 'down'. |
| Deconfigures the TAP device. |
12.4.4. Accelerated Networking with vhost-net
The vhost-net module is used to accelerate
KVM's paravirtualized network drivers. It provides better latency and
greater throughput for network.
To make use of the module, verify that the host's running Kernel has
CONFIG_VHOST_NET turned on or enabled as a module:
grep CONFIG_VHOST_NET /boot/config-`uname -r`
Also verify that the guest's running Kernel has
CONFIG_PCI_MSI enabled:
grep CONFIG_PCI_MSI /boot/config-`uname -r`
If both conditions are met, use the vhost-net driver
by starting the guest with the following example command line:
qemu-kvm [...] -netdev tap,id=guest0,vhost=on,script=no
-net nic,model=virtio,netdev=guest0,macaddr=00:16:35:AF:94:4B
Note that guest0 is an identification string of the
vhost-driven device.
12.5. Viewing a VM Guest with VNC
QEMU normally uses an SDL (a cross-platform multimedia library) window
to display the graphical output of a VM Guest. With the
-vnc option specified, you can make QEMU listen on a
specified VNC display and redirect its graphical output to the VNC
session.
| |
When working with QEMU's virtual machine via VNC session, it is useful
to work with the
Moreover, if you need to use another keyboard layout than the default
| |
The first suboption of -vnc must be a
display value. The -vnc option
understands the following display specifications:
host:displayOnly connections from
hoston the display numberdisplaywill be accepted. The TCP port on which the VNC session is then running is normally a 5900 +displaynumber. If you do not specifyhost, connections will be accepted from any host.unix:pathThe VNC server listens for connections on Unix domain sockets. The
pathoption specifies the location of the related Unix socket.noneThe VNC server functionality is initialized, but the server itself is not started. You can start the VNC server later with the QEMU monitor. For more information, see Chapter 13, Administrating Virtual Machines with QEMU Monitor.
tux@venus:~> qemu-kvm [...] -vnc :5
(on the client:)
wilber@jupiter:~> vinagre venus:5905 &
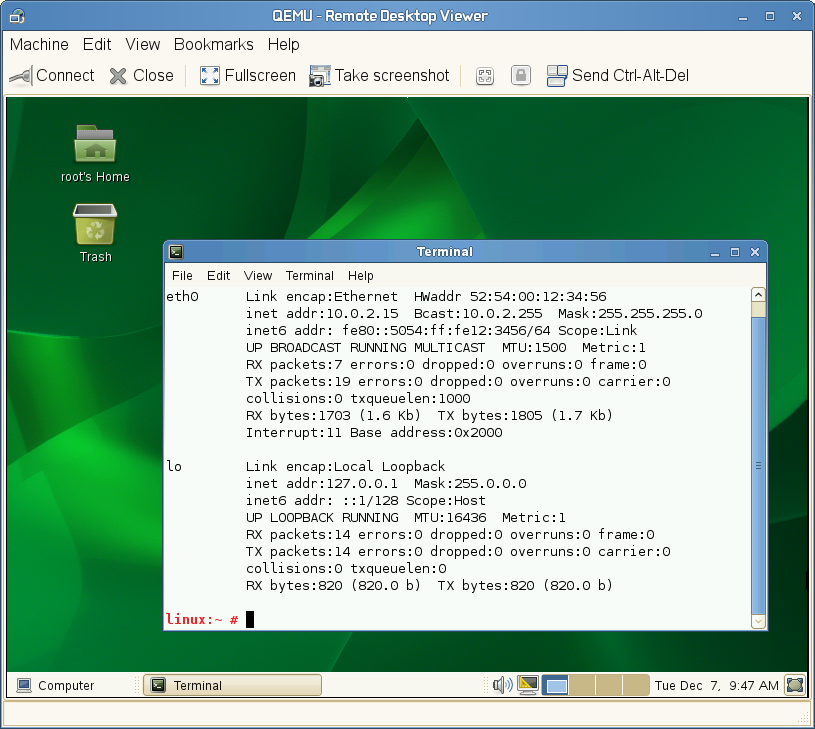
12.5.1. Secure VNC Connections
The default VNC server setup does not use any form of authentication. In the previous example, any user can connect and view the QEMU VNC Session from any host on the network.
There are several levels of security which you can apply to your VNC client/server connection. You can either protect your connection with a password, use x509 certificates, use SASL authentication, or even combine some of these authentication methods in one QEMU command.
See Section A.2, “Generating x509 Client/Server Certificates” for more information about
the x509 certificates generation. For more information about configuring
x509 certificates on a VM Host Server and the client, see
Section 6.2.2, “Remote TLS/SSL Connection with x509 Certificate (qemu+tls)” and
Section 6.2.2.3, “Configuring the Client and Testing the Setup”.
The Vinagre VNC viewer supports advanced authentication mechanisms.
Therefore, it will be used to view the graphical output of VM Guest in
the following examples. For this example, let us assume that the server
x509 certificates ca-cert.pem,
server-cert.pem, and
server-key.pem are located in the
/etc/pki/qemu directory on the host, while the
client's certificates are distributed in the following locations on the
client:
/etc/pki/CA/cacert.pem
|
/etc/pki/libvirt-vnc/clientcert.pem
|
/etc/pki/libvirt-vnc/private/clientkey.pem
|
Example 12.5. Password Authentication
qemu-kvm [...] -vnc :5,password -monitor stdio
Starts the VM Guest graphical output on VNC display number 5 (usually
port 5905). The password suboption initializes a
simple password-based authentication method. There is no password set
by default and you have to set one with the change vnc
password command in QEMU monitor:
QEMU 0.12.5 monitor - type 'help' for more information
(qemu) change vnc password
Password: ****
You need the -monitor stdio option here, because you
would not be able to manage the QEMU monitor without redirecting its
input/output.
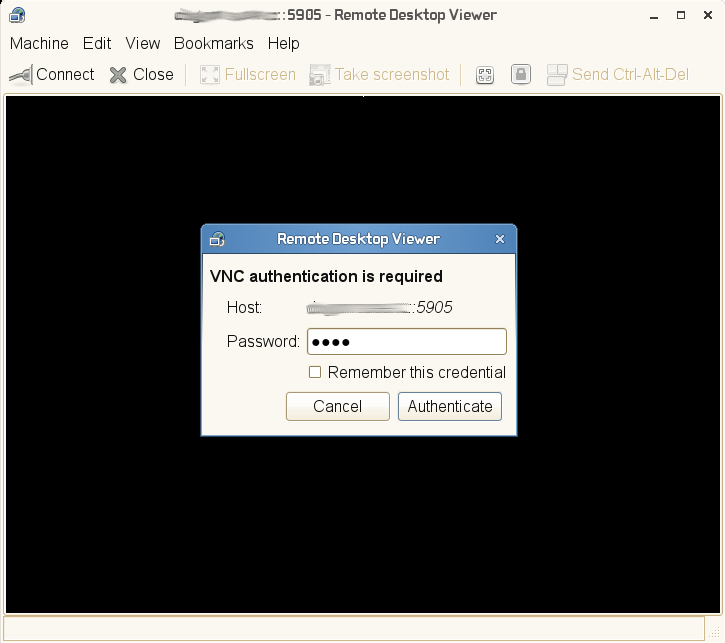
Example 12.6. x509 Certificate Authentication
The QEMU VNC server can use TLS encryption for the session and x509 certificates for authentication. The server asks the client for a certificate and validates it against the CA certificate. Use this authentication type if your company provides an internal certificate authority.
qemu-kvm [...] -vnc :5,tls,x509verify=/etc/pki/qemu
Example 12.7. x509 Certificate and Password Authentication
You can combine the password authentication with TLS encryption and x509 certificate authentication to create a two-layer authentication model for clients. Remember to set the password in the QEMU monitor after you run the following command:
qemu-kvm [...] -vnc :5,password,tls,x509verify=/etc/pki/qemu -monitor stdio
Example 12.8. SASL Authentication
Simple Authentication and Security Layer (SASL) is a framework for authentication and data security in Internet protocols. It integrates several authentication mechanisms, like PAM, Kerberos, LDAP and more. SASL keeps its own user database, so the connecting user accounts do not need to exist on VM Host Server.
For security reasons, you are advised to combine SASL authentication with TLS encryption and x509 certificates:
qemu-kvm [...] -vnc :5,tls,x509,sasl -monitor stdio
12.6. VirtFS: Sharing Folders between Host and Guests
VM Guests usually run in a separate computing space — they are provided their own memory range, dedicated CPUs, and filesystem space. Ability to share parts of VM Host Server's filesystem makes the virtualization environment more flexible by simplifying mutual data exchange. Network filesystems, such as CIFS and NFS, have been the traditional way of sharing folders. But as they are not specifically designed for virtualization purposes, they suffer from major performance and feature issues.
KVM introduces a new and more optimized tool called VirtFS (sometimes referred to as a “filesystem pass-through”). VirtFS uses a paravirtual filesystem driver, which avoids converting the guest application filesystem operations into block device operations, and then again into host filesystem operations. VirtFS uses Plan-9 network protocol for communication between the guest and the host.
You can typically use VirtFS to
access a shared folder from several guests, or to provide guest-to-guest filesystem access.
replace the virtual disk as the root filesystem to which the guest's ramdisk connects to during the guest boot process
provide storage services to different customers from a single host filesystem in a cloud environment
12.6.1. Implementation
In QEMU, the implementation of VirtFS is facilitated by defining two types of devices:
virtio-9p-pcidevice which transports protocol messages and data between the host and the guest.fsdevdevice which defines the export filesystem properties, such as filesystem type and security model.
Example 12.9. Exporting Host's Filesystem with VirtFS
qemu-kvm [...] -fsdev local,id=exp1
| Identification of the filesystem to be exported. |
| Filesystem path on the host to be exported. |
|
Security model to be used — |
|
The exported filesystem ID defined before with |
| Mount tag used later on the guest to mount the exported filesystem. |
Such an exported filesystem can be mounted on the guest like this
mount -t 9p -o trans=virtio v_tmp /mnt
where v_tmp is the mount tag defined earlier with
-device mount_tag= and /mnt is
the mount point where you want to mount the exported filesystem.
12.7. KSM: Sharing Memory Pages between Guests
Kernel SamePage Merging (KSM) is a Linux Kernel feature which merges identical memory pages from multiple running processes into one memory region. Because KVM guests run as processes under Linux, KSM provides the memory overcommit feature to hypervisors for more efficient use of memory. Therefore, if you need to run multiple virtual machines on a host with limited memory, KSM is the best solution for you.
To make use of KSM, do the following.
Verify that KSM is enabled in your running Kernel:
grep KSM /boot/config-`uname -r`
CONFIG_KSM=y
If KSM is enabled in the running Kernel, you will see the following files under the
/sys/kernel/mm/ksmdirectory:ls -l /sys/kernel/mm/ksm total 0 drwxr-xr-x 2 root root 0 Nov 9 07:10 ./ drwxr-xr-x 6 root root 0 Nov 9 07:10 ../ -r--r--r-- 1 root root 4096 Nov 9 07:10 full_scans -r--r--r-- 1 root root 4096 Nov 9 07:10 pages_shared -r--r--r-- 1 root root 4096 Nov 9 07:10 pages_sharing -rw-r--r-- 1 root root 4096 Nov 9 07:10 pages_to_scan -r--r--r-- 1 root root 4096 Nov 9 07:10 pages_unshared -r--r--r-- 1 root root 4096 Nov 9 07:10 pages_volatile -rw-r--r-- 1 root root 4096 Nov 9 07:10 run -rw-r--r-- 1 root root 4096 Nov 9 07:10 sleep_millisecs
Check if KSM feature is turned on.
cat /sys/kernel/mm/ksm/run
If the command returns
0, turn KSM on withecho 1 > /sys/kernel/mm/ksm/run
Now run several VM Guests under KVM and inspect the content of files
pages_sharingandpages_shared, for example:while [ 1 ]; do cat /sys/kernel/mm/ksm/pages_shared; sleep 1; done 13522 13523 13519 13518 13520 13520 13528
For more information on the meaning of the
/sys/kernel/mm/ksm/* files, see
/usr/src/linux/Documentation/vm/ksm.txt (package
kernel-source).
Chapter 13. Administrating Virtual Machines with QEMU Monitor
Contents
- 13.1. Accessing Monitor Console
- 13.2. Getting Information about the Guest System
- 13.3. Changing VNC Password
- 13.4. Managing Devices
- 13.5. Controlling Keyboard and Mouse
- 13.6. Changing Available Memory
- 13.7. Dumping Virtual Machine Memory
- 13.8. Managing Virtual Machine Snapshots
- 13.9. Suspending and Resuming Virtual Machine Execution
- 13.10. Live Migration
When QEMU is running, a monitor console is provided for performing interaction with the user. Using the commands available in the monitor console, it is possible to inspect the running operating system, change removable media, take screenshots or audio grabs and control several other aspects of the virtual machine.
13.1. Accessing Monitor Console
To access the monitor console from QEMU, press Ctrl+Alt+2. To return back to QEMU from the monitor console, press Ctrl+Alt+1.
To get help while using the console, use help or
?. To get help for a specific command, use
help command.
13.2. Getting Information about the Guest System
To get information about the guest system, use the info
option command. If used without any option,
the list of possible options is printed. Options determine which part of the
system will be analyzed:
- info version
Shows the version of QEMU
- info commands
Lists available QMP commands
- info network
Shows the network state
- info chardev
Shows the character devices
- info block
Information about block devices, such as hard drives, floppy drives, or CD-ROMs
- info blockstats
Read and write statistics on block devices
- info registers
Shows the CPU registers
- info cpus
Shows information about available CPUs
- info history
Shows the command line history
- info irq
Shows the interrupts statistics
- info pic
Shows the i8259 (PIC) state
- info pci
Shows the PCI information
- info tlb
Shows virtual to physical memory mappings
- info mem
Shows the active virtual memory mappings
- info jit
Shows dynamic compiler information
- info kvm
Shows the KVM information
- info numa
Shows the NUMA information
- info usb
Shows the guest USB devices
- info usbhost
Shows the host USB devices
- info profile
Shows the profiling information
- info capture
Shows the capture (audio grab) information
- info snapshots
Shows the currently saved virtual machine snapshots
- info status
Shows the current virtual machine status
- info pcmcia
Shows the guest PCMCIA status
- info mice
Shows which guest mice is receiving events
- info vnc
Shows the VNC server status
- info name
Shows the current virtual machine name
- info uuid
Shows the current virtual machine UUID
- info usernet
Shows the user network stack connection states
- info migrate
Shows the migration status
- info balloon
Shows the balloon device information
- info qtree
Shows the device tree
- info qdm
Shows the qdev device model list
- info roms
Shows the ROMs
13.3. Changing VNC Password
To change the VNC password, use the change vnc password command and enter the new password:
(qemu) change vnc password
Password: ********
(qemu)
13.4. Managing Devices
To release the device or file connected to the removable media device,
use the eject device
command. Use the optional -f to force ejection.
To change removable media (like CD-ROMs), use the change
device command. The name of the
removable media can be determined using the info block
command:
(qemu) info block
ide1-cd0: type=cdrom removable=1 locked=0 file=/dev/sr0 ro=1 drv=host_device
(qemu) change ide1-cd0 /path/to/image
13.5. Controlling Keyboard and Mouse
It is possible to use the monitor console to emulate keyboard and mouse
input if necessary. For example, if your graphical user interface
intercepts some key combinations at low level (such as
Ctrl+Alt+F1
in X Window), you can still enter them using the sendkey
keys:
sendkey ctrl-alt-f1
To list the key names used in the keys option,
enter sendkey and press Tab.
To control the mouse, the following commands can be used:
- mouse_move
dxdy[dz] Move the active mouse pointer to the specified coordinates dx, dy with the optional scroll axis dz.
- mouse_button
val Change the state of the mouse buttons (1=left, 2=middle, 4=right).
- mouse_set
index Set which mouse device receives events. Device index numbers can be obtained with the info mice command.
13.6. Changing Available Memory
If the virtual machine was started with the -balloon
virtio option and the paravirtualized balloon device that allows
to dynamically change the amount of memory available is therefore
enabled, it is possible to change the available memory dynamically. For
more information about enabling the balloon device, see
Section 11.1, “Basic Installation with qemu-kvm”.
To get information about the balloon device in the monitor console and to determine whether the device is enabled, use the info balloon command:
(qemu) info balloon
If the balloon device is enabled, use the balloon
memory_in_MB command to set the
requested amount of memory:
(qemu) balloon 400
13.7. Dumping Virtual Machine Memory
To save the content of the virtual machine memory to a disk or console output, use the following commands:
- memsave
addrsizefilename Saves virtual memory dump starting at
addrof sizesizeto filefilename- pmemsave
addrsizefilename Saves physical memory dump starting at
addrof sizesizeto filefilename-- x /
fmtaddr Makes a virtual memory dump starting at address
addrand formatted according to thefmtstring. Thefmtstring consists of three parameterscountformatsizeThe
countparameter is the number of items to be dumped.The
formatcan bex(hex),d(signed decimal),u(unsigned decimal),o(octal),c(char) ori(assembly instruction).The
sizeparameter can beb(8 bits),h(16 bits),w(32 bits) org(64 bits). On x86,horwcan be specified with theiformat to respectively select 16 or 32-bit code instruction size. is the number of the items to be dumped.- xp /
fmtaddr Makes a physical memory dump starting at address
addrand formatted according to thefmtstring. Thefmtstring consists of three parameterscountformatsizeThe
countparameter is the number of the items to be dumped.The
formatcan bex(hex),d(signed decimal),u(unsigned decimal),o(octal),c(char) ori(asm instruction).The
sizeparameter can beb(8 bits),h(16 bits),w(32 bits) org(64 bits). On x86,horwcan be specified with theiformat to respectively select 16 or 32-bit code instruction size. is the number of the items to be dumped.
13.8. Managing Virtual Machine Snapshots
| |
Managing snapshots in QEMU monitor is not officially supported by SUSE yet. However, the information found in this section may be helpful in specific cases. | |
Virtual machine snapshots are snapshots of the complete virtual machine
including the state of CPU, RAM, and the content of all writable disks.
To use virtual machine snapshots, you must have at least one
non-removable and writable block device using the
qcow2 disk image format.
Snapshots are helpful when you need to save your virtual machine in a particular state. For example, after you configured network services on a virtualized server and want to quickly start the virtual machine in the same state that has been saved last. You can also create a snapshot after the virtual machine has been powered off to create a backup state before you try something experimental and possibly make VM Guest unstable. This section introduces the former case, while the latter is described in Section 11.2.3, “Managing Snapshots of Virtual Machines with qemu-img”.
The following commands are available for managing snapshots in QEMU monitor:
- savevm
name Creates a new virtual machine snapshot under the tag
nameor replaces an existing snapshot.- loadvm
name Loads a virtual machine snapshot tagged
name.- delvm
Deletes a virtual machine snapshot.
- info snapshots
Prints information about available snapshots.
(qemu) info snapshots
Snapshot list:
ID       TAG               VM SIZE        DATE          VM CLOCK
1         booting                4.4M 2010-11-22 10:51:10   00:00:20.476
2         booted                 184M 2010-11-22 10:53:03   00:02:05.394
3         logged_in              273M 2010-11-22 11:00:25   00:04:34.843
4         ff_and_term_running    372M 2010-11-22 11:12:27   00:08:44.965
Unique identification number of the snapshot. Usually auto-incremented.
Unique description string of the snapshot. It is meant as a human readable version of the ID.
The disk space occupied by the snapshot. Note that the more memory is consumed by running applications, the bigger the snapshot is.
Time and date the snapshot was created.
The current state of the virtual machine's clock.
13.9. Suspending and Resuming Virtual Machine Execution
The following commands are available for suspending and resuming virtual machines:
- stop
Suspends the execution of the virtual machine.
- cont
Resumes the execution of the virtual machine.
- system_powerdown
Sends an ACPI shutdown request to the machine. The effect is similar to the power button on a physical machine.
- q or quit
Terminates QEMU immediately.
13.10. Live Migration
The live migration process allows to transmit any virtual machine from one host system to another host system without any interruption in availability. It is possible to change hosts permanently or just during a maintenance. It is recommended that the source and destination systems have the same architecture, however it is possible to migrate between hosts with AMD and Intel architectures.
The requirements for the live migration:
The virtual machine image must be accessible on both source and destination hosts. For example, it can be located on a shared NFS disk.
The image directory should be located in the same path on both hosts.
Both hosts must be located in the same subnet.
The guest on the source and destination hosts must be started in the same way.
The live migration process has the following steps:
The virtual machine instance is running on the source host.
The virtual machine is started on the destination host in the frozen listening mode. The parameters used are the same as on the source host plus the
-incoming tcp:parameter, whereip:portipspecifies the IP address andportspecifies the port for listening to the incoming migration. If 0 is set as IP address, the virtual machine listens on all interfaces.On the source host, switch to the monitor console and use the migrate -d tcp:
destination_ip:portcommand to initiate the migration.To determine the state of the migration, use the info migrate command in the monitor console on the source host.
To cancel the migration, use the migrate_cancel command in the monitor console on the source host.
To set the maximum tolerable downtime for migration in seconds, use the migrate_set_downtime
number_of_secondscommand.To set the maximum speed for migration in bytes per second, use the migrate_set_speed
bytes_per_secondcommand.
Appendix A. Appendix
A.1. Installing Para-Virtualized Drivers
A.1.1. Installing virtio Drivers for Microsoft Windows*
Providing para-virtualized drivers during a Microsoft Windows installation does currently not work, since the installation refuses to boot from a para-virtualized hard disk. Therefore, the para-virtualized drivers need to be installed on a running Windows installation.
The following instructions assume that the existing Windows installation
uses a single IDE hard disk and a single network adapter. An ISO image
containing the virtio drivers for Windows is part of the
kvm package and is
available on the KVM host under
/usr/share/qemu-kvm/win-virtio-drivers.iso. Make
this ISO image available as a CD-ROM on your virtual machine as
described in Section 8.4, “Ejecting and Changing Floppy or CD/DVD-ROM Media with Virtual Machine Manager”. In
case your virtual machine is configured without a CD-ROM device or you
prefer to add a second one, see
Section 8.2, “Adding a CD/DVD-ROM Device with Virtual Machine Manager” for setup instructions.
Finding the virtio drivers for Windows
- Windows XP 32-bit
Memory Ballooning: balloon\install\XP\x86\balloon.infNetwork: NetKVM\install\XP_Win2003\x86\netkvm.infStorage: viostor\install\XP\x86\viostor.inf- Windows XP 64-bit
Memory Ballooning: not available Network: NetKVM\install\XP_Win2003\amd64\netkvm.infStorage: viostor\install\XP\amd64\viostor.inf- Windows Server 2003 32-bit
Memory Ballooning: balloon\install\Win2003\x86\balloon.infNetwork: NetKVM\install\XP_Win2003\x86\netkvm.infStorage: viostor\install\Win2003\x86\viostor.inf- Windows Server 2003 64-bit
Memory Ballooning: balloon\install\Win2003\amd64\balloon.infNetwork: NetKVM\install\XP_Win2003\amd64\netkvm.infStorage: viostor\install\XP\amd64\viostor.inf- Windows Vista/Server 2008 32-bit
Memory Ballooning: balloon\install\Vista_Win2008\x86\balloon.infNetwork: NetKVM\install\Vista_Win2008\x86\netkvm.infStorage: viostor\install\Vista_Win2008\x86\viostor.inf- Windows Vista/Server 2008 64-bit
Memory Ballooning: balloon\install\Vista_Win2008\amd64\balloon.infNetwork: NetKVM\install\Vista_Win2008\amd64\netkvm.infStorage: viostor\install\Vista_Win2008\amd64\viostor.inf- Windows 7 32-bit
Memory Ballooning: balloon\install\Win7\x86\balloon.infNetwork: NetKVM\install\Win7\x86\netkvm.infStorage: viostor\install\Win7\x86\viostor.inf- Windows 7 64-bit
Memory Ballooning: balloon\install\Win7\amd64\balloon.infNetwork: NetKVM\install\Win7\amd64\netkvm.infStorage: viostor\install\Win7\amd64\viostor.inf
A.1.1.1. Windows 7
The following instructions show how to install para-virtualized storage an network drivers for Windows 7. Please make sure to exactly follow the instructions for installing the storage drivers, otherwise your system will either completely refuse to boot or will boot into a “blue screen”!
| Technical Support |
|---|---|
The following instructions require to use virsh
| |
Procedure A.1. Installing Para-Virtualized Storage Drivers for Windows 7 32-bit
Shut down the Windows 7 VM Guest and use Virtual Machine Manager to add an additional hard disk of type
virtio(a para-virtualized hard disk). This disk is only temporarily needed and will be removed again from the VM Guest.If necessary, use Virtual Machine Manager to adjust the . It must start with , otherwise the system will not boot once the system disk is para-virtualized. You need to confirm your changes with , otherwise they will not be written to the configuration.
Reboot the VM Guest. Once it has booted, open the , for example, by opening the main menu and entering devmgmt.msc followed by Enter into the field.
Search for the entry +. The entry is marked with an exclamation mark as being problematic. Right-click this entry and choose .
Install the driver. Choose to . Use the button to select the directory on the driver CD containing the storage drivers for your operating system and architecture (
viostor\install\Win7\x86\). Confirm the security exception by clicking .Once the driver installation is finished, a new named is listed in the . Additionally, the entry now contains the temporary para-virtualized disk. It is listed as .
Shut down the Windows 7 VM Guest and use Virtual Machine Manager to remove the temporary para-virtualized disk added earlier.
Changing the type of a virtual hard disk is currently not supported by Virtual Machine Manager—therefore the XML configuration needs to be changed directly. Open a terminal and enter the following command (replace
NAMEwith the name of you Windows 7 VM Guest). If operating from a remote host, also specify a connection URl with the-cparameter.virsh edit
NAMEAn editor (vi by default) opens. Search for a block similar to the following:
<disk type='block' device='disk'>
  <driver name='qemu' type='raw'/>
  <source file='/var/lib/libvirt/images/win7.raw'/>
  <target dev='hda' bus='ide'/>
  <address type='drive' controller='0' bus='0' unit='0'/>
</disk>
Remove the <address> tag. Change the attributes of the <target> tag to
dev='vda'andbus='virtio':<disk type='block' device='disk'> <driver name='qemu' type='raw'/> <source dev='/dev/Virtual/win7'/> <target dev='vda' bus='virtio'/> </disk>
Save the file. A successful save results in
DomainIn case an error is reported (for example, when having produced invalid XML), the configuration has not been changed.NAMEXML configuration edited.Restart the VM Guest. If starting it via Virtual Machine Manager, make sure the hardware change is visible in the screen before you start (this may take a few seconds after you have saved the configuration changes from virsh). Otherwise your changes will be overwritten with the configuration last used by Virtual Machine Manager.
Your Windows 7 VM Guest now uses a para-virtualized system disk.
Installing para-virtualized network drivers is very similar to installing the storage drivers:
Procedure A.2. Installing Para-Virtualized Network Drivers for Windows 7
Shut down the Windows 7 VM Guest and use Virtual Machine Manager to add an additional network adapter of type
virtio(a para-virtualized network adapter). This ensures that you still have network connectivity while installing the drivers.Reboot the VM Guest and install the driver via the as described above. The new network adapter can be found under +. After a successful driver installation, a is listed in the under .
Shut down the VM Guest and remove the original, non-para-virtualized network adapter from the guest configuration using Virtual Machine Manager. Reboot the guest—now it uses a para-virtualized network adapter.
A.1.1.2. Other Windows Versions (XP, Server 2003/2008, Vista)
Installing para-virtualized drivers for other Windows versions is very similar to installing them on Windows 7 (see Section A.1.1.1, “Windows 7”). You do not need to manually start the — Windows will rather prompt you to install the missing drivers. Make sure to manually choose the location of the driver during the installation process.
| Para-Virtualized Storage Drivers on Windows Vista |
|---|---|
Currently the para-virtualized storage drivers for Windows Vista do not support booting from a para-virtualized disk. Using para-virtualized storage devices for non-bootable disks is supported. | |
| Para-Virtualized Storage Drivers on Windows XP not Recommended |
|---|---|
Using the para-virtualized storage drivers on Windows XP does not result in any performance gain—it may even result in performance penalties. Therefore, it is not recommended to use them. See http://www.mail-archive.com/kvm@vger.kernel.org/msg22834.html for technical details. Note that this only affects para-virtualized storage drivers for Windows XP! Using para-virtualized storage drivers on other Windows versions will result in better performance. Using para-virtualized network drivers on Windows XP is also beneficial. | |
A.2. Generating x509 Client/Server Certificates
In order to be able to create x509 client and server certificates you
need to issue them by a Certificate Authority (CA). It is recommended to
set up an independent CA that only issues certificates for
libvirt.
Set up a CA as described in Section “Creating a Root CA” (Chapter 15, Managing X.509 Certification, ↑Security Guide).
Create a server and a client certificate as described in Section “Creating or Revoking User Certificates” (Chapter 15, Managing X.509 Certification, ↑Security Guide). The Common Name (CN) for the server certificate must be the full qualified hostname, the Common Name for the client certificate can be freely chosen. For all other fields stick with the defaults suggested by YaST.
Export the client and server certificates to a temporary location (for example,
/tmp/x509/) by performing the following steps:Select the certificate on the tab.
Choose ++, provide the and the full path and the filename under , for example,
/tmp/x509/server.pemor/tmp/x509/client.pem.Open a terminal and change to the directory where you have saved the certificate and issue the following commands to split it into certificate and key (this example splits the server key):
csplit -z -f s_ server.pem '/-----BEGIN/' '{1}'
       mv s_00 servercert.pem
       mv s_01 serverkey.pem
Repeat the procedure for each client and server certificate you would like to export.
Finally export the CA certificate by performing the following steps:
Switch to the tab.
Choose++ and enter the full path and the filename under , for example,
/tmp/x509/cacert.pem.
Appendix B. GNU Licenses
This appendix contains the GNU General Public License version 2 and the GNU Free Documentation License version 1.2.
B.1. GNU General Public License
Version 2, June 1991
Copyright (C) 1989, 1991 Free Software Foundation, Inc. 59 Temple Place - Suite 330, Boston, MA 02111-1307, USA
Everyone is permitted to copy and distribute verbatim copies of this license document, but changing it is not allowed.
B.1.1. Preamble
The licenses for most software are designed to take away your freedom to share and change it. By contrast, the GNU General Public License is intended to guarantee your freedom to share and change free software--to make sure the software is free for all its users. This General Public License applies to most of the Free Software Foundation’s software and to any other program whose authors commit to using it. (Some other Free Software Foundation software is covered by the GNU Library General Public License instead.) You can apply it to your programs, too.
When we speak of free software, we are referring to freedom, not price. Our General Public Licenses are designed to make sure that you have the freedom to distribute copies of free software (and charge for this service if you wish), that you receive source code or can get it if you want it, that you can change the software or use pieces of it in new free programs; and that you know you can do these things.
To protect your rights, we need to make restrictions that forbid anyone to deny you these rights or to ask you to surrender the rights. These restrictions translate to certain responsibilities for you if you distribute copies of the software, or if you modify it.
For example, if you distribute copies of such a program, whether gratis or for a fee, you must give the recipients all the rights that you have. You must make sure that they, too, receive or can get the source code. And you must show them these terms so they know their rights.
We protect your rights with two steps: (1) copyright the software, and (2) offer you this license which gives you legal permission to copy, distribute and/or modify the software.
Also, for each author’s protection and ours, we want to make certain that everyone understands that there is no warranty for this free software. If the software is modified by someone else and passed on, we want its recipients to know that what they have is not the original, so that any problems introduced by others will not reflect on the original authors’ reputations.
Finally, any free program is threatened constantly by software patents. We wish to avoid the danger that redistributors of a free program will individually obtain patent licenses, in effect making the program proprietary. To prevent this, we have made it clear that any patent must be licensed for everyone’s free use or not licensed at all.
The precise terms and conditions for copying, distribution and modification follow.
B.1.2. GNU GENERAL PUBLIC LICENSE TERMS AND CONDITIONS FOR COPYING, DISTRIBUTION AND MODIFICATION
0. This License applies to any program or other work which contains a notice placed by the copyright holder saying it may be distributed under the terms of this General Public License. The “Program”, below, refers to any such program or work, and a “work based on the Program” means either the Program or any derivative work under copyright law: that is to say, a work containing the Program or a portion of it, either verbatim or with modifications and/or translated into another language. (Hereinafter, translation is included without limitation in the term “modification”.) Each licensee is addressed as “you”.
Activities other than copying, distribution and modification are not covered by this License; they are outside its scope. The act of running the Program is not restricted, and the output from the Program is covered only if its contents constitute a work based on the Program (independent of having been made by running the Program). Whether that is true depends on what the Program does.
1. You may copy and distribute verbatim copies of the Program’s source code as you receive it, in any medium, provided that you conspicuously and appropriately publish on each copy an appropriate copyright notice and disclaimer of warranty; keep intact all the notices that refer to this License and to the absence of any warranty; and give any other recipients of the Program a copy of this License along with the Program.
You may charge a fee for the physical act of transferring a copy, and you may at your option offer warranty protection in exchange for a fee.
2. You may modify your copy or copies of the Program or any portion of it, thus forming a work based on the Program, and copy and distribute such modifications or work under the terms of Section 1 above, provided that you also meet all of these conditions:
a). You must cause the modified files to carry prominent notices stating that you changed the files and the date of any change.
b). You must cause any work that you distribute or publish, that in whole or in part contains or is derived from the Program or any part thereof, to be licensed as a whole at no charge to all third parties under the terms of this License.
c). If the modified program normally reads commands interactively when run, you must cause it, when started running for such interactive use in the most ordinary way, to print or display an announcement including an appropriate copyright notice and a notice that there is no warranty (or else, saying that you provide a warranty) and that users may redistribute the program under these conditions, and telling the user how to view a copy of this License. (Exception: if the Program itself is interactive but does not normally print such an announcement, your work based on the Program is not required to print an announcement.)
These requirements apply to the modified work as a whole. If identifiable sections of that work are not derived from the Program, and can be reasonably considered independent and separate works in themselves, then this License, and its terms, do not apply to those sections when you distribute them as separate works. But when you distribute the same sections as part of a whole which is a work based on the Program, the distribution of the whole must be on the terms of this License, whose permissions for other licensees extend to the entire whole, and thus to each and every part regardless of who wrote it.
Thus, it is not the intent of this section to claim rights or contest your rights to work written entirely by you; rather, the intent is to exercise the right to control the distribution of derivative or collective works based on the Program.
In addition, mere aggregation of another work not based on the Program with the Program (or with a work based on the Program) on a volume of a storage or distribution medium does not bring the other work under the scope of this License.
3. You may copy and distribute the Program (or a work based on it, under Section 2) in object code or executable form under the terms of Sections 1 and 2 above provided that you also do one of the following:
a). Accompany it with the complete corresponding machine-readable source code, which must be distributed under the terms of Sections 1 and 2 above on a medium customarily used for software interchange; or,
b). Accompany it with a written offer, valid for at least three years, to give any third party, for a charge no more than your cost of physically performing source distribution, a complete machine-readable copy of the corresponding source code, to be distributed under the terms of Sections 1 and 2 above on a medium customarily used for software interchange; or,
c). Accompany it with the information you received as to the offer to distribute corresponding source code. (This alternative is allowed only for noncommercial distribution and only if you received the program in object code or executable form with such an offer, in accord with Subsection b above.)
The source code for a work means the preferred form of the work for making modifications to it. For an executable work, complete source code means all the source code for all modules it contains, plus any associated interface definition files, plus the scripts used to control compilation and installation of the executable. However, as a special exception, the source code distributed need not include anything that is normally distributed (in either source or binary form) with the major components (compiler, kernel, and so on) of the operating system on which the executable runs, unless that component itself accompanies the executable.
If distribution of executable or object code is made by offering access to copy from a designated place, then offering equivalent access to copy the source code from the same place counts as distribution of the source code, even though third parties are not compelled to copy the source along with the object code.
4. You may not copy, modify, sublicense, or distribute the Program except as expressly provided under this License. Any attempt otherwise to copy, modify, sublicense or distribute the Program is void, and will automatically terminate your rights under this License. However, parties who have received copies, or rights, from you under this License will not have their licenses terminated so long as such parties remain in full compliance.
5. You are not required to accept this License, since you have not signed it. However, nothing else grants you permission to modify or distribute the Program or its derivative works. These actions are prohibited by law if you do not accept this License. Therefore, by modifying or distributing the Program (or any work based on the Program), you indicate your acceptance of this License to do so, and all its terms and conditions for copying, distributing or modifying the Program or works based on it.
6. Each time you redistribute the Program (or any work based on the Program), the recipient automatically receives a license from the original licensor to copy, distribute or modify the Program subject to these terms and conditions. You may not impose any further restrictions on the recipients’ exercise of the rights granted herein. You are not responsible for enforcing compliance by third parties to this License.
7. If, as a consequence of a court judgment or allegation of patent infringement or for any other reason (not limited to patent issues), conditions are imposed on you (whether by court order, agreement or otherwise) that contradict the conditions of this License, they do not excuse you from the conditions of this License. If you cannot distribute so as to satisfy simultaneously your obligations under this License and any other pertinent obligations, then as a consequence you may not distribute the Program at all. For example, if a patent license would not permit royalty-free redistribution of the Program by all those who receive copies directly or indirectly through you, then the only way you could satisfy both it and this License would be to refrain entirely from distribution of the Program.
If any portion of this section is held invalid or unenforceable under any particular circumstance, the balance of the section is intended to apply and the section as a whole is intended to apply in other circumstances.
It is not the purpose of this section to induce you to infringe any patents or other property right claims or to contest validity of any such claims; this section has the sole purpose of protecting the integrity of the free software distribution system, which is implemented by public license practices. Many people have made generous contributions to the wide range of software distributed through that system in reliance on consistent application of that system; it is up to the author/donor to decide if he or she is willing to distribute software through any other system and a licensee cannot impose that choice.
This section is intended to make thoroughly clear what is believed to be a consequence of the rest of this License.
8. If the distribution and/or use of the Program is restricted in certain countries either by patents or by copyrighted interfaces, the original copyright holder who places the Program under this License may add an explicit geographical distribution limitation excluding those countries, so that distribution is permitted only in or among countries not thus excluded. In such case, this License incorporates the limitation as if written in the body of this License.
9. The Free Software Foundation may publish revised and/or new versions of the General Public License from time to time. Such new versions will be similar in spirit to the present version, but may differ in detail to address new problems or concerns.
Each version is given a distinguishing version number. If the Program specifies a version number of this License which applies to it and “any later version”, you have the option of following the terms and conditions either of that version or of any later version published by the Free Software Foundation. If the Program does not specify a version number of this License, you may choose any version ever published by the Free Software Foundation.
10. If you wish to incorporate parts of the Program into other free programs whose distribution conditions are different, write to the author to ask for permission. For software which is copyrighted by the Free Software Foundation, write to the Free Software Foundation; we sometimes make exceptions for this. Our decision will be guided by the two goals of preserving the free status of all derivatives of our free software and of promoting the sharing and reuse of software generally.
B.1.2.1. NO WARRANTY
11. BECAUSE THE PROGRAM IS LICENSED FREE OF CHARGE, THERE IS NO WARRANTY FOR THE PROGRAM, TO THE EXTENT PERMITTED BY APPLICABLE LAW. EXCEPT WHEN OTHERWISE STATED IN WRITING THE COPYRIGHT HOLDERS AND/OR OTHER PARTIES PROVIDE THE PROGRAM “AS IS” WITHOUT WARRANTY OF ANY KIND, EITHER EXPRESSED OR IMPLIED, INCLUDING, BUT NOT LIMITED TO, THE IMPLIED WARRANTIES OF MERCHANTABILITY AND FITNESS FOR A PARTICULAR PURPOSE. THE ENTIRE RISK AS TO THE QUALITY AND PERFORMANCE OF THE PROGRAM IS WITH YOU. SHOULD THE PROGRAM PROVE DEFECTIVE, YOU ASSUME THE COST OF ALL NECESSARY SERVICING, REPAIR OR CORRECTION.
12. IN NO EVENT UNLESS REQUIRED BY APPLICABLE LAW OR AGREED TO IN WRITING WILL ANY COPYRIGHT HOLDER, OR ANY OTHER PARTY WHO MAY MODIFY AND/OR REDISTRIBUTE THE PROGRAM AS PERMITTED ABOVE, BE LIABLE TO YOU FOR DAMAGES, INCLUDING ANY GENERAL, SPECIAL, INCIDENTAL OR CONSEQUENTIAL DAMAGES ARISING OUT OF THE USE OR INABILITY TO USE THE PROGRAM (INCLUDING BUT NOT LIMITED TO LOSS OF DATA OR DATA BEING RENDERED INACCURATE OR LOSSES SUSTAINED BY YOU OR THIRD PARTIES OR A FAILURE OF THE PROGRAM TO OPERATE WITH ANY OTHER PROGRAMS), EVEN IF SUCH HOLDER OR OTHER PARTY HAS BEEN ADVISED OF THE POSSIBILITY OF SUCH DAMAGES.
B.1.2.2. END OF TERMS AND CONDITIONS
B.1.3. How to Apply These Terms to Your New Programs
If you develop a new program, and you want it to be of the greatest possible use to the public, the best way to achieve this is to make it free software which everyone can redistribute and change under these terms.
To do so, attach the following notices to the program. It is safest to attach them to the start of each source file to most effectively convey the exclusion of warranty; and each file should have at least the “copyright” line and a pointer to where the full notice is found.
   one line to give the program’s name and an idea of what it does.
   Copyright (C) yyyy name of author
   This program is free software; you can redistribute it and/or
   modify it under the terms of the GNU General Public License
   as published by the Free Software Foundation; either version 2
   of the License, or (at your option) any later version.
   This program is distributed in the hope that it will be useful,
   but WITHOUT ANY WARRANTY; without even the implied warranty of
   MERCHANTABILITY or FITNESS FOR A PARTICULAR PURPOSE. See the
   GNU General Public License for more details.
   You should have received a copy of the GNU General Public License
   along with this program; if not, write to the Free Software
   Foundation, Inc., 59 Temple Place - Suite 330, Boston, MA 02111-1307, USA.
Also add information on how to contact you by electronic and paper mail.
If the program is interactive, make it output a short notice like this when it starts in an interactive mode:
   Gnomovision version 69, Copyright (C) year name of author
   Gnomovision comes with ABSOLUTELY NO WARRANTY; for details
   type `show w’. This is free software, and you are welcome
   to redistribute it under certain conditions; type `show c’
   for details.
The hypothetical commands `show w’ and `show c’ should show the appropriate parts of the General Public License. Of course, the commands you use may be called something other than `show w’ and `show c’; they could even be mouse-clicks or menu items--whatever suits your program.
You should also get your employer (if you work as a programmer) or your school, if any, to sign a “copyright disclaimer” for the program, if necessary. Here is a sample; alter the names:
   Yoyodyne, Inc., hereby disclaims all copyright
   interest in the program `Gnomovision’
   (which makes passes at compilers) written
   by James Hacker.
   signature of Ty Coon, 1 April 1989
   Ty Coon, President of Vice
This General Public License does not permit incorporating your program into proprietary programs. If your program is a subroutine library, you may consider it more useful to permit linking proprietary applications with the library. If this is what you want to do, use the GNU Lesser General Public License instead of this License.
B.2. GNU Free Documentation License
Copyright (C) 2000, 2001, 2002 Free Software Foundation, Inc. 51 Franklin St, Fifth Floor, Boston, MA 02110-1301 USA. Everyone is permitted to copy and distribute verbatim copies of this license document, but changing it is not allowed.
0. PREAMBLE
The purpose of this License is to make a manual, textbook, or other functional and useful document "free" in the sense of freedom: to assure everyone the effective freedom to copy and redistribute it, with or without modifying it, either commercially or noncommercially. Secondarily, this License preserves for the author and publisher a way to get credit for their work, while not being considered responsible for modifications made by others.
This License is a kind of "copyleft", which means that derivative works of the document must themselves be free in the same sense. It complements the GNU General Public License, which is a copyleft license designed for free software.
We have designed this License in order to use it for manuals for free software, because free software needs free documentation: a free program should come with manuals providing the same freedoms that the software does. But this License is not limited to software manuals; it can be used for any textual work, regardless of subject matter or whether it is published as a printed book. We recommend this License principally for works whose purpose is instruction or reference.
1. APPLICABILITY AND DEFINITIONS
This License applies to any manual or other work, in any medium, that contains a notice placed by the copyright holder saying it can be distributed under the terms of this License. Such a notice grants a world-wide, royalty-free license, unlimited in duration, to use that work under the conditions stated herein. The "Document", below, refers to any such manual or work. Any member of the public is a licensee, and is addressed as "you". You accept the license if you copy, modify or distribute the work in a way requiring permission under copyright law.
A "Modified Version" of the Document means any work containing the Document or a portion of it, either copied verbatim, or with modifications and/or translated into another language.
A "Secondary Section" is a named appendix or a front-matter section of the Document that deals exclusively with the relationship of the publishers or authors of the Document to the Document's overall subject (or to related matters) and contains nothing that could fall directly within that overall subject. (Thus, if the Document is in part a textbook of mathematics, a Secondary Section may not explain any mathematics.) The relationship could be a matter of historical connection with the subject or with related matters, or of legal, commercial, philosophical, ethical or political position regarding them.
The "Invariant Sections" are certain Secondary Sections whose titles are designated, as being those of Invariant Sections, in the notice that says that the Document is released under this License. If a section does not fit the above definition of Secondary then it is not allowed to be designated as Invariant. The Document may contain zero Invariant Sections. If the Document does not identify any Invariant Sections then there are none.
The "Cover Texts" are certain short passages of text that are listed, as Front-Cover Texts or Back-Cover Texts, in the notice that says that the Document is released under this License. A Front-Cover Text may be at most 5 words, and a Back-Cover Text may be at most 25 words.
A "Transparent" copy of the Document means a machine-readable copy, represented in a format whose specification is available to the general public, that is suitable for revising the document straightforwardly with generic text editors or (for images composed of pixels) generic paint programs or (for drawings) some widely available drawing editor, and that is suitable for input to text formatters or for automatic translation to a variety of formats suitable for input to text formatters. A copy made in an otherwise Transparent file format whose markup, or absence of markup, has been arranged to thwart or discourage subsequent modification by readers is not Transparent. An image format is not Transparent if used for any substantial amount of text. A copy that is not "Transparent" is called "Opaque".
Examples of suitable formats for Transparent copies include plain ASCII without markup, Texinfo input format, LaTeX input format, SGML or XML using a publicly available DTD, and standard-conforming simple HTML, PostScript or PDF designed for human modification. Examples of transparent image formats include PNG, XCF and JPG. Opaque formats include proprietary formats that can be read and edited only by proprietary word processors, SGML or XML for which the DTD and/or processing tools are not generally available, and the machine-generated HTML, PostScript or PDF produced by some word processors for output purposes only.
The "Title Page" means, for a printed book, the title page itself, plus such following pages as are needed to hold, legibly, the material this License requires to appear in the title page. For works in formats which do not have any title page as such, "Title Page" means the text near the most prominent appearance of the work's title, preceding the beginning of the body of the text.
A section "Entitled XYZ" means a named subunit of the Document whose title either is precisely XYZ or contains XYZ in parentheses following text that translates XYZ in another language. (Here XYZ stands for a specific section name mentioned below, such as "Acknowledgements", "Dedications", "Endorsements", or "History".) To "Preserve the Title" of such a section when you modify the Document means that it remains a section "Entitled XYZ" according to this definition.
The Document may include Warranty Disclaimers next to the notice which states that this License applies to the Document. These Warranty Disclaimers are considered to be included by reference in this License, but only as regards disclaiming warranties: any other implication that these Warranty Disclaimers may have is void and has no effect on the meaning of this License.
2. VERBATIM COPYING
You may copy and distribute the Document in any medium, either commercially or noncommercially, provided that this License, the copyright notices, and the license notice saying this License applies to the Document are reproduced in all copies, and that you add no other conditions whatsoever to those of this License. You may not use technical measures to obstruct or control the reading or further copying of the copies you make or distribute. However, you may accept compensation in exchange for copies. If you distribute a large enough number of copies you must also follow the conditions in section 3.
You may also lend copies, under the same conditions stated above, and you may publicly display copies.
3. COPYING IN QUANTITY
If you publish printed copies (or copies in media that commonly have printed covers) of the Document, numbering more than 100, and the Document's license notice requires Cover Texts, you must enclose the copies in covers that carry, clearly and legibly, all these Cover Texts: Front-Cover Texts on the front cover, and Back-Cover Texts on the back cover. Both covers must also clearly and legibly identify you as the publisher of these copies. The front cover must present the full title with all words of the title equally prominent and visible. You may add other material on the covers in addition. Copying with changes limited to the covers, as long as they preserve the title of the Document and satisfy these conditions, can be treated as verbatim copying in other respects.
If the required texts for either cover are too voluminous to fit legibly, you should put the first ones listed (as many as fit reasonably) on the actual cover, and continue the rest onto adjacent pages.
If you publish or distribute Opaque copies of the Document numbering more than 100, you must either include a machine-readable Transparent copy along with each Opaque copy, or state in or with each Opaque copy a computer-network location from which the general network-using public has access to download using public-standard network protocols a complete Transparent copy of the Document, free of added material. If you use the latter option, you must take reasonably prudent steps, when you begin distribution of Opaque copies in quantity, to ensure that this Transparent copy will remain thus accessible at the stated location until at least one year after the last time you distribute an Opaque copy (directly or through your agents or retailers) of that edition to the public.
It is requested, but not required, that you contact the authors of the Document well before redistributing any large number of copies, to give them a chance to provide you with an updated version of the Document.
4. MODIFICATIONS
You may copy and distribute a Modified Version of the Document under the conditions of sections 2 and 3 above, provided that you release the Modified Version under precisely this License, with the Modified Version filling the role of the Document, thus licensing distribution and modification of the Modified Version to whoever possesses a copy of it. In addition, you must do these things in the Modified Version:
Use in the Title Page (and on the covers, if any) a title distinct from that of the Document, and from those of previous versions (which should, if there were any, be listed in the History section of the Document). You may use the same title as a previous version if the original publisher of that version gives permission.
List on the Title Page, as authors, one or more persons or entities responsible for authorship of the modifications in the Modified Version, together with at least five of the principal authors of the Document (all of its principal authors, if it has fewer than five), unless they release you from this requirement.
State on the Title page the name of the publisher of the Modified Version, as the publisher.
Preserve all the copyright notices of the Document.
Add an appropriate copyright notice for your modifications adjacent to the other copyright notices.
Include, immediately after the copyright notices, a license notice giving the public permission to use the Modified Version under the terms of this License, in the form shown in the Addendum below.
Preserve in that license notice the full lists of Invariant Sections and required Cover Texts given in the Document's license notice.
Include an unaltered copy of this License.
Preserve the section Entitled "History", Preserve its Title, and add to it an item stating at least the title, year, new authors, and publisher of the Modified Version as given on the Title Page. If there is no section Entitled "History" in the Document, create one stating the title, year, authors, and publisher of the Document as given on its Title Page, then add an item describing the Modified Version as stated in the previous sentence.
Preserve the network location, if any, given in the Document for public access to a Transparent copy of the Document, and likewise the network locations given in the Document for previous versions it was based on. These may be placed in the "History" section. You may omit a network location for a work that was published at least four years before the Document itself, or if the original publisher of the version it refers to gives permission.
For any section Entitled "Acknowledgements" or "Dedications", Preserve the Title of the section, and preserve in the section all the substance and tone of each of the contributor acknowledgements and/or dedications given therein.
Preserve all the Invariant Sections of the Document, unaltered in their text and in their titles. Section numbers or the equivalent are not considered part of the section titles.
Delete any section Entitled "Endorsements". Such a section may not be included in the Modified Version.
Do not retitle any existing section to be Entitled "Endorsements" or to conflict in title with any Invariant Section.
Preserve any Warranty Disclaimers.
If the Modified Version includes new front-matter sections or appendices that qualify as Secondary Sections and contain no material copied from the Document, you may at your option designate some or all of these sections as invariant. To do this, add their titles to the list of Invariant Sections in the Modified Version's license notice. These titles must be distinct from any other section titles.
You may add a section Entitled "Endorsements", provided it contains nothing but endorsements of your Modified Version by various parties--for example, statements of peer review or that the text has been approved by an organization as the authoritative definition of a standard.
You may add a passage of up to five words as a Front-Cover Text, and a passage of up to 25 words as a Back-Cover Text, to the end of the list of Cover Texts in the Modified Version. Only one passage of Front-Cover Text and one of Back-Cover Text may be added by (or through arrangements made by) any one entity. If the Document already includes a cover text for the same cover, previously added by you or by arrangement made by the same entity you are acting on behalf of, you may not add another; but you may replace the old one, on explicit permission from the previous publisher that added the old one.
The author(s) and publisher(s) of the Document do not by this License give permission to use their names for publicity for or to assert or imply endorsement of any Modified Version.
5. COMBINING DOCUMENTS
You may combine the Document with other documents released under this License, under the terms defined in section 4 above for modified versions, provided that you include in the combination all of the Invariant Sections of all of the original documents, unmodified, and list them all as Invariant Sections of your combined work in its license notice, and that you preserve all their Warranty Disclaimers.
The combined work need only contain one copy of this License, and multiple identical Invariant Sections may be replaced with a single copy. If there are multiple Invariant Sections with the same name but different contents, make the title of each such section unique by adding at the end of it, in parentheses, the name of the original author or publisher of that section if known, or else a unique number. Make the same adjustment to the section titles in the list of Invariant Sections in the license notice of the combined work.
In the combination, you must combine any sections Entitled "History" in the various original documents, forming one section Entitled "History"; likewise combine any sections Entitled "Acknowledgements", and any sections Entitled "Dedications". You must delete all sections Entitled "Endorsements".
6. COLLECTIONS OF DOCUMENTS
You may make a collection consisting of the Document and other documents released under this License, and replace the individual copies of this License in the various documents with a single copy that is included in the collection, provided that you follow the rules of this License for verbatim copying of each of the documents in all other respects.
You may extract a single document from such a collection, and distribute it individually under this License, provided you insert a copy of this License into the extracted document, and follow this License in all other respects regarding verbatim copying of that document.
7. AGGREGATION WITH INDEPENDENT WORKS
A compilation of the Document or its derivatives with other separate and independent documents or works, in or on a volume of a storage or distribution medium, is called an "aggregate" if the copyright resulting from the compilation is not used to limit the legal rights of the compilation's users beyond what the individual works permit. When the Document is included in an aggregate, this License does not apply to the other works in the aggregate which are not themselves derivative works of the Document.
If the Cover Text requirement of section 3 is applicable to these copies of the Document, then if the Document is less than one half of the entire aggregate, the Document's Cover Texts may be placed on covers that bracket the Document within the aggregate, or the electronic equivalent of covers if the Document is in electronic form. Otherwise they must appear on printed covers that bracket the whole aggregate.
8. TRANSLATION
Translation is considered a kind of modification, so you may distribute translations of the Document under the terms of section 4. Replacing Invariant Sections with translations requires special permission from their copyright holders, but you may include translations of some or all Invariant Sections in addition to the original versions of these Invariant Sections. You may include a translation of this License, and all the license notices in the Document, and any Warranty Disclaimers, provided that you also include the original English version of this License and the original versions of those notices and disclaimers. In case of a disagreement between the translation and the original version of this License or a notice or disclaimer, the original version will prevail.
If a section in the Document is Entitled "Acknowledgements", "Dedications", or "History", the requirement (section 4) to Preserve its Title (section 1) will typically require changing the actual title.
9. TERMINATION
You may not copy, modify, sublicense, or distribute the Document except as expressly provided for under this License. Any other attempt to copy, modify, sublicense or distribute the Document is void, and will automatically terminate your rights under this License. However, parties who have received copies, or rights, from you under this License will not have their licenses terminated so long as such parties remain in full compliance.
10. FUTURE REVISIONS OF THIS LICENSE
The Free Software Foundation may publish new, revised versions of the GNU Free Documentation License from time to time. Such new versions will be similar in spirit to the present version, but may differ in detail to address new problems or concerns. See http://www.gnu.org/copyleft/.
Each version of the License is given a distinguishing version number. If the Document specifies that a particular numbered version of this License "or any later version" applies to it, you have the option of following the terms and conditions either of that specified version or of any later version that has been published (not as a draft) by the Free Software Foundation. If the Document does not specify a version number of this License, you may choose any version ever published (not as a draft) by the Free Software Foundation.
ADDENDUM: How to use this License for your documents
   Copyright (c) YEAR YOUR NAME.
   Permission is granted to copy, distribute and/or modify this document
   under the terms of the GNU Free Documentation License, Version 1.2
   or any later version published by the Free Software Foundation;
   with no Invariant Sections, no Front-Cover Texts, and no Back-Cover Texts.
   A copy of the license is included in the section entitled “GNU
   Free Documentation License”.
If you have Invariant Sections, Front-Cover Texts and Back-Cover Texts, replace the “with...Texts.” line with this:
   with the Invariant Sections being LIST THEIR TITLES, with the
   Front-Cover Texts being LIST, and with the Back-Cover Texts being LIST.
If you have Invariant Sections without Cover Texts, or some other combination of the three, merge those two alternatives to suit the situation.
If your document contains nontrivial examples of program code, we recommend releasing these examples in parallel under your choice of free software license, such as the GNU General Public License, to permit their use in free software.